About Configuring ReportCaster
During ReportCaster installation, the ReportCaster
configuration file (an encrypted XML file) is created. It contains
ReportCaster environment information, including default configuration
settings you entered during the installation. Once you install ReportCaster,
all changes to these configuration settings are made by a ReportCaster administrator
in the Configuration tab of the ReportCaster Administration Interface.
Some configuration default settings, for example, the e-mail
server name for e-mail distributions, appear in the Schedule user
interface for your convenience, but you are able to override them
when you create a schedule. (ReportCaster configuration default
setting names begin with the term Default.)
Note: Several ReportCaster configuration settings that
appear in the ReportCaster Configuration folders can also be configured
from the WebFOCUS Administration Console. These settings are noted
when they are described in this section. For information on accessing
and using the WebFOCUS Administration Console, see the WebFOCUS
Security and Administration manual.
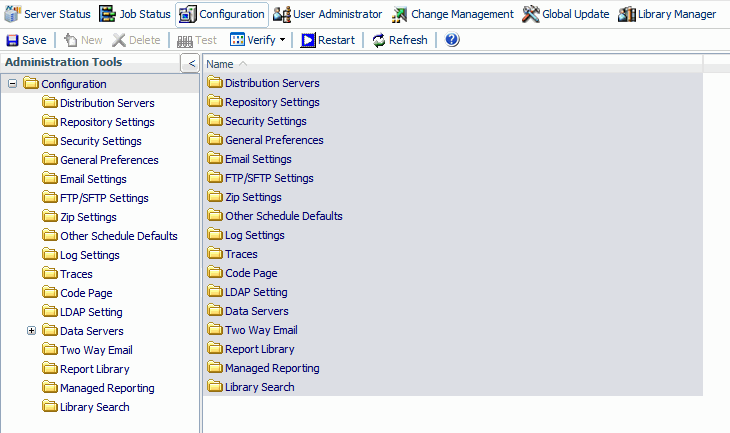
The Configuration tab in the ReportCaster
Administration Interface provides the settings that enable you to
configure the ReportCaster environment. To access the ReportCaster
Configuration tab, in the ReportCaster section of the WebFOCUS Welcome Page,
click ReportCaster Administration. In the ReportCaster Administration
Interface, select the Configuration tab. The ReportCaster Configuration
tool opens displaying the configuration folders, which organize
the configuration settings available to you, as shown in the following
image.
xReportCaster Configuration Toolbar Icons
Along the top of the ReportCaster Configuration tab,
a series of toolbar icons enable you to perform the following tasks.
(The icons that are available for selection are dependent on the
configuration folder you are in.)
-
Save. Save
any changes made to the configuration. You will receive a message
asking you to confirm the save. You must save the changes to the configuration
settings as part of the process to implement the change. For details,
see Changing Configuration Settings.
-
New. Create
a new WebFOCUS Reporting Server. This option is only active when
working in the Data Servers folder.
-
Delete. Delete
a specified WebFOCUS Reporting Server. You will receive a message
asking you to confirm the deletion. This option is only active when
working in the Data Servers folder.
-
Test. Test
the connection to a specified server or repository. This option is
only active when working in the Data Servers, Repository Settings,
and LDAP Settings folders. You may be prompted for a user ID and
password to connect to a specified server. You will receive a message
describing whether the test succeeded or failed.
-
Verify. Schedule,
Inline Report Distribution, Format List, Method List, Task List,
and Address Book Access Type.
-
Restart. Restart
the Distribution Server and ReportCaster to implement changes to
the server configuration. You can also select Restart from
the Action menu. For more information, see Changing Configuration Settings.
-
Refresh. Refresh
the settings to reflect the last saved configuration settings.
-
Help. Help
opens the online Help file. This option is only available when accessing
the configuration tool through the ReportCaster Web Application.
It is not available when accessing the tool from the Windows Programs
menu or by running editit.bat or the UNIX editit script file from
the /utilities directory under the ReportCaster Distribution Server
installation.
xReportCaster Configuration Tab Folders
The ReportCaster Configuration tab provides access to
configuration settings through the following folders:
-
Distribution Servers. Define
and configure the ReportCaster Distribution Server. This folder
provides settings to define a failover Distribution Server to act
as a backup, and configure two or more Distribution Servers to share
the workload. For details on these settings, see Distribution Servers Settings.
-
Repository Settings. Specify
the JDBC driver and the ReportCaster Repository properties. For
details on these settings, see Repository Settings.
-
Security Settings. Change
the default ReportCaster Administrator ID and password, and define
encryption and security plug-in options. For details on these settings,
see Security Settings.
-
General Preferences. Specify
which Address Book access types, schedule tasks, distribution formats,
and methods will be available to a user creating a schedule. In
this folder, you can also specify whether administrators can schedule
group blackout dates, and if you can distribute a PDF file directly
to a printer. For details on these settings, see General Preferences Settings.
-
Email Settings. Configure
e-mail settings, such as the default e-mail host, the notification
e-mail host, number of attempts to distribute to an e-mail host, and
security information. For details on these settings, see Email Settings.
-
FTP/SFTP Settings. Specify
the default FTP or SFTP host and user ID, and SFTP security plug-in.
For details on these settings, see FTP/SFTP Settings.
-
Zip Settings. Configure
the minimum Zip file size, the optional Zip encryption password
plug-in, and Zip encoding. For details on these settings, see Zip Settings.
-
Other Schedule Defaults. Define
the default end date and time of a ReportCaster schedule. For details
on these settings, see Other Schedule Defaults.
-
Log Settings. Specify
the time and period that log files will be automatically purged.
For details on these settings, see Log Settings.
-
Traces. Specify
tracing options and default trace file locations. For details on
these settings, see Traces Settings.
-
Code Page. Specify
the code page for the Distribution Server to use and the Web Server.
For details on these settings, see Code Page Settings.
-
LDAP Settings. Configure
ReportCaster self-service users to be authenticated and authorized
against an LDAP data source rather than the ReportCaster Repository.
You can also configure ReportCaster to retrieve e-mail address information from
an LDAP data source. For details on these settings, see LDAP Settings.
-
Data Servers. Configure
multiple WebFOCUS Reporting Servers, including cluster servers.
For details on these settings, see Data Servers Settings.
-
Two Way Email. Specify
settings for the optional Two-Way Email product. For details on
these settings, see Two-Way Email Settings.
-
Report Library. Specify
Report Library settings, such as the default URL to access content
in the Library, and whether or not to compress files stored in the Library.
For details on these settings, see Report Library Settings.
-
Managed Reporting. Specify
Managed Reporting settings, such as a default HTTP user and password,
whether or not you installed Managed Reporting with ReportCaster,
and the node on which the Managed Reporting Repository is located.
For details on these settings, see Managed Reporting Settings.
-
Library Search. Specify
settings for Magnify or the optional Google® Search Appliance product,
which provides the ability to search for Report Library content using
the search engine. For details on these settings, see Library Search Settings.
xChanging Configuration Settings
To implement changes to the ReportCaster server configuration
settings, you must save the changes and then restart the Distribution
Server and the ReportCaster Web application. Use the following steps
to save any configuration changes.
- After you make changes
in a configuration folder, click the Save icon
in the Configuration tab toolbar.
A window opens asking you to
confirm the save.
- Click Yes.
A
window opens explaining that you must restart the Distribution Server
and the ReportCaster Web application in order for the changes that
you saved to take effect, and that a Restart button is available
in the Configuration toolbar.
- Click OK.
- Click the Restart icon
in the Configuration toolbar.
A window opens asking you to confirm
that you want to stop all running jobs and restart.
- Click Yes.
A
window opens with a message that the server has been restarted.
Note: If
failover or workload distribution is configured, all Distribution Servers
are started.
- Have all users currently
logged on restart their sessions to obtain the new configuration
information. (Since the user session does not have information cached pertaining
to the ReportCaster configuration, the user interfaces must be restarted
to obtain any updated configuration information.)
xChanging Default User IDs
Several of the Configuration tab folders provide the
option to change the default user ID and/or a password. To change
a default user ID settings, click the  icon
that appears to the right of the setting field. This opens the User
dialog box, where you can type a new user ID and password. When
your changes are complete, click OK to exit
the User dialog box. Remember to Save your changes and restart the
Distribution Server to implement any changes.
icon
that appears to the right of the setting field. This opens the User
dialog box, where you can type a new user ID and password. When
your changes are complete, click OK to exit
the User dialog box. Remember to Save your changes and restart the
Distribution Server to implement any changes.