In this section: |
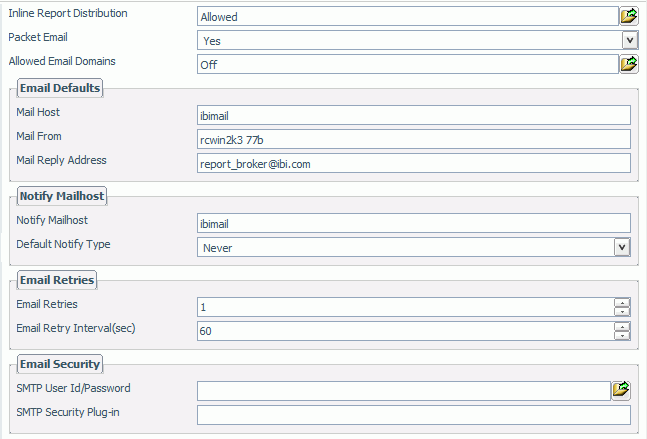
The Email Settings folder in the Configuration tab, shown in the following image, contains the settings, such as the default email server, the notification e-mail server, and e-mail security.

The Email Settings folder contains the following configuration settings.
|
Setting |
Optional or Required/Default Value |
Descriptions and Possible Values |
|---|---|---|
|
Inline Report Distribution |
Required. Default value is Allowed. |
Designates whether or not the e‑mail distribution method in the Schedule user interface will enable the option to send a report in the body of the e‑mail (inline). For details on this setting, see Inline Report Distribution Setting. Possible values are:
|
|
Packet Email |
Required. Default value is Yes. |
Controls how task output and burst content are distributed through e-mail. Valid values are:
For details about the Packet Email setting, see Packet Email Setting. |
|
Allowed Email Domains |
Default value is Off. |
Contains the e-mail domains that are permitted in a distribution. For instruction to add or remove e-mail domains, see Configuring Allowed Email Domains. Note: Files containing e-mail addresses intended for distribution are also verified for valid domains at schedule execution time. If it contains a restricted address, then no delivery is made to that address and an error message is written to the log file. |
|
Email Defaults section | ||
|
Mail Host |
Required. |
Name of the default mail server used to distribute an e-mail schedule. You can also specify a port for Mail Host using hostname:port. If you do not specify a port or the port you specify is not present, the default port is used. Note: This setting is also available in the WebFOCUS Administration Console. |
|
Mail From |
Optional. |
Default value for the e-mail From field. This can be any value. Note: This setting is also available in the WebFOCUS Administration Console. |
|
Mail Reply Address |
Optional. |
Default e-mail reply address when creating an e-mail schedule. Note: This setting is also available in the WebFOCUS Administration Console. |
|
Notify Mailhost section | ||
|
Notify Mailhost |
Optional. |
Name of the mail server that handles notification e-mail. If blank, ReportCaster uses the Mailhost setting as the notification mail server. Tip: Information Builders recommends using different mail servers for notification and e-mail distribution. This way, if there is a problem with your Mailhost, notification will still be sent. Having separate mail servers ensures that you will be informed when the default mail server falters. You can also specify a port for the Notify Mailhost using hostname:port. If you do not specify a port or the port you specify is not present, the default port is used. Note: This setting is also available in the WebFOCUS Administration Console. |
|
Default Notify Type |
Default value is Never. |
Specifies whether to send notification of the schedule status to a specified e-mail address. Possible values are:
Note: This setting is also available in the WebFOCUS Administration Console. |
|
Email Retries section | ||
|
Email Retries |
Default value is 0. |
The number of times the Distribution server will try to connect to the e-mail server to deliver report output. If the Distribution server is unable to connect to the e-mail server on the first try, it will attempt to connect again after the specified Email Retry Interval has passed. A message for each attempt is written to the log file. Valid values are 0 through 9. |
|
Email Retry Interval(sec) |
Default value is 60 seconds. |
The amount of time that the Distribution server will wait between retries. Valid values are 1 through 999. |
|
Email Security section | ||
|
SMTP User Id/Password |
Required if the mailhost is using SMTP Authorization. No default value. |
The user ID and password used to connect to the mailhost. |
|
SMTP Security Plug-in |
Optional. |
The name of a custom written Java class that implements the ReportCaster SMTP security interface to dynamically retrieve the user ID and password needed to connect to an SMTP server. For more information, see Customizing ReportCaster Plug-ins. |
How to: |
The Inline Report Distribution setting controls whether or not a user will have the option to include a report in the body of an e‑mail when setting up an e‑mail distribution method for a schedule. When inline report distribution is not allowed, the option is not available for selection in the schedule user interface.
In addition, if you disable the Inline Report Distribution option, another option is available in the Inline Report Distribution dialog box that designates whether or not to run existing schedules configured for inline distribution.
Note: The display of a report that is distributed as an inline e-mail message can be affected by settings in the e-mail client.
The ReportCaster - Inline Report Distribution dialog box opens, as shown in the following image.
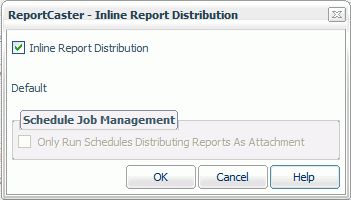
The default setting is to allow inline e-mail report distribution.
When the inline option is not selected, notice that the Only Run Schedules Distributing Reports As Attachment option is available for selection, as shown in the following image.
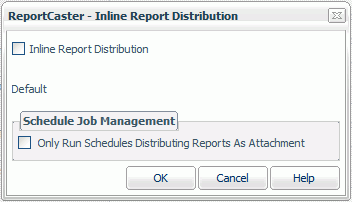
Select the Only Run Schedules Distributing Reports As Attachment option to determine if existing inline e‑mail distribution schedules will run.
The following image is an example of the window displaying a list of inline e‑mail distribution schedules.
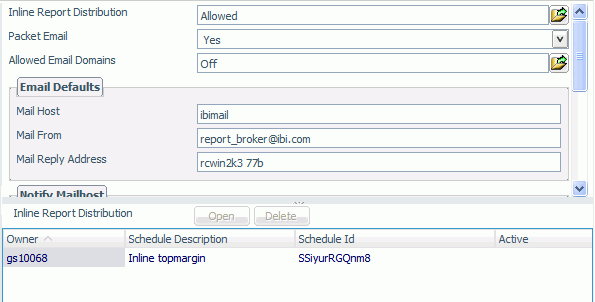
To run existing schedules set for inline e‑mail distribution, clear the Only Run Schedules Distributing Reports As Attachments option.
The Packet Email setting controls how burst content and task output are distributed through e-mail. The previous settings are:
To illustrate the Packet Email setting, we will use the example of a single schedule with the following two tasks and Distribution List:
Schedule Tasks
Distribution List
|
Burst Value |
Address |
|---|---|
|
ENGLAND |
Tom@ibi.com |
|
ENGLAND |
Alex@ibi.com |
|
FRANCE |
Sylvie@ibi.com |
|
FRANCE |
Tom@ibi.com |
E-mails Distributions
The following are the expected e-mail distributions based on the Packet Email setting.
When the Packet Email setting is No, this schedule generates eight e-mails (one e-mail for each attachment), as follows:
When the Packet Email setting is Yes, this schedule generates three e-mails (one e-mail containing the appropriate attachments for each address in the Distribution List), as follows:
When the Packet Email setting is Burst, this schedule generates four e-mails (one e-mail containing the appropriate attachments for each combination of a burst value and e-mail address in the Distribution List), as follows:
Notice that Tom now gets two separate e-mails, each with two attachments.
Note: It is possible to create a multi-task schedule with one or more tasks that are burst and one or more tasks that are not burst. When Packet Email is set to Yes, non-burst output is always distributed to every e-mail address in the Distribution List. When Packet Email is set to Burst, non-burst output is only distributed to e-mail addresses in the Distribution List with a burst value that is present in the report output.
For example, a schedule contains Task1 set for bursting and Task2 set for non-bursting, and the following Distribution List.
|
Burst Value |
Address |
|---|---|
|
ENGLAND |
Tom@ibi.com |
|
FRANCE |
Sylvie@ibi.com |
|
CHINA |
Joe@ibi.com |
If there is no data for China in the report output, then a burst report for China cannot be created, and the following reports are distributed.
How to: |
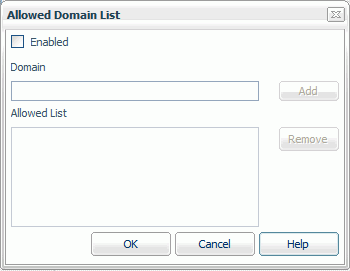
When the Allowed Email Domains setting is set to On, you will define the e-mail domains that you want in a distribution. You can add to and remove from this list, as needed.
The Allowed Domain List dialog box opens, shown in the following image.
The following image shows the Allowed Domain List with entries in the Allowed List field.
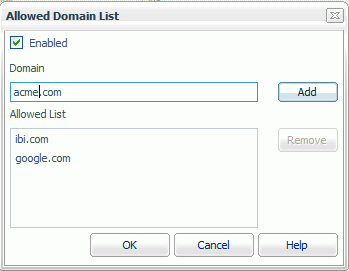
The domain appears in the Allowed List field.
The selected domain is removed from the list.
| WebFOCUS |