In this section: |
From the Dashboard View Builder, Managed Reporting Administrators, MR Security Object Managers, and Group Administrators can customize the Dashboard page for a selected public or group view, which overrides the default view, without editing any files. The View Builder Edit Settings button launches the View Settings dialog box, which provides the settings to enable and disable features, display or hide types of reports in the Domain Tree, change the appearance of the view, and perform other customizations. The dialog box is divided into three panes, Settings, User Links, and Redirects.
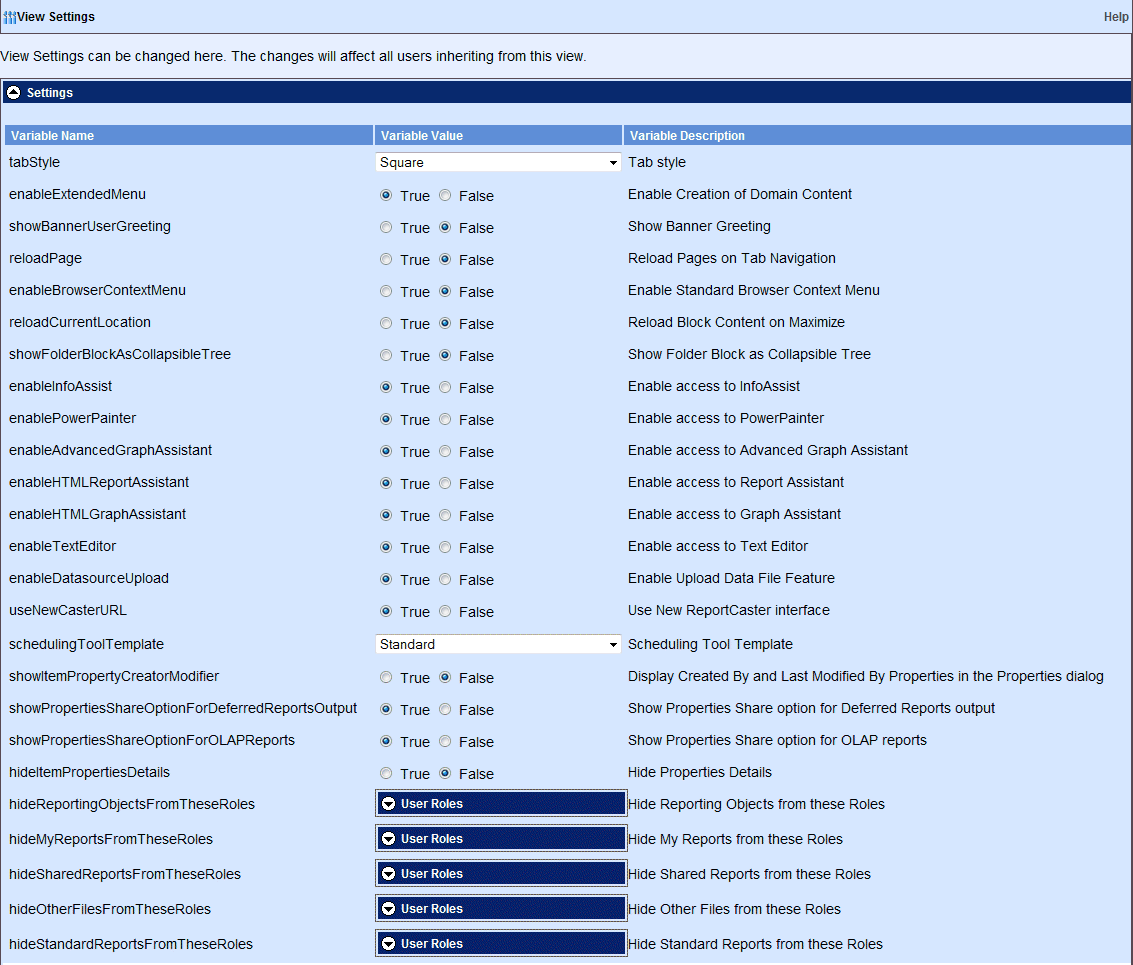
The following image shows the View Settings dialog box, Settings pane. Use the scroll bar to view all of the settings, and access the User Links and Redirect settings.

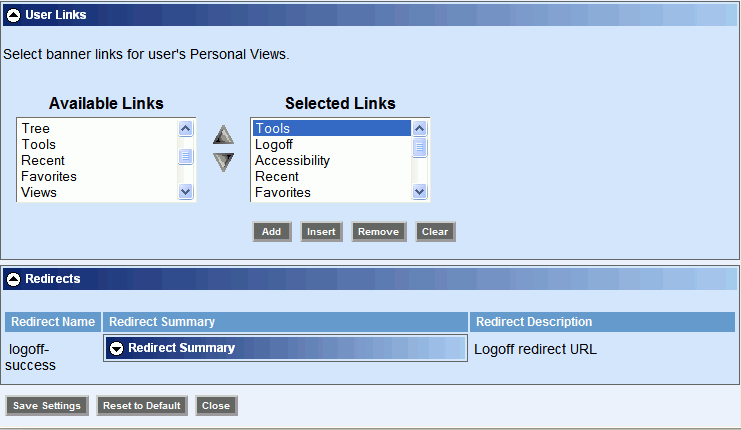
The following image shows the View Settings dialog box, expanded User Links and Redirect panes, which are initally collapsed when you enter the View Settings dialog box. The bottom of the dialog box includes the View Settings dialog box buttons, Save Settings, Reset to Default, and Close.

The following is a list of the settings available in the Settings pane.
Note: This is a customized customer template that requires specific configuration for FTP distribution. For more information, contact Customer Support Services.
Note: The list of user roles you can select from includes Analytical User, Content Manager, Developer, Library User Only, MR Administrator, MR Group Authorization Manager, MR Security Object Manager, No Privileges, Power User, Run Only User, User, any custom user roles you have created, and the ability to select all user roles that have access to the selected view.
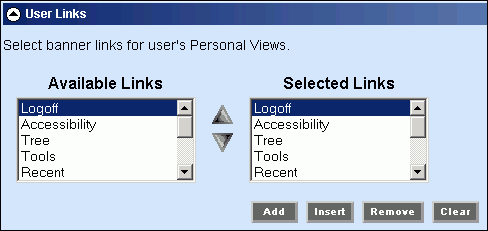
The following image shows the View Settings dialog box User Links pane, which you can access by clicking the down-arrow to the left of User Links.

The User Links pane contains the Available Links list box and the Selected Links list box. When a personal view is created, all banner links that were made available by the administrator are selected to display in the view by default. You can remove links from the Selected Links list box and add back previously removed links that are in the Available Links list box.
The following image shows the View Settings dialog box Redirects pane, which you can access by clicking the down-arrow to the left of Redirects.

The Redirects pane contains the Redirect context type drop-down menu and the Redirect URL text box. When users log off from a view, they are redirected to the Welcome Page by default. You can redirect users to a different logoff window by selecting context-redirect or x-redirect from the Redirect context type drop-down list and entering the desired URL in the Redirect URL field. The context-redirect option is the default setting and is used to add additional segments to the default redirect URL to redirect a user to a different URL inside the application context upon logoff. The x-redirect option is used to redirect a user to a fully qualified URL outside the application. For more information, see Customizing the Logoff Window.
All changes made to the selected view are saved in the following location:
\ibi\WebFOCUS77\worp\worp_users\viewname\view-config.xmlwhere:
Indicates the name of the customized view created in the View Builder.
When all Settings, User Links, and Redirects changes are completed for the view, click the Save Settings button. If you click the Reset to Default button, the customized view is deleted from the view-config.xml file and all default settings are restored. Click Close to return to the View Builder.
| WebFOCUS |