Adding the iWay Data Profiler Server (idp) and iWay Data Profiler Client (idpweb) to the WebFOCUS Application Path
- Ensure that the WebFOCUS Reporting Server is started.
- Enter the following URL in a browser to access the WebFOCUS
Reporting Server Web Console:
http://host_name:port
where:
- host_name
Is the name of the system where the WebFOCUS Reporting Server is installed and being hosted.
- port
Is the port number where the WebFOCUS Reporting Server is listening. The default port is 8121.
The WebFOCUS Reporting Server Web Console opens.
- Click Application Path on the ribbon.
The Application Path pane is displayed, as shown in the following image.
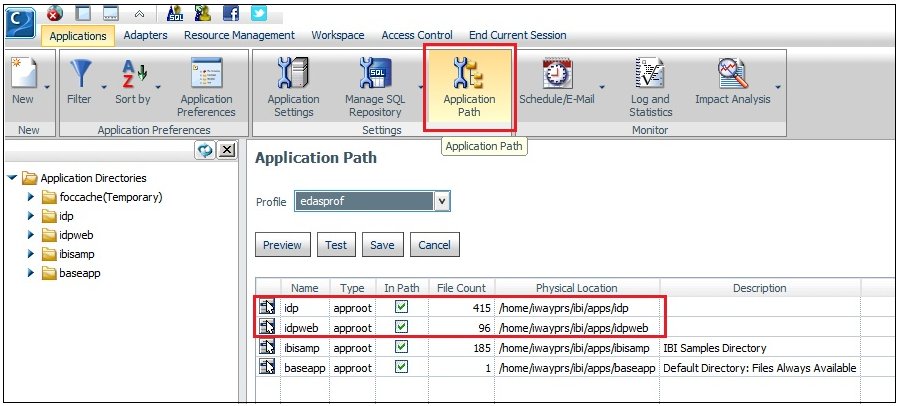
- Add the iWay Data Profiler Server (idp) and iWay Data Profiler
Client (idpweb) installation paths to the Application Path.
<root>/ibi/apps/idp
<root>/ibi/apps/idpweb
where:
- <root>
Is the root directory of the user account that was used to execute the iDP installation. For example:
/home/iwayprs
- Ensure that these two paths appear first on the list. You can select each row and use the arrows to the right of the Application Path pane to reorder accordingly.
- Click Save.