To create a Transform project using the Project Wizard:
-
From
the File menu, select New, Transform
Project.
or
click the New
 icon
on the toolbar.
icon
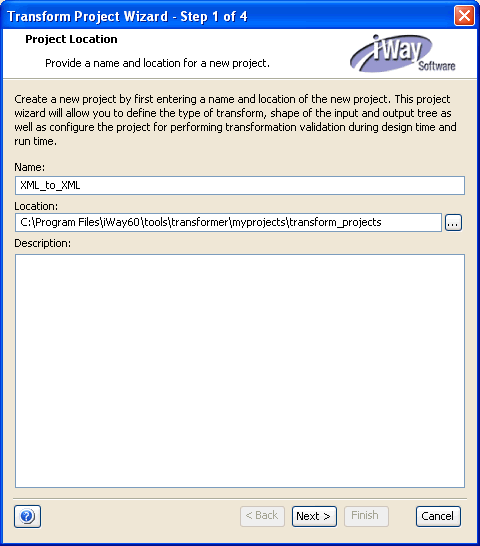
on the toolbar.The Transform Project Wizard - Project Location dialog box opens as shown in the following image.
-
In the Name field, type a name for your new project.
Note: When naming a project, Transformer adds a file extension to the name for you.
-
In the Location field, type or choose a path for the project working
directory, or you can use the default, which is:
<iWaySMHome>\tools\transformer\myprojects\transform_projectswhere:
- <iWaySMHome>
Is the directory where iWay Service Manager was installed.
Note: Only one Transform project file can be stored in each directory that is specified in the Location field. You can think of this directory as the project’s workspace. In addition, it is also recommended to keep all supporting files, for example, an input file, in the same directory where the Transform project (.gxp) file is located. This setup, along with setting relative path and embedding your files, helps to migrate your project easily when required.
- In the Description field, type a project description (optional).
-
In the Name field, type a name for your new project.
-
Click Next.
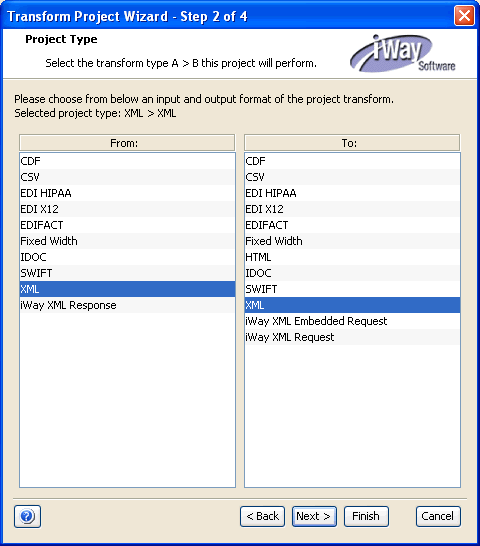
The Transform Project Wizard - Project Type dialog box opens as shown in the following image.
Note: You can skip the Transform Project Wizard steps by clicking the Finish button if it is enabled (see step 7). You can then manually alter the Transform project properties at your convenience from the Project Properties dialog box. For more information, see Configuring Project Properties.
- From the list in the From pane, select the format of your input, for example, XML.
- From the list in the To pane, select the format of your output data, for example, XML.
-
Click Next.
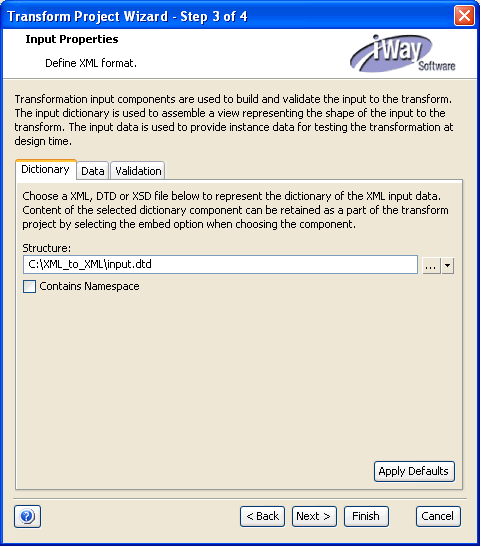
The Transform Project Wizard - Input Properties dialog box opens with the Dictionary tab active as shown in the following image.
-
In the
Structure field, type the name of a DTD, XSD (schema), or XML file
that represents the input dictionary or click the Browse button
to select it.
For more information on how to configure input properties for the Transform project, see Input.
-
Click Next.
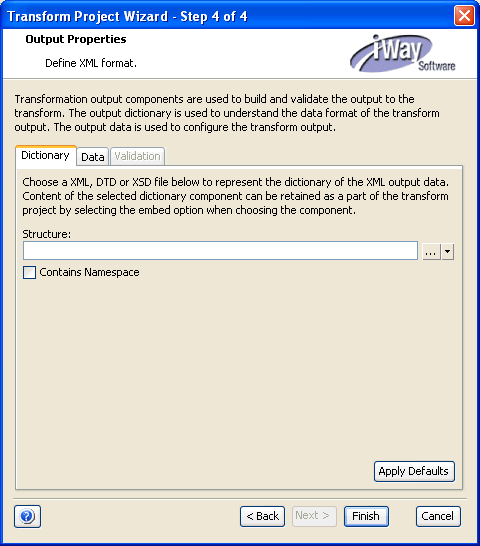
The Transform Project Wizard - Output Properties dialog box opens.
-
In the
Structure field, type the name of a data dictionary to represent the
structure of the output data or click the Browse button
to select a file (optional).
For more information on how to configure output properties for the Transform project, see Output.
-
Click Finish.
The Transform Project Wizard closes.
Your new Transform project is displayed in the Transformer workspace and also exists in the directory you named during the creation process.
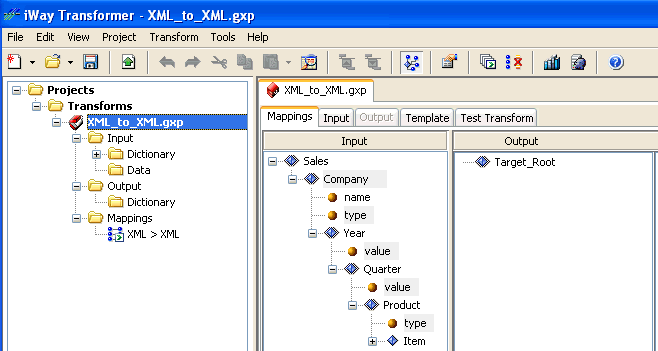
Note: For more information about the workspace layout of a Transform project, see Viewing Transform Projects.