Creating a Custom Toolbar
You can insert custom toolbars in Dashboard that can
contain any type of link that the Internet or intranet supports,
such as Web sites, other tools, applications, and documents. When
a user clicks one of the links, a new browser window opens and displays
the contents.
Toolbars can be placed in various positions in Dashboard and
you can select different colors for the toolbars so they fit in
with your Dashboard look. For details on selecting colors, see Selecting Custom Colors.
You can have up to two toolbars per Dashboard view. The number
of items a toolbar can contain is only limited by the display space.
Toolbars do not scroll, but you can maximize your space by positioning
the toolbar appropriately (for example, a vertical toolbar can contain
more items than a horizontal toolbar in most cases).
Since toolbars are created from items in a toolbox, you must
create a toolbox before you create a toolbar. You can create as
many toolboxes as you require and each toolbox can contain an unlimited
number of items.
Once a toolbox is created, it is available in all public and
group views.
x
Procedure: How to Create a Toolbox
-
From the View Builder, click the Toolbox link.
The Toolbox window opens as shown
in the following image.

-
Below
the Select Toolbox list box, click Add.
The Explorer User Prompt dialog box opens.
-
Type
a name for the toolbox in the Explorer User Prompt dialog box and
click OK.
Note:
- Toolbox names
and link captions are limited to alphanumeric characters only.
- Toolboxes are
stored in the ibi\WebFOCUS\worp\conf directory with a .tbx file extension.
The file is given a default name based on the current date and time,
so every toolbox has a unique name. This does not effect the display
name you type in the Explorer User Prompt dialog box.
-
In the
Link Caption field, type the name for the link.
This is the text that displays in the toolbar.
-
In the
Link URL field, type the URL for the link in the format:
http://websitename
For
example, http://www.informationbuilders.com.
-
Click Insert and
the link is added to the Available Links list box.
-
Click Clear and
repeat steps 4 through 6 to add additional items to the toolbox.
The number of items you can put in a toolbox is unlimited.
-
Click Save when
you are finished.
x
Procedure: How to Copy a Toolbox
-
From
the View Builder, click the Toolbox link.
The Toolbox window opens.
-
Select
a toolbox from the Select Toolbox list and click Save
As.
The Explorer User Prompt dialog box opens.
-
Type
a name for the new toolbox in the Explorer User Prompt dialog box
and click OK.
Note that toolbox names and link captions are limited to alphanumeric
characters only.
-
Click Save when
you are finished.
x
Procedure: How to Create a Toolbar
-
From
the View Builder, select a view and click the Edit Look link.
The Look page opens.
-
Click
the Toolbar link.
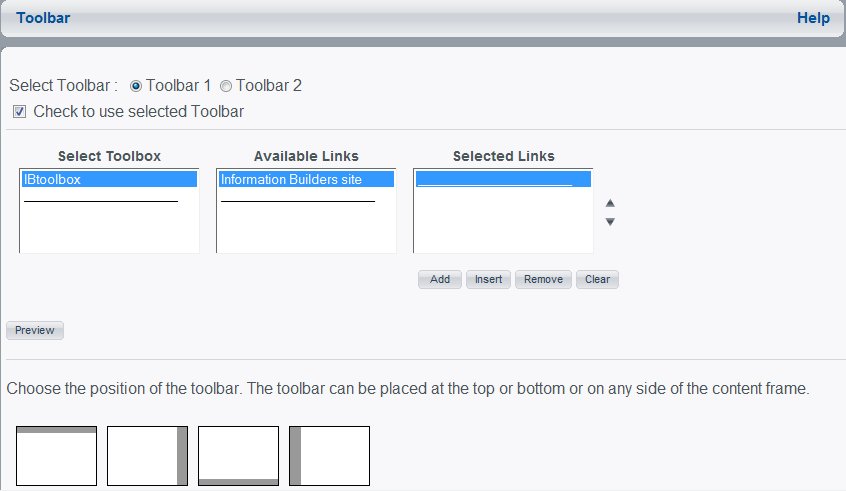
The Toolbar window opens as shown in the following image.
-
Select
the Toolbar 1 or Toolbar 2 option.
-
Select
the Check to use selected Toolbar check box.
-
Select
a toolbox in the Select Toolbox list.
-
From
the Available Links list, select a link and click Add.
-
Repeat
steps 3 and 4 until your toolbar is complete.
-
Use the
up and down arrows to the right of the Selected Links list box to
position the order of the selected links.
-
Select
the toolbar position (top, bottom, left, or right) by clicking the
appropriate image at the bottom of the Toolbar window.
You may need to scroll down to view these images.
-
Click Save when
you are finished.