To store metadata values:
- Select the Service object icon from the toolbar and drag it to the workspace.
-
In the New Service Object dialog box, name the object
and type a brief description.
Using our example, the object name is Store Values.
-
Click Next.
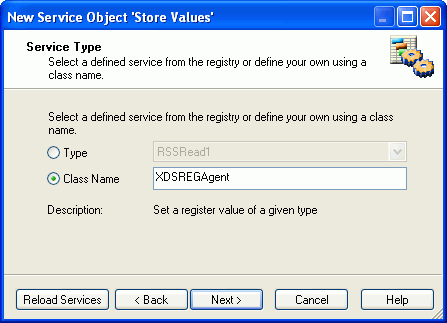
The Service Type dialog box opens.
-
Select Class Name and in
the Class Name field, type XDSREGAgent.
Important: This is not an arbitrary name. XDSREGAgent is the exact name of the class.
The following image shows the Service Type dialog box with the class name field populated.
- Click Next.
-
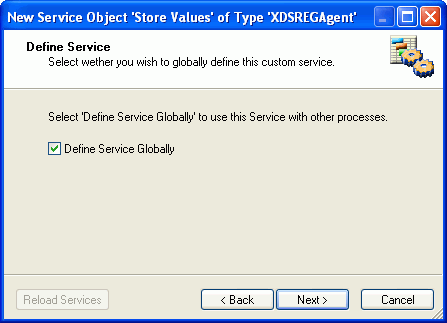
In the Define Service dialog box, select Define
Service Globally, as shown in the following image.
(This makes this object available for use in other processes.)
-
Click Next.
The Properties dialog box opens, as shown in the following image.
-
Leave this dialog box as is, and click Next.
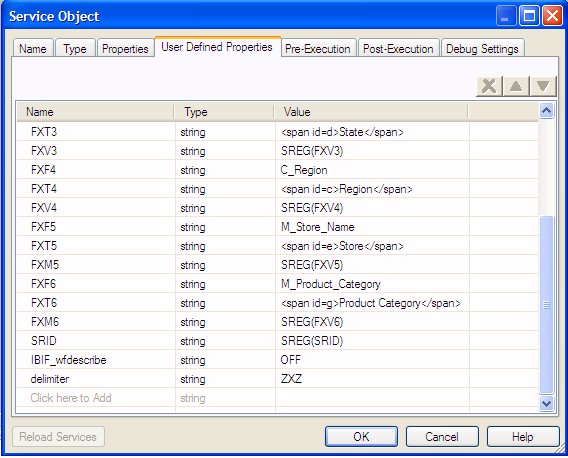
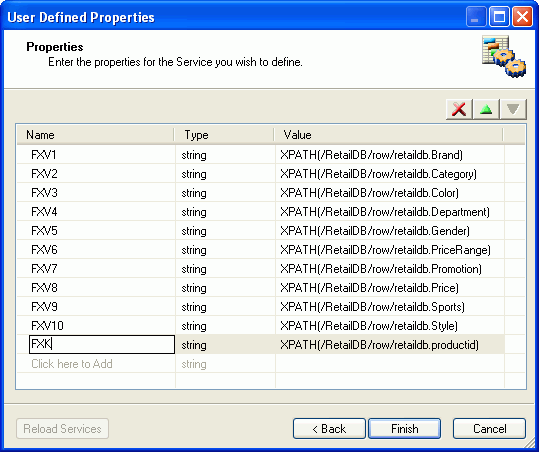
The User Defined Properties dialog box opens, as shown in the following image.
In this dialog box we can identify and the specific which metadata from the incoming XML document you want to appear in the Dynamic Categorization search results tree using the following metadata parameters:
- FXVn. Parameter for the desired field value (where n is the sequential number of the field value you are identifying. Start with FXV1 and continue to FXV2, FXV3, and so on.
- FXM. Parameter for
a desired field that contains multiple values. FXM is used in place
of FXVn and contains a unique delimiter that is used to assign
each value its own category in the dynamic categorization tree.
The delimiter can be any value, but it should be unique and not
used in the field value. You must use delimiter as the metadata
parameter name to define the delimiter value. The delimiter value
is defined once and applied to all FXMn metatags in the Service
Object. Therefore, the delimiter must be the same for all FXMn values.
For example, the following image shows several FXM values and a ZXZ delimiter value specified by the delimiter user-defined property name:
Note: The FXM metadata parameter is not available in the Magnify Prototype Wizard.
- FXK. A unique identifier for the incoming record. Use the following parameters for multiple identifiers; FXK, FXK n, where n = 2, 3, 4, and so on (FXK implies FXK1).
For more information on metadata parameters, see Magnify Search Configuration Example.
- Double-click in the Name field and type FXV1 to represent the first field value you will define. The Type is string.
-
From the Value drop-down list, select Create
XPath expression.
Note: An XML Path Language (XPath) expression defines the path to a specific value (or values) within an XML document. This path is based on the hierarchal structure of the XML document. This step ties the property name (FXVn) to the location in the XML file that holds the property value (the XPath expression).
The XPath Builder wizard opens.
-
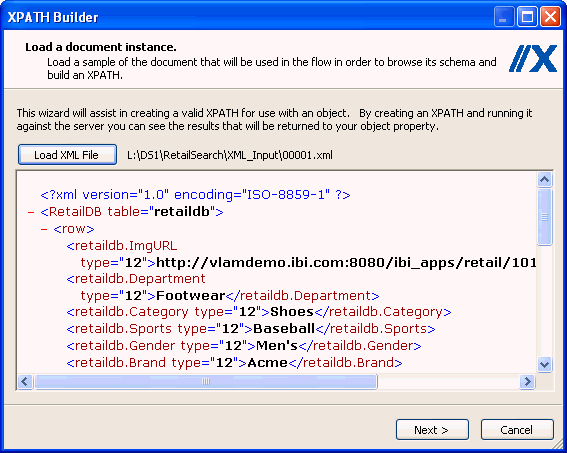
In the XPath Builder, load a document instance dialog
box, click Load XML File and
browse to an XML document that will be coming into the process
flow.
The XML document appears in the document pane. The following image shows an XML document in the Load a document instance dialog box.
-
Click Next.
The Build an XPath dialog box opens.
-
In the left pane, expand the XML document node to expose
the elements, then double-click the element you want in the
XPath expression.
In our example, we want to include the value of Brand, therefore, expand the RetailDB node, and select the Brand field, retaildb.Brand.
The following image shows an XML structure in the left pane with the Brand element selected for the XPath expression.
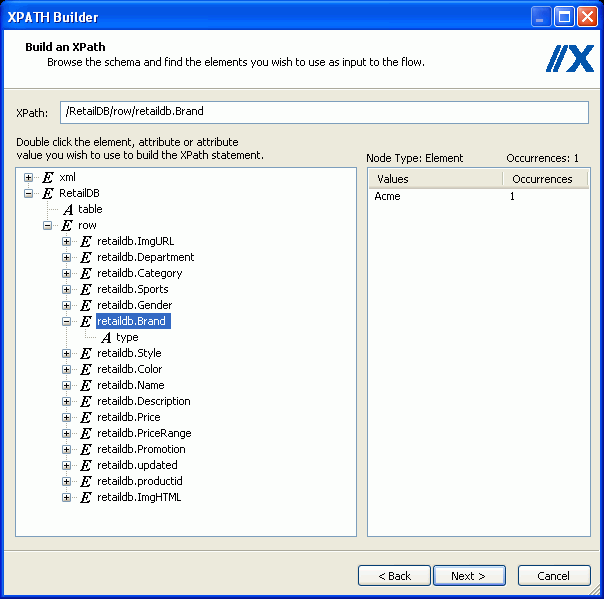
Using our example, the path to the Brand element appears in the XPath field, and the Brand element value and occurrence in the XML document appears in the right pane.
-
Click Next. In the next dialog
box, click Next, and in the
last dialog box, click Finish.
The XPath expression appears in the Value field, as shown in the following image.

With the FXV1 parameter, we have identified an item we want to appear in the Dynamic Categorization tree by locating the XML field where it resides.
-
Continue to add the items for the Dynamic Categorization
tree using Steps 9 through 15.
The subsequent parameter names for our example field values are:
FXV2 with a value of an XPath expression pointing to the retaildb.Category field.
FXV3 with a value of an XPath expression pointing to the retaildb.Color field.
And so on, through to FXV10 pointing to the retaildb.Style field.
-
Once all the metadata you require is defined, add one
or more unique identifiers for this data (FXK and FXKn for
multiple identifiers) using the same method as for field values.
In our example, the productid is the unique identifier of this record.
Note: The order in which you enter the values and the key identifier is not critical. However, the FX meta tags must be in sequential order. If a set of FX meta tags are removed, the remaining meta tags must be renumbered. Otherwise, the links on the Dynamic Categorization tree will produce an error.
The following images shows the User Defined Properties dialog box with our example of ten defined parameters and their unique identifier.
- Click Finish. The Service object appears in the workspace.
-
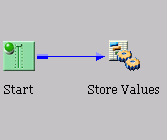
Build a relationship between the Start object and the
Store Values object with the Event option set to OnCompletion.
The following image shows the process flow with the Store Values object.
Continue creating the process flow using the instructions found in Creating the HTML Document.