To create an HTML document from the incoming XML document:
- Select the Transform object icon from the toolbar and drag it to the workspace.
-
In the New Transform Object dialog box, name the object
and type a brief description.
In our example, the object name is Create HTML.
-
Click Next.
The Transform Type dialog box opens, as shown in the following image. By default, New Transformer appears in the Transform field.
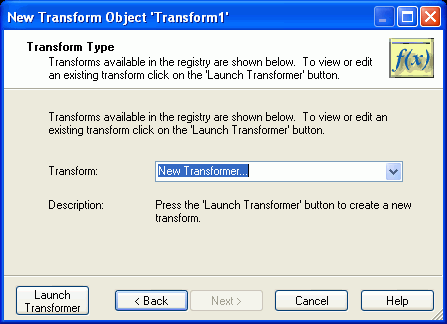
Note: Once a transformation is created and published, it becomes available in the Transform drop-down list. This procedure explains how to create a new transform.
-
Click the Launch Transformer button.
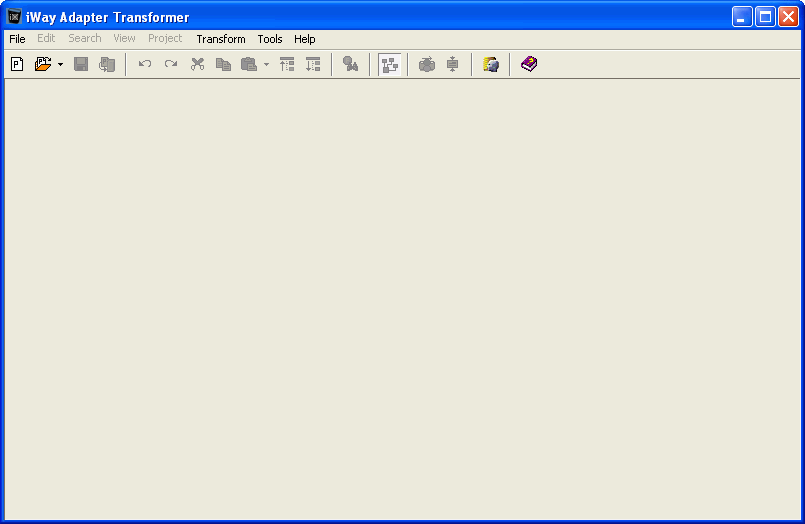
The iWay Adapter Transformer tool, shown in the following image, opens in a separate window.
-
To start the Project Wizard, from the main menu select
File, then Project
Wizard.
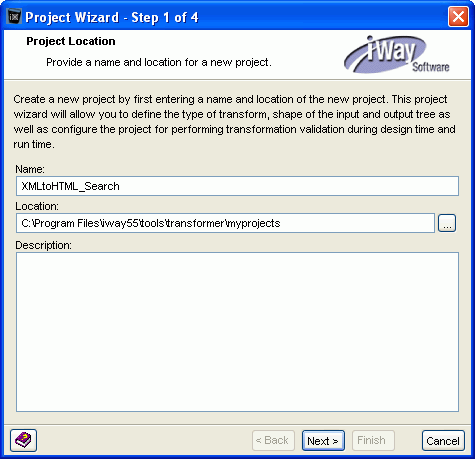
The Project Location dialog box opens, as shown in the following image.
-
Type a name for the transformation project and browse
to the location where you want to store it.
The transform for our example is named XMLtoHTML_Search.
-
Click Next.
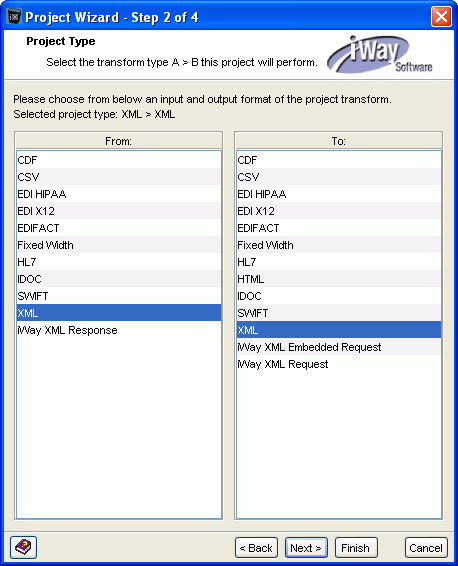
The Project Type dialog box opens, as shown in the following image.
-
Select XML in both the From pane and the To pane.
Note: Because XML provides a certain flexibility and can be used to produce an HTML document, you can choose XML as the output format for the XML-to-HTML transform.
-
Click Next.
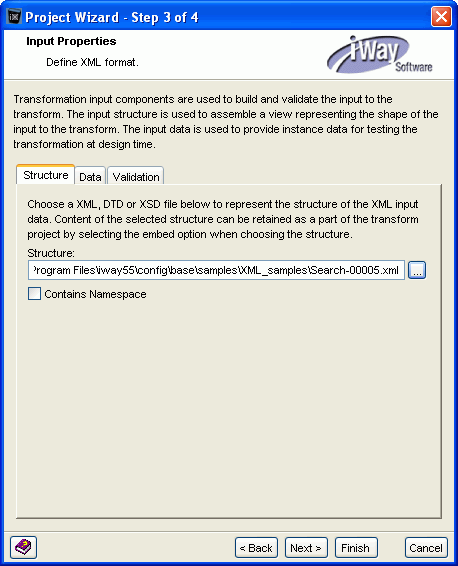
The Input Properties dialog box opens, as shown in the following image.
-
In the Structure tab, browse to a file that represents
the XML document that will come from the listener.
Note: All iWay listeners produce an XML formatted file.
- In the Data tab, browse to a sample XML data input file that can be used to test the transformation.
-
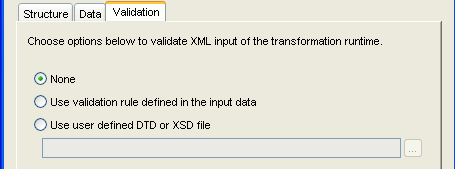
In the Validation tab, select an option for validating
the XML input document during run time.
The following image shows the Validation options.
-
Click Next.
The Output Properties dialog box, shown in the following image, opens.
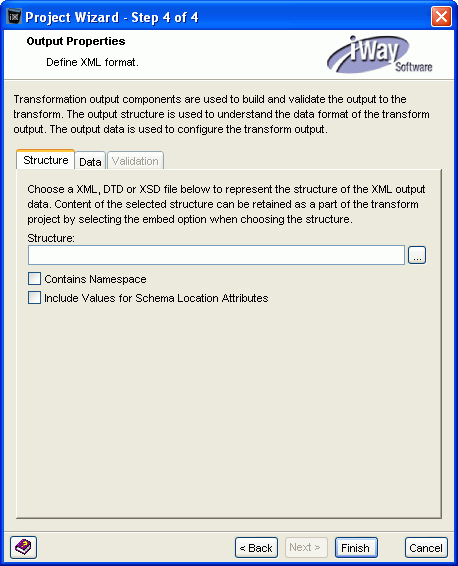
Note: If you have a template of the output structure, browse to it in the Structure field. This is helpful, but not necessary, when building the output structure in the mapping step of this procedure.
For the required HTML output structure, see Creating the HTML Document.
-
Click Finish.
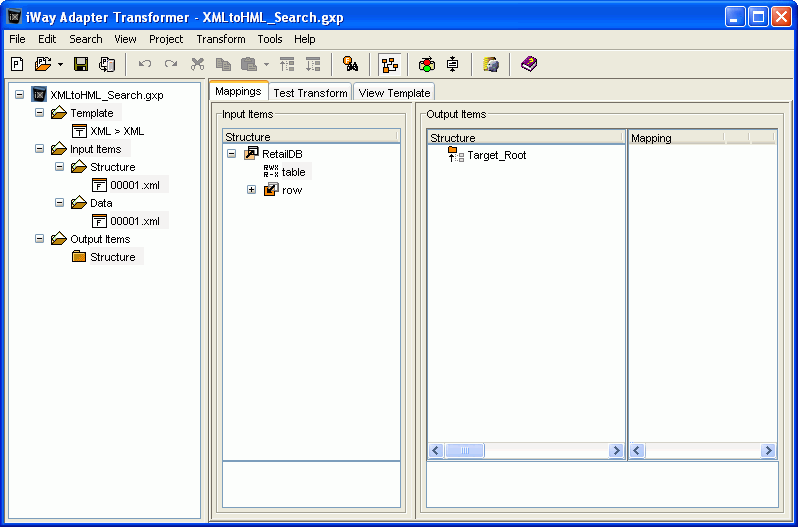
The project appears in the main Transformer window, as shown in the following image. The Input Items Structure pane reflects the XML input file structure and the Output (unless you provided a template) contains the Target_Root tag. You will build the HTML output structure under this root tag.
As noted in Creating the HTML Document, the HTML document you send to the search engine must have a specific format. The following tables list the required HTML parameters and values when using:
- A standalone report procedure.
- A Managed Reporting report procedure.
- An external URL.
Use the information you recorded in the configuration worksheets as you build the HTML output.
The following table describes the HTML format required for all access types.
Parameter
Value
HTML
None.
HEAD
None.
TITLE
Title to be displayed as the search result link.
Custom Meta Tags
META NAME="X" CONTENT="Y"
Meta tags that are stored with the search result, but are not index or available for searching.
Unique Key
META name="WF_INDEX_UNIQUE_KEY"
Used to identify a unique document when updating or deleting records from the index. This can be the document URL address or a database field value.
This is a required meta tag and must be unique within each index library.
Target for Search Results
META name="TITLE_TARGET"
Specifies the target in which the results of the main search result link displays. Valid values are as follows:
- _blank
-
Displays the results in a new browser window.
- _self
-
Replaces the current browser window with the search results. This is the default.
- _parent
-
Displays the results in the inner frameset.
- _top
-
Replaces the entire frameset with the search results.
- frame name
-
Displays the search result in the frame specified.
META name="LINK_TARGETn"
Specifies the target in which the results for each additional link displays. Valid values are as follows:
- _blank
-
Displays the results in a new browser window.
- _self
-
Replaces the current browser window with the search results. This is the default.
- _parent
-
Displays the results in the inner frameset.
- _top
-
Replaces the entire frameset with the search results.
- frame name
-
Displays the search result in the frame specified.
Where n must be in sequential order (1, 2, 3, and so on).
Date Information
META name="date"
By default, Magnify adds a date field for each record. The date field value contains the date in which the record was indexed. Optionally, you can add your own date information by adding a date META tag in your transformation. If date information is provided with the record, Magnify will include this value in the index and not the default date value. The format for the date must be as follows:
yyyy-mm-ddwhere:
- yyyy
- Is the year.
- mm
- Is the month.
- dd
- Is the day.
META name="datetime"
By default, Magnify adds a datetime field for each record. The datetime field value contains the date and time in which the record was indexed, including the timezone difference. Optionally, you can add your own date and time information by adding a datetime META tag in your transformation. If date/time information is provided with the record, Magnify will include this value in the index and not the default datetime value. The format for the datetime value must be as follows:
yyyy-mm-dd hh:mm:ss.ttt-xxxxwhere:
- yyyy
- Is the year.
- mm
- Is the month.
- dd
- Is the day.
- hh
- Is the hour.
- mm
- Are the minutes.
- ss
- Are the seconds.
- ttt
- Are the milliseconds from 000 to 999.
- xxxx
- Is the timezone difference from Greenwich Mean Time. The range is from 0000 to 2300.
Data That Can be Searched On
BODY
Data to be indexed (and therefore searchable) by the search engine.
The following table describes optional meta tag information when indexing documents.
Parameter
Value
File Metadata Information
META name= "MAGNIFY_ACTION_FILE_PROPERTY_FIELD"
Defines the meta-properties of the file in the Dynamic Categorization Tree.
META name= "MAGNIFY_ACTION_FILE_PROPERTY_TITLE"
Defines the text used to display the meta-properties of the file that are included in the Dynamic Categorization Tree.
META name= "MAGNIFY_ACTION_FILE_PROPERTY_BODY"
Defines the meta-property values of the file to be indexed as part of the file search body (IBI_CONTENT).
META name="MAGNIFY_ACTION_FILE_BODY"
Defines any additional static values used to enrich the file content, such as data from the database record or an email.
The following table describes the HTML format required for a standalone report procedure.
Parameter
Value
WebFOCUS Standard Report Access Details
META name="FOCEXEC_FOR_TITLE"
WebFOCUS report (FOCEXEC) to be executed when you click the title link. Can include images, if necessary.
META name= "FOCSOURCEDATABASE_FOR_TITLE"
Name of the database accessed when you click the title link.
META name= "FOCEXECCAPPNAME_FOR_TITLE"
Name of the FOCUS application accessed (where the FOCEXEC resides) when you click the title link.
Additional Links
META name="LINK_DISPLAY_NAMEn"
Name of additional search result links. Can include images, if necessary.
Where n is the sequential number of the link you are creating (1, 2, 3, and so on).
META name="FOCEXECn"
Name of the report procedure that will be executed when nth link is clicked.
META name="FOCSOURCEDATABASEn"
Name of the data source for the nth link.
Where n is the sequential number of the link (1, 2, 3, and so on).
META name="FOCEXECAPPNAMEn"
FOCUS application name for the nth link.
Where n is the sequential number of the link (1, 2, 3, and so on).
The following table describes the HTML format for a Managed Reporting report procedure.
Parameter
Value
WebFOCUS Managed Reporting Access Details
META name="IBIMR_action_FOR_TITLE"
Parameters to use for a Managed Reporting report that will execute when the main link is clicked.
META name="IBIMR_sub_action_FOR_TITLE"
META name="IBIMR_fex_FOR_TITLE"
META name="IBIMR_folder_FOR_TITLE"
META name="IBIMR_drill_FOR_TITLE"
META name="IBIMR_domain_FOR_TITLE"
Additional Links
META name="LINK_DISPLAY_NAMEn"
Name of additional search result links.
Where n is the sequential number of the link you are creating (1, 2, 3, and so on).
META name="IBIMR_actionn"
Parameter to the Managed Reporting report for the nth link.
META name="IBIMR_sub_actionn"
META name="IBIMR_fexn"
META name="IBIMR_folderN"
META name="IBIMR_drilln"
META name="IBIMR_domainn"
The following table describes the HTML format required for an external URL.
Parameter
Value
URL Access Details
META name="TITLE_URL"
URL of the title link.
META name="LINK_URLn"
URL of the nth link.
Additional Links
META name="LINK_DISPLAY_NAMEn"
Name of additional search result links.
Where n is the sequential number of the link you are creating (1, 2, 3, and so on).
In the subsequent steps of this procedure, we will build our HTML output using the standalone report procedure parameters.
-
Rename the Target_Root tag, and create the HEAD and TITLE
tags, as follows:
- In the Output Items Structure pane, rename the Target_Root tag to HTML. (Right-click the tag and select Rename.)
- Right-click the HTML tag and select Add, Parent from the drop-down list.
- An Output_Parent_Tag appears under the HTML tag. Rename this tag HEAD.
-
Right-click the HEAD tag and select Add,
Element. An Output_Element_Tag appears
under the HEAD tag. Rename this tag TITLE.
Give the TITLE tag a value, as noted in the previous table, that corresponds to the title you want to appear as the search result link.
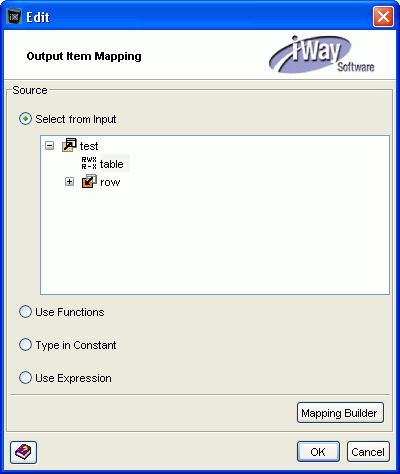
When you assign a value to an output item, you can:
- Select from Input (select an item from the input structure)
- Use Functions. Select a function that operates on the input value. Use this option to concatenate strings.
- Type a Constant (type a constant value).
- Use an Expression.
-
Highlight the TITLE tag, then in the Mapping pane, click
the ellipsis (...).
The Edit - Output Item Mapping dialog box opens, as shown in the following image.
-
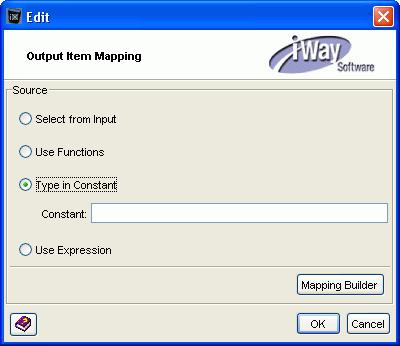
Select Type in Constant.
The Type in Constant field becomes available, as shown in
the following image.
-
In the Constant field, type the title for the search
result.
In our example, the title is Acme Delux Classic Basketball Spike Mens.
-
Click OK.
The TITLE tag mapping field (in the Output Items Mapping pane) is populated. The following image shows these elements in the Output Mapping pane.

-
Add the required META tags for the items in the Dynamic Categorization
tree. For each item, create a META tag that contains two attributes (name
and content), as follows:
- Right-click the HEAD tag and select Add, Element. An Output_Element_Tag appears under the HEAD tag. Rename this tag META.
-
Right-click the META tag and select Add,
Attribute from the drop-down list.
An Output_Attribute appears under the META tag.
- Rename the Output_Attribute tag name.
- Add another attribute to this META tag and rename it content.
- Click the name attribute ellipsis, and in the Edit dialog box, select Type in Constant.
-
In the Constant field, type the name for the Dynamic Categorization
tree.
Using our example, we type Department.
-
Click OK.
The name Mapping field is populated with your entry.
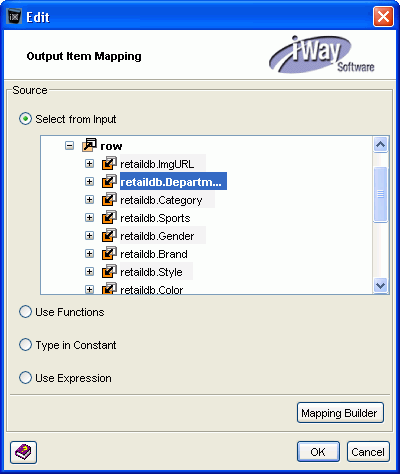
- Click the content attribute ellipsis, and in the Edit dialog box, choose Select from Input.
-
Expand the row node and select the value for META tag.
Select the retaildb.Department field to point to the value for Department in the database, as shown in the following image.
-
Click OK.
The name Mapping field is populated with your entry.
The following image shows the new mapping for the Department META entry. (You can set the View to represent the mapping between input and output items as a line.)

- Using this same technique, enter the remaining Dynamic Categorization items as META tags.
-
Continue by mapping the WebFOCUS report information you
want to associate with the link, as follows.
- Create an element under the HEAD element and rename it META.
- Create two attributes for the new META element (Add, Attribute), as described in Step 16.
- Click the name attribute ellipsis, and in the Edit dialog box, select Type in Constant.
-
In the Constant field, type the parameter for the link
title, as follows:
FOCEXEC_FOR_TITLE
-
Click OK.
The name Mapping field is populated with your entry.
- Click the content attribute ellipsis, and in the Edit dialog box, select Type In Constant.
-
Type the FOCEXEC that you want to use for this link.
The FOCEXEC in our example is prddet.
The content Mapping field is populated with your entry, as shown in the following image.
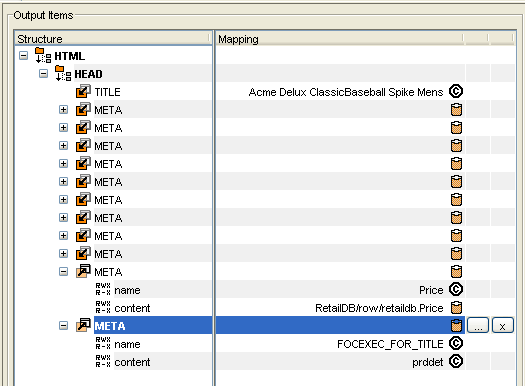
-
Continue using this method to add the remaining WebFOCUS report
parameters:
FOCSOURCEDATABASE_FOR_TITLE
FOCEXECAPPNAME_FOR_TITLE
-
Add META tags for the additional links.
The additional links in our example are Product Sheet and Summary Report.
- Add a META element under the HEAD element, and add two attributes (name and content) as previously described.
- Click the name attribute ellipsis, and in the Edit dialog box, select Type in Constant.
-
In the Constant field, type the parameter name for the
link, as follows:
LINK_DISPLAY_NAME1
-
Click OK.
The name Mapping field is populated with your entry.
- Click the content attribute ellipsis, and in the Edit dialog box, select Type In Constant.
-
Type the name you want to appear in the search results
page as this link.
In our example, the link name is Product Sheet. We also want a PDF icon to appear next to this name, so we include the path to the image in this element content, as follows:
content = "Product Sheet <img src="http://vlamdemo.ibi.com:8080/
ibi_html/javaassist/images/mr/mr_ex_pdf.gif" border="0">"
-
Continue using this method to add the remaining META elements,
which identify the WebFOCUS report associated with this link,
as follows:
-
FOCEXEC1
-
FOCSOURCEDATABASE1
-
FOCEXECAPPNAME1
The following shows the META elements in the Output Items Mapping pane.
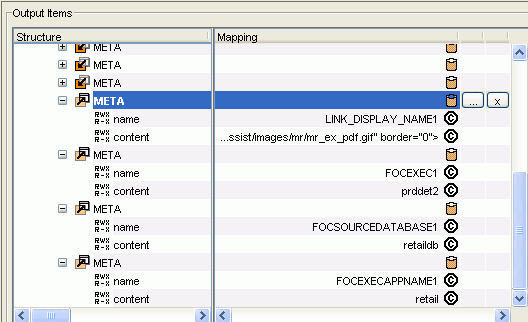
-
-
Add another META element under the HEAD element, and
add two attributes (name and content) as previously described.
This element will define a second link, if desired. The entries
are all Type In Constant.
In our example, the second link is Summary Report. Our entries for this example are:
META name = "LINK_DISPLAY_NAME2" content = "Summary Report"
META name = "FOCEXEC2" content = "prdsum"
META name = "FOCSOURCEDATABASE2" content ="retaildb"
META name = "FOCEXECAPPNAME2" content = "retail"
-
Add the BODY element. This element contains all possible
items and text that a user can search on to retrieve this
record.
Note: Because this element can contain lengthy content, you can use the concatenate function to join strings, as shown in this procedure.
- Under the HEAD element, add an element and rename it BODY.
- Click the BODY ellipsis in the Mapping pane.
-
In the Edit - Output Item Mapping dialog box, select
Use Functions. The function
selections appear in the Edit dialog box, as follows:
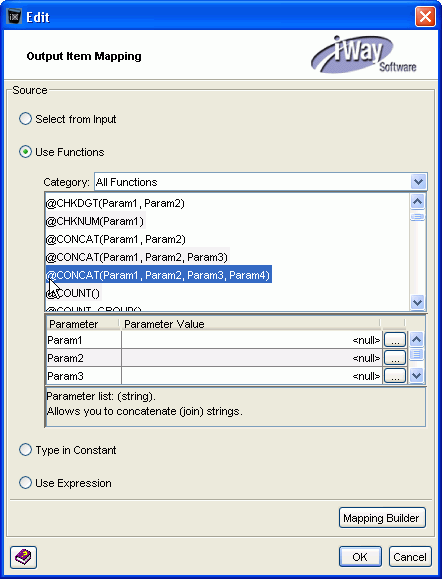
-
Select a concatenate function (@CONCAT) based on the
number of items in the XML document you want to include in
the body.
The Parameter and Parameter Value fields appear below the function pane.
Note: We recommend that you include all of the items from the XML document in the body. You can also add additional words or phrases you think will help locate this record.
Tip: Use the following guidelines when working with the concatenate functions.
- Each parameter (Param1, Param2, Param3, and Param4) in the concatenate function can then hold another concatenate function, and each of those, another concatenate function, meaning you can nest concatenates to produce a string to hold the content needed.
- In addition to XML items, the concatenate parameters must also provide the spaces between these items in the BODY element. Therefore, each concatenate that contains four parameters can hold two values and two spaces.
- When nesting Concatenate functions, you must create the layers of the nest and start defining the parameters in the innermost concatenate function.
To illustrate nesting Concatenate functions, use our example XML document, which contains 13 items that we want to include in the BODY element. In addition we want to include the word "Sporting" to make a total of 14. Because we have so many items to include, we select the @CONCAT(Param1, Param2, Param3, Param4) function to start. The following diagram shows the structure of the nested concatenate functions to join the desired string values and spaces for the record in our example.
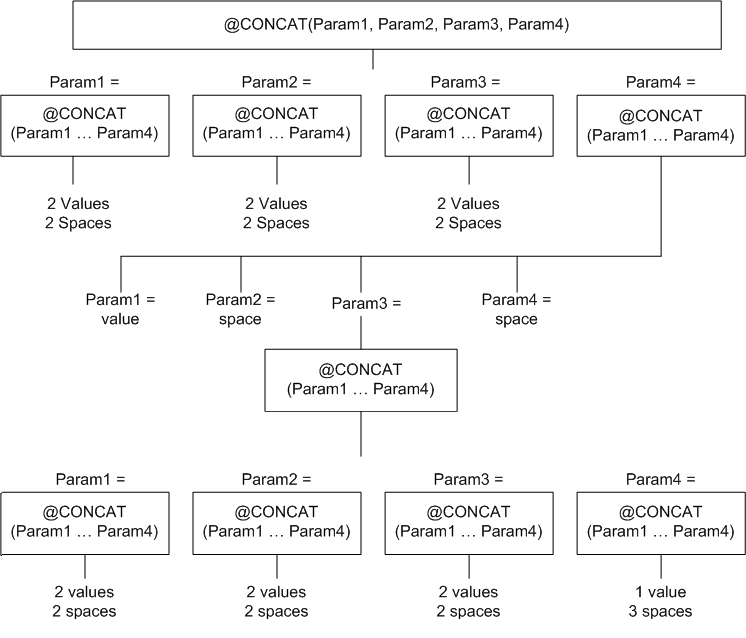
Note: Considerations should be made in preparing data earlier in the process.
-
To define Param1, click the ellipsis to the right of
the Param1 Parameter Value field.
The Edit -- Param1 window opens with the same options (Edit from Input, Use Functions, Type in Constant, and Use Expression).
-
Select either Select From Input to type
an actual value, or Use Functions and
select another concatenate function to continue nesting the
concatenate function.
The value of our example Param1 will be @CONCAT(Param1, Param2, Param3, Param4). The following image shows the first concatenate selection (Step d) in the left Edit window, and the Param1 Edit window in the right Edit window.
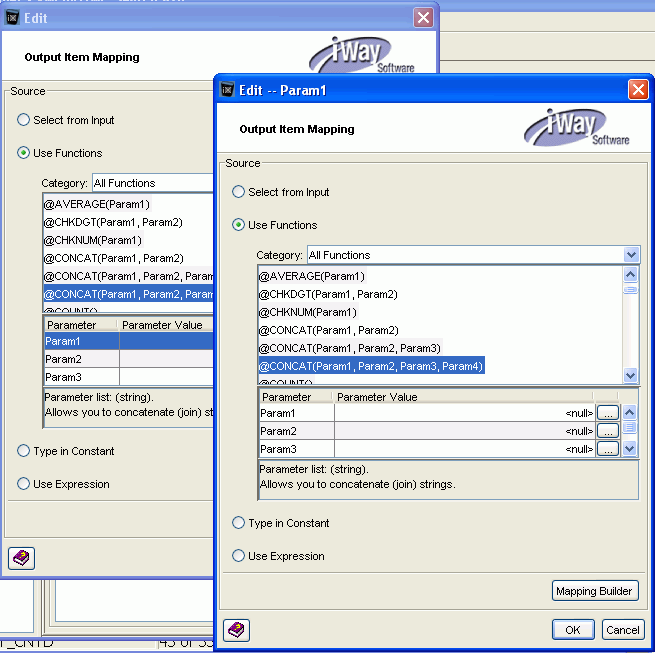
Note: An additional Edit window appears each time you select a function as a parameter value.
- In the Edit -- Param1 window, click the ellipsis for Param1 Parameter Value and choose Select from Input.
-
In the Select from Input pane, expand the row element
and select the database field you want this parameter value
to be.
From our example, we select Department for the Param1 value.
-
Click OK.
The Parameter Value field is populated with this value.
- To create a space between this value and the next, click the ellipsis for Param2 Parameter Value and select Type in Constant.
- Press the space bar to input a space, then click OK.
- Click the ellipsis for Param3 Parameter Value and select Select from Input.
-
In the Select from Input pane, expand the row element
and select the database field you want this parameter value
to be.
Using our example, we choose Category for Param3.
-
Click OK.
The Parameter Value field is populated with this value.
- To create a space between this value and the next, click the ellipsis for Param4 Parameter Value and select Type in Constant.
-
Press the space bar to input a space, then click OK.
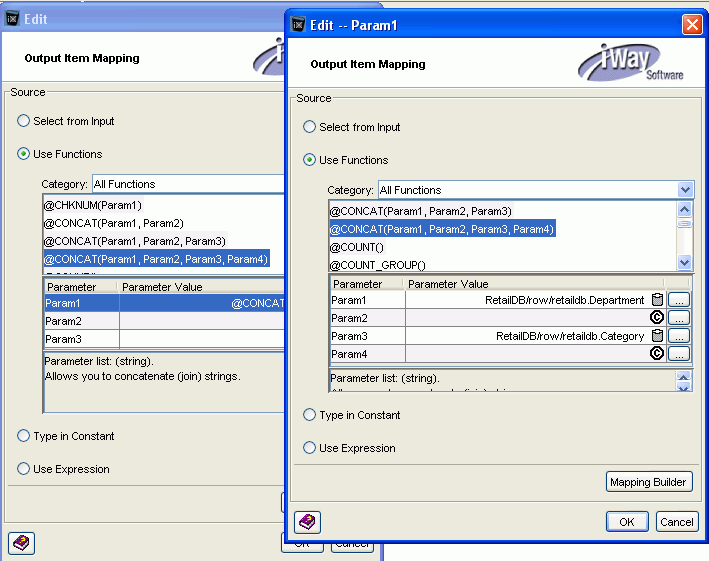
The following image shows the original Edit window and the Edit -- Param1 window. In the Edit -- Param1 window, we have assigned values for the 4 parameters of the Parma1 concatenate. Note that parameters 2 and 4 contain spaces.
-
In the Edit -- Param1 window, click OK.
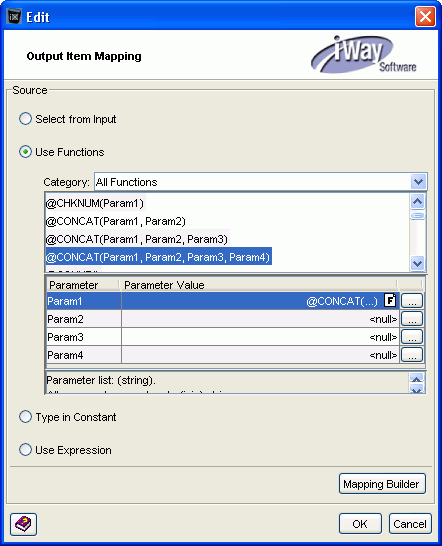
The Edit -- Param1 window closes and the concatenate value appears in the Parameter Value field of the original Edit window, as shown in the following image.
-
Continue defining the remaining parameter values and
adding spaces using this method.
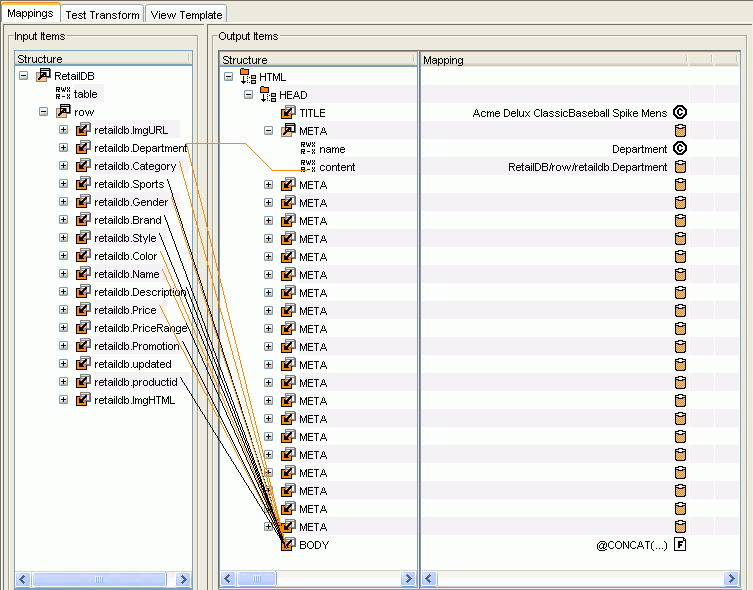
The XML to HTML transform project is now complete. The following image is an example of the mapping between the input and output structure that shows the META tags and the BODY tags mapped to the original XML elements. (This image only shows one expanded META element to reveal its mapping.)
- Save the transform project (File, Save Project).
-
To test the transformation, click the Test
Transform tab (located above the Input Items and
Output Items panes), or from the main menu, select Transform,
then Test.
The transformation output is then indexed and becomes part of the content of a record.
The test results, which are the resulting HTML documents, appear in the Test Transform pane.
For more information on the structure of the document, see Magnify Protocols for Indexing Documents.
-
Publish the transformation so that it is available for
use by the iWay Adapter Manager, as follows:
- From the File menu, select Publish Project.
- In the Transform Properties dialog box, type a name for the project and a brief description, and select an encoding protocol from the Encoding drop-down list.
-
Click Next.
The Transform Location dialog box opens.
-
In the Repositories pane, expand the server node of interest and
select the configuration to which you want to publish the
project.
Note: The Transforms pane lists the transform projects that exist in the selected folder.
- Click Next.
- In the Publish Transform dialog box, confirm the details of the publication and make any necessary changes.
- Click Publish.
- In the confirmation window, click OK.
The transform now resides on the iWay server and configuration you selected and is available for selection in the Adapter Designer Transform object.
- In the Adapter Designer Transform object, click Reload Transforms to load the available transforms, which includes the transform you just created.
-
From the Transform drop-down list, select the XML to
HTML transformation you just created for this search indexing.
For our example, select XMLtoHTML_Search.
- Click Next.
-
Click Finish.
The Transform object appears in the Designer workspace.
-
Build a relationship between the Service object and Transform
object with the Event option set to OnCompletion.
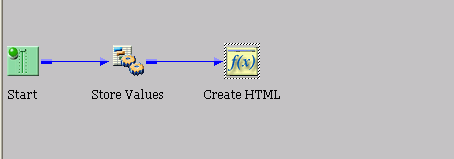
The following image shows the process flow with the Create HTML object.
