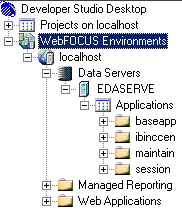
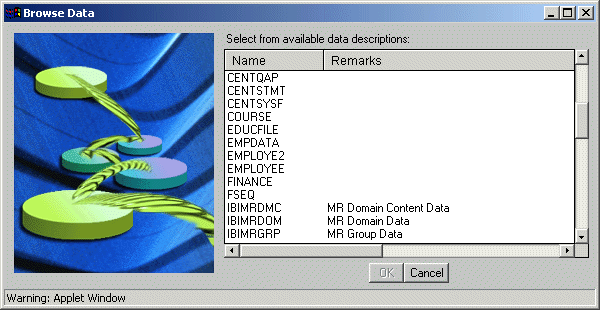
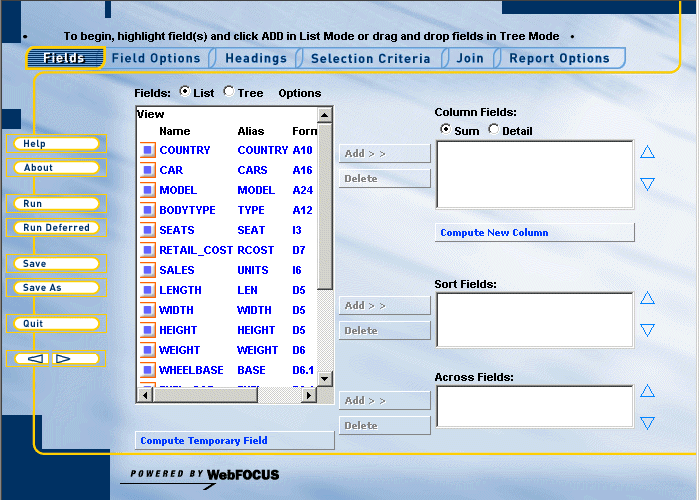
You can control which applications, files, fields, and
field descriptions appear in WebFOCUS development tools like Managed
Reporting or Developer Studio.
x
You can control the display of applications, files,
fields, and field descriptions by placing FOCUS selection syntax
(IF, WHERE commands) in FEX files that WebFOCUS includes when it
requests a list of applications, files, or fields. You then declare variables
that point to the FEX files containing the selection syntax.
WebFOCUS provides the following variables:
- &&IBI_IF_APPS
(Customizing the Display of Applications)
This
variable can be set to a file containing syntax that defines which
applications are displayed. The syntax is normally WHERE or IF selection
statements on the value of the APPNAME attribute.
- &&IBI_IF_FILE
(Customizing the Display of Files)
This
variable can be set to a file containing syntax that defines which
Master Files are displayed. The syntax is normally WHERE or IF selection
statements on the value of the NAME or REMARKS attributes.
- &&IBI_IF_FLDS
(Customizing the Display of Fields)
This
variable can be set to a file containing syntax that defines which
fields are displayed. The syntax can be WHERE or IF selection statements
on different field attributes, including the following: NAME, FILENAME,
ALIAS, DESCRIPTION, or USAGE.
- &&IBI_EXTDESC
(Customizing the Display of External Descriptions)
This variable can be set to a file containing
syntax that defines how descriptions set in external files are displayed.
This may involve creating a join from a selected Master File to
an external file containing descriptions for fields in the Master File.
The variables can be set on either the
WebFOCUS Client or the WebFOCUS Reporting Server:
- To set variables on the server, declare
variables at the end of the server profile:
C:\ibi\srv77\wfs\etc\edasprof.prf
For
example:
-SET &&IBI_IF_APPS='C:\wfexcludes\excludeapps.fex';-SET &&IBI_IF_FILE='C:\wfexcludes\excludefiles.fex';
- To set variables
on the WebFOCUS Client, declare variables in the site.wfs file or in
the node profile of a specified WebFOCUS Reporting Server (node.prf),
and store the values in the \wfc\etc directory under the WebFOCUS
Client installation directory.
c:\ibi\client\wfc\etc\site.wfs
or
c:\ibi\client\wfc\etc\node.prf
where:
- node
Is the node name for the server in the WebFOCUS Client odin.cfg
file. For more information about creating server node profiles,
see Configuring WebFOCUS Reporting Server Settings.
In site.wfs
or node.prf, you must use the \ character
to escape characters such as & and \ and you can indicate Windows
directories using the UNIX / convention. All -SET commands must
begin on a new line which you indicate using \n as shown below.
If you declare multiple variables, you must end lines with \\= as
shown below. The section defining the variables must begin with
the _site_profile line. For example:
_site_profile = \\=
\n -SET \&\&IBI_IF_FLDS = 'c:/wfexcludes/excludefields.fex'; \\=
\n -SET \&\&IBI_IF_FILE = 'c:/wfexcludes/excludefiles.fex';
The
following sample code may be used in the node profile of a specified WebFOCUS
Reporting Server (node.prf):
_site_profile= &_site_profile \\=
\n –SET \&\&IBI_IF_FLDS = 'c:/wfexcludes/excludefields.fex'; \\=
\n –SET \&\&IBI_IF_FILE = 'c:/wfexcludes/excludefiles.fex';
Note
that files must be located on the WebFOCUS Reporting Server machine
even if you set variables on the WebFOCUS Client.
If you change
variable settings in site.wfs or node.prf,
you must restart your Web server and/or application server for the
settings to take effect. Changing variables in edasprof.prf does
not require a restart.
Note: A variable set on the WebFOCUS Client overrides
a variable set on the WebFOCUS Reporting Server.
The files containing syntax can be located anywhere on the server
machine and may be given any name you choose. However, avoid names
and directories with spaces. Placing the files outside of the root
ibi directory is convenient for using them when you upgrade or reinstall.
Examples in this document use the following directory:
C:\wfexcludes
If a variable is declared, the contents of its file are included
when WebFOCUS requests a list of applications, files, or fields.
If a variable is not declared, all applications, files, or fields
are returned.
Note: If you are unfamiliar with FOCUS syntax, see the Creating Reports With WebFOCUS Language manual.
xCustomizing the Display of Applications
The &&IBI_IF_APPS variable lets you specify
a file that can limit which applications display in WebFOCUS Development
tools. For example, you can stop the ibisamp directory from appearing
in Developer Studio or Managed Reporting.

x
Procedure: How to Customize Which Applications Display
-
Create
a partial FEX file in a text editor containing only WHERE or IF
selections on the value of the APPNAME attribute. You can use as many
lines as needed.
For example, create a file called excludeapps.fex and enter
the following to hide the IBISAMP application:
WHERE APPNAME NE 'ibisamp'
Note: Be
sure to use the correct case for the directory.
-
Go to
the following page on your Web server to run an ad hoc procedure to
test your syntax:
http://webserver/ibi_html/homepage/adhoc.htm
-
Enter
the following to test your file:
APP ENABLE
APP LIST HOLD
TABLE FILE FOCAPPL
PRINT APPNAME
-INCLUDE path_to_file
END
where:
- path_to_file
Is the full path to the file on the WebFOCUS Reporting Server
machine containing your syntax.
-
Click Run.
A list of desired applications appears if your syntax is
correct. If not, troubleshoot accordingly.
-
If your
syntax is correct, edit edasprof.prf or site.wfs to declare and
set the &&IBI_IF_APPS variable to the FEX file you just
created.
For example, in edasprof.prf:
-SET &&IBI_IF_APPS='C:\wfexcludes\excludeapps.fex';
Note: You
can confirm the variable definition as explained in Troubleshooting Variable Settings.
xCustomizing the Display of Files
The &&IBI_IF_FILE variable lets you specify
a file that can limit which files display in WebFOCUS Development
tools. For example, you can hide Master Files for sample data, like
GGORDER, GGPROD, and GGSALES.

x
Procedure: How to Customize Which Files Display
-
Create
a partial FEX file in a text editor containing only WHERE or IF
selections on the value of the NAME or REMARKS field. You can use as
many lines as needed.
For example, create a file called excludefiles.fex and
enter the following to hide files that begin with gg*:
WHERE NAME NOT LIKE 'GG%'
Use
uppercase for file names regardless of their case in the file system.
-
Go to
the following page on your Web server to run an ad hoc procedure to
test your syntax:
http://webserver/ibi_html/homepage/adhoc.htm
-
Enter
the following to test your file:
SQL FMI SET FILECASE UPPER
TABLE FILE SYSTABLE
PRINT NAME
-INCLUDE path_to_file
END
where:
- path_to_file
Is the full path to the file on the WebFOCUS Reporting Server
machine containing your syntax.
-
Click Run.
A list of desired files appears if your syntax is correct.
If not, troubleshoot accordingly.
-
If your
syntax is correct, edit edasprof.prf or site.wfs to declare and
set the &&IBI_IF_FILE variable to the FEX file you just
created.
For example, in edasprof.prf:
-SET &&IBI_IF_FILE='c:\wfexcludes\excludefiles.fex';
Note: You
can confirm the variable definition, as explained in Troubleshooting Variable Settings.
xCustomizing the Display of Fields
The &&IBI_IF_FLDS variable lets you specify
a file that can limit which fields display in WebFOCUS Development
tools. You can hide fields containing sensitive data, undisplayable
content (concatenated fields like an alpha for JOIN purposes), or intermediate
fields (fields to calculate other fields (unsigned packed bytes)).
For example, you can hide the DEALER_COST field in the sample car.foc
data source.

x
Procedure: How to Customize Which Fields Display
-
Create
a partial FEX file in a text editor containing only WHERE or IF
selections on the value of field attributes, such as NAME, ALIAS, DESCRIPTION,
or USAGE. You can use as many lines as needed. Specific selections
will apply to all files viewed through WebFOCUS development tools.
To limit selections to specific files, use the TBNAME attribute.
For example, create a file called excludefields.fex and
enter the following to hide the DEALER_COST field of car.foc:
WHERE NAME NE 'DEALER_COST'
-
Go to
the following page on your Web server to run an ad hoc procedure to
test your syntax:
http://webserver/ibi_html/homepage/adhoc.htm
-
Enter
syntax similar to the following to test your file:
TABLE FILE SYSCOLUM
PRINT NAME ALIAS COMPUTE DESCRIPTION/A3000 = REMARKS;
-* any other fields needed
IF TBNAME EQ testfile
ON TABLE HOLD AS WF$HOLD
END
TABLE FILE WF$HOLD
PRINT testfield
-INCLUDE path_to_file
END
where:
- testfile
Is a Master File (not including the .mas extension) you want
to test your field selection against. The case should match the
case in the file system. For example:
car
- testfield
Is a field or fields you want to display in the test results.
For example:
NAME
- path_to_file
Is the full path to the file on the WebFOCUS Reporting Server
machine containing your syntax.
-
Click Run.
A list of desired fields appears if your syntax is correct.
If not, troubleshoot accordingly.
-
If your
syntax is correct, edit edasprof.prf or site.wfs to declare and
set the &&IBI_IF_FLDS variable to the FEX file you just
created.
For example, in edasprof.prf:
-SET &&IBI_IF_FLDS='c:\wfexcludes\excludefields.fex';
Note: You
can confirm the variable definition as explained in Troubleshooting Variable Settings.
xCustomizing the Display of External Descriptions
The &&IBI_EXTDESC variable lets you display
field descriptions held in external files. For example, if instead
of describing fields in the same table or Master File in which the
fields appear, the descriptions might be stored in a separate table.
You can use the &&IBI_EXTDESC variable to specify FOCUS
syntax to join and display these descriptions in WebFOCUS Development
tools.
x
Procedure: How to Display External Descriptions
-
Create
a partial FEX file in a text editor containing only syntax to JOIN
and display the descriptions. You can use as many lines as needed.
Refer to the Creating Reports With WebFOCUS Language manual
for syntax necessary to JOIN and display the descriptions.
In
the following example, FIELDDESCX.DAT is an external file and each
record is 'filename || fieldname' followed by a description:
FILEDEF XXX DISK C:\FIELDDESCX.DAT
DEFINE FILE WF$HOLD ADD
FNFLD/A132 = FILENAME || NAME ;
XDESCRIPTION/A3000 = DECODE FNFLD(XXX ELSE ' ');
DESCRIPTION = IF XDESCRIPTION NE ' ' THEN XDESCRIPTION
              ELSE DESCRIPTION;
END
-
Go to
the following page on your Web server to run an ad hoc procedure to
test your syntax:
http://webserver/ibi_html/homepage/adhoc.htm
-
Enter
syntax similar to the following to test your file:
TABLE FILE SYSCOLUM
PRINT FILENAME NAME ALIAS COMPUTE DESCRIPTION/A3000 = REMARKS;
-* any other fields needed
IF TBNAME EQ testfile
ON TABLE HOLD AS WF$HOLD
END
-INCLUDE path_to_file
TABLE FILE WF$HOLD
PRINT NAME DESCRIPTION/A80
END
where:
- testfile
Is a Master File (not including the .mas extension) you want
to test your field selection against. The case should match the
case in the file system. For example:
car
- path_to_file
Is the full path to the file on the WebFOCUS Reporting Server
machine containing your syntax.
-
Click Run.
A list of desired fields and descriptions appear if your
syntax is correct. If not, troubleshoot accordingly.
-
Edit
edasprof.prf or site.wfs to declare and set the &&IBI_EXTDESC variable
to the FEX file you just created.
For example, in edasprof.prf:
-SET &&IBI_EXTDESC='c:\wfexcludes\externaldesc.fex'
Note: You
can confirm the variable definition as explained in Troubleshooting Variable Settings.


