Reference: |
The ribbon represents the activities performed in the DMC. Commands are active or inactive depending on the activity being performed. These include a general toolbar for operations like opening and saving files, a process and data flow toolbar for operations like running and deleting flows, a specialized process flow toolbar for adding objects to the workspace, and a reports toolbar for operations like displaying data in a spreadsheet.
The Quick Access Toolbar contains the following buttons, as default. Other buttons can be added as required.
Button |
Function |
---|---|
|
New Lets you create new flows, stored procedures, synonyms, specialized flows, or server connections, as well as configure adapters. |
|
Save Saves the current procedure under a specified file name. |
|
Save As Saves the current procedure under a specified file name. |
|
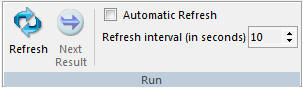
Refresh Refreshes the Explorer tree in the navigation pane. |
The Home tab consists of the following five groups:
The View group consists of the commands shown in the following image.
Displays the status bar at the bottom of the DMC.
Displays the browser in the DMC.
Displays the Console Log in the DMC.
Displays the workspace in full screen mode.
Opens a Windows Explorer style window on the right side of the DMC that shows detailed information about the currently selected server object.
Goes back one directory level. This option is available when in Explorer view.
Goes forward one directory level. This option is available when in Explorer view.
Goes up one directory level. This option is available when in Explorer view.
The Filter group consists of the commands shown in the following image.
Clears any of the filters set for an application directory.
Shows saved flows, procedures, and user functions in the application directory.
Shows synonyms that describe data.
Allows you to specify what you want to see in the navigation pane. For more information, see Advanced Command.
The Find group consists of the commands shown in the following image.
Allows you to specify a term to search for in an application directory. You can specify that the search needs to match a whole word or case, by selecting the appropriate check box below the find field.
The Tools group consists of the commands shown in the following image.
Opens the console log file in a text editor, such as Notepad.
Selecting the arrow opens a context menu with the following additional options:
Opens the Product License Code window where you can view or change, your license code.
Opens the Language Selection window where you can configure a localized version (for selected languages) of the Data Management Console and the language used for text entry and display.
Opens the Options dialog box where you can set user preferences. For more information, see Setting User Preferences.
The Windows group consists of the commands shown in the following image.
Has the following options from the context menu:
The Flow tab consists of the following groups that apply to both a Data and Process Flow. Some of these commands are only available when working with a Process Flow.
The Undo/Redo group consists of the commands shown in the following image.
Undoes the last operation.
Undoes the last undo.
The Clipboard group consists of the commands shown in the following image.
Deletes the selected object.
Cuts the selected item.
Copies the selected item.
Pastes the cut or copied item.
The Editing group consists of the commands shown in the following image.
Opens the Find dialog box, which allows you to enter a text string and search parameters. This option is available when in Text or Edit as Text view.
Finds the next occurrence. This option is available when in Text or Edit as Text view
Finds the previous occurrence. This option is available when in Text or Edit as Text view.
Selects all of the text in the file. This option is available when in Text or Edit as Text view.
Opens the Replace dialog box that lets you enter a text string to find and replace it with. This option is only available when in Edit as Text view.
Opens the Go To Line dialog box, which allows you to enter a specific line number to view. This option is available when in Text or Edit as Text view.
The View group consists of the commands shown in the following image.
Switches to the Data Flow view in the workspace.
Switches to the Process Flow view in the workspace.
Switches to the Text view in the workspace.
Opens the Aerial View window.
If you are working with a data flow, the Insert group consists of the commands shown in the following image.
Creates a source in the workspace.
Joins two objects in the workspace.
Creates a select object in the workspace.
Create a union object in the workspace.
Adds an existing target in the workspace.
Creates a new target in the workspace.
If you are working with a process flow, the Insert group consists of the commands shown in the following image.
Creates a Stored Procedure object in the workspace.
Creates a flow object in the workspace.
Creates an email object in the workspace.
Creates a Parallel Group object in the workspace.
Creates a Wait object in the workspace.
Sets variables for the process flow.
The Run group consists of the commands shown in the following image.
Launches a drop-down menu for Submit, Run, Run with Options, and Impact Analysis.
The Reports group consists of the commands shown in the following image.
Runs the impact analysis report for the flow that is currently open.
Opens the last log for the flow that is currently open.
Runs the flow report for the flow that is currently open.
The Tools group consists of the commands shown in the following image.
Rearranges the objects in the workspace.
Validates the flow.
Displays the property pane for the flow.
The User Functions tab becomes active when you edit functions. It contains the following additional groups:
The View group consists of the commands shown in the following image.
Shows the selected function in a tree view.
Shows the selected function in a list view.
Shows the selected function in a text view.
The Insert group consists of the commands shown in the following image.
Creates a new function for the function.
Creates a new parameter for the function.
Creates a new define for the function.
The Run group consists of the command shown in the following image.
Opens the Test Function dialog box, where you can enter values to test the function.
The Tools group consists of the command shown in the following image.
Opens the Properties pane for whatever is selected in the workspace.
The Report tab becomes active when you run a report or view the Server Session Log. The Report tab has the following additional groups.
The Print group consists of the commands shown in the following image.
Opens the print dialog box to print the report.
Displays the preview of the to be printed.
The Run group consists of the commands shown in the following image.
Reruns the report.
Displays the next report in the output.
Note: This option is only available for output with multiple pages.
Automatically reruns the report at the refresh interval specified.
Allows you to specify how often a report reruns.
The Tools group consists of the commands shown in the following image.
Exports the report as an Excel spreadsheet.
Note: This option is available for Alpha and Original output only.
Copies the selected report text to the clipboard.
Allows you to specify what information is shown in the report. This option is available when viewing a Server Session Log.
Deletes all messages from the log and controls what types of messages appear in the server session log. This option is available when viewing a Server Session Log.
Opens the Scheduler Agent page where you can select the columns that appear on the scheduler agents page. This option is available when viewing the Scheduler Agent.
Opens the Select the states that will appear on the Scheduler Agents dialog box where you can select what states will appear on the Scheduler Agents page. This option is available when viewing the Scheduler Agent.
Allows you to select multiple flows or procedures and set the schedule status as active in a single operation. When using this command, it is recommended that you use Choose columns and select the Status column to display. This option is available when viewing the Scheduler Agent.
Allows you to select multiple flows or procedures and set the schedule status as inactive in a single operation. When using this command, it is recommended that you use Choose columns and select the Status column to display. This option is available when viewing the Scheduler Agent.
iWay Software |