How to: |
To create a new Tenant in PMF, you need to copy the template files that are set up in the default tenant template pmf_base, which is created when you install PMF. Then, set up the WebFOCUS Server and WebFOCUS Client to access that tenant exclusively whenever a user from that tenant logs in.
If you have shared client and server instances, you need to create only one set of folders. If you have a split-tier configuration, you will create separate sets of folders on both the client and the server.
For example, assuming this is a shared client or server configuration and are using SQL Server as host RDBMS for the PMF Data Mart, you will create tenant folders under the application root and then make one copy of the [proper master folders] (with content) under each the new tenant name folder.
- In the WebFOCUS Reporting Server, set up the user in admin.cfg.
-
Create a
database in the RDBMS for your new tenant by following the standard
build and DDL process for PMF. Typically, you would do this in your
RDBMS server console. You will need to:
- Create a new database with schema [tenant_name]. Make sure [tenant_name] schema has all access levels required for PMF (read/write/create and destroy tables/create and destroy views/create and destroy triggers).
- Run the PMF SQL DDL for that RDBMS to set up the database framing. In the case of SQL Server, you would run approot/pmfdbms/Create_Database/sqlmss.sql.
Tips:
- For ultimate security purposes, you could also configure the data mart using OS security to only allow the local OS user for each tenant to access this database.
- If you are using Oracle or DB2 to house your data marts, your procedure can vary. Contact your IB Support representative for more information.
-
Set up the
user profile by copying pmf_base.prf to a profile that uses your
tenant name. The following example shows pmf_base.prf:
-SET &&PM_TNT_NAME_PRF = '[tenant_name]' ;
-SET &RDBMS_PRF      = '[SQLrdbms]' ;
-SET &RDBMS_CUBE_PRF = 'sqlhyp' ;
-SET &PMF_DB_SPLIT_MODE_PRF = 'OFF' ;
APP MAP pmfdata              "C:\ibi\apps\pmf_tenants\pmfdata"
APP MAP pmfdata_tenant       "C:\ibi\apps\pmf_tenants\pmf_base\pmfdata_tenant"
APP MAP pmfdb_system         "C:\ibi\apps\pmfdbms\pmfdb_system\pmfdb_system_&RDBMS_PRF"
APP MAP pmfdb_system_tenant  "C:\ibi\apps\pmf_tenants\pmf_base\pmfdb_system\pmfdb_system_&RDBMS_PRF"
APP MAP pmfdb_cube           "C:\ibi\apps\pmfdbms\pmfdb_cube\pmfdb_cube_&RDBMS_CUBE_PRF"
APP MAP pmfdb_cube_tenant    "C:\ibi\apps\pmf_tenants\pmf_base\pmfdb_cube\pmfdb_cube_&RDBMS_CUBE_PRF"
APP MAP pmf_custom_tenant    "C:\ibi\apps\pmf_tenants\pmf_base\pmfcustom"
-SET &APP_PATH_START = 'pmf_custom_tenant pmf_custom' ;
-SET &APP_PATH_CUBE  = IF (&PMF_DB_SPLIT_MODE_PRF EQ 'OFF') THEN ' ' ELSE 'pmfdb_cube_tenant pmfdb_cube' ;
-SET &APP_PATH_END   = 'pmfdata_tenant pmfdata pmfdb_system_tenant pmfdb_system mainstreet' ;
APP PREPENDPATH &APP_PATH_START &APP_PATH_CUBE &APP_PATH_END
-*  Followed by ENGINE statements
ENGINE [RDBMS_ENGINE] SET CONNECTION_ATTRIBUTES pmf_system [machine]/[uid],[password];[tenant_dbschema]
-
Edit the
server connect string at the bottom of the file to point to the [tenant_name]
database:
ENGINE SQLMYSQL SET CONNECTION_ATTRIBUTES pmf_system
my_server/abcdefg,longxxpassword;pmf_tenant01
-
Edit the TENANT_NAME parameter at the top of the script:
-SET &&PM_TNT_NAME_PRF = 'pmf_tenant01' ;
-
On the WebFOCUS
Client, copy the pmf_base MR Domain folder. Rename the root folder
and [tenant_name].html files for the MR Domain short name of the
new tenant, as shown in the following image.
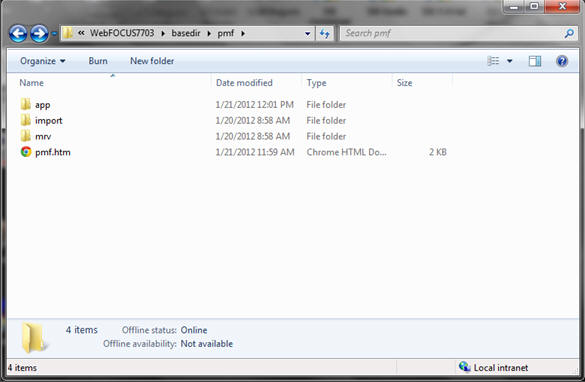
- Copy and rename the root app folder of pmf_base under pmf_tenants.
-
Add the following tenant support block to site.wfs:
<IF> IBIMR_domain EQ "[tenant_name]/[tenant_name].htm"
IBIF_wfdescribe = OFF
IBIC_server=PMF_BASE
<SET>IBIC_user(PASS)
<SET>IBIC_pass(PASS)
_site_profile = -INCLUDE FILTERS
<ENDIF>
-
Set up the
service node block for the tenant under Reporting Servers, Remote
Services, as shown in the following image.

-
In WebFOCUS
7.7. and earlier, please follow these additional steps to create
the tenant’s Domain and Group View folders:
- Copy the pmf_base domain in the MR basedir folder, and change the name to [tenant_name] using lowercase characters. Rename the folder and HTML File, then add this entry to mrrepos.htm.
- Create new MR groups for this tenant and create new Group Views in View Builder([tenant_name]\PMF Admin, [tenant_name] \PMF Author). Additional groups to be added in standard PMF installations are Analyst and Consumer.
-
Open the group view folder in worp_user folder and copy the
xml files from pmf_adm_gbv (Admin) and pmf_aut_gbv (Author) and
from pmf_aut_gbv(Analyst) and pmf_cns_gbv (Consumer).
Note: Group Views can also be created for any additional Functional Roles you might have to configure for your users. For more information, see the Performance Management Framework manual.
- Open the layout.xml and replace pmf/pmf.htm with [tenant_name].
-
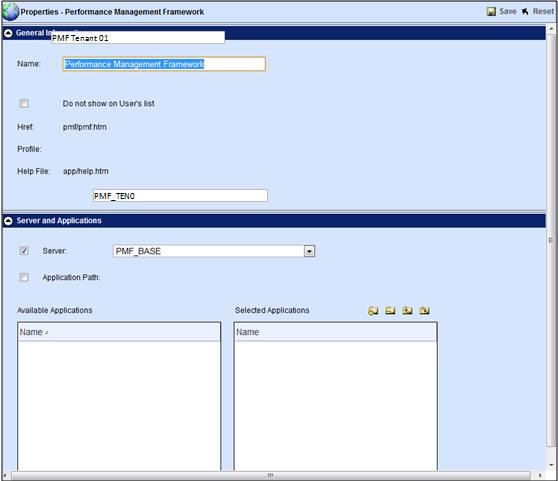
In Managed
Reporting Administration, connect the MR Domain panel of the tenant
with the node block used, as shown in the following image.
-
For testing
purposes, In MR Administration, create at least one sample user
for each tenant in MR, or in the system of record used for CUS security,
and assign them to the proper group for the new tenant. It is recommended
that you add the standard pmfadmin ID to each MR Domain as a bootstrap.
Once you have logged in as that user and set up additional users,
you can delete the pmfadmin ID from PMF and from the MR Domain.
Note: If you are using SSO technology and would prefer not to use the standard bootstrap ID, contact IB Customer Support for PMF installation help.
- Test the tenant by starting PMF, logging on using the sample admin user, and performing a Resync.
- Restore a Snapshot. For more information, see How to Restore a Snapshot.
- Fully test all tabs in PMF and ensure they are working properly.