iWay Transformer Basic Tutorial

In this section:

This topic provides a basic tutorial for iWay Transformer.

Transformer Workbench Basics

In this section:

The Transformer workbench is an Eclipse-based, end-to-end, integrated development environment (IDE) for data transformation design, testing, and management within iWay Service Manager (iSM). It uses a collection of visual layout, build, and debugging tools. Some of the basic functionality of the Transformer IDE comes from Eclipse. For example, managing, searching, and navigating resources are inherited from the core features.

About the Transformer Workbench

The Transformer workbench is a full-featured environment that is tailored to assist you in developing data transformations for iSM.

Unless you are using other Eclipse plug-ins, you do not need to be concerned with the underlying Eclipse framework.

Workbench. The workbench refers to the iWay Transformer development environment, which contains three primary facilities:

  • Perspective. A perspective is a group of views and editors in the workbench. Essentially, it is a special work environment that helps you accomplish a specific type of task. The Transformer workbench is located within the Integration Explorer perspective of iWay Integration Tools (iIT).
  • Editor. An editor allows you to edit various file types. iWay Transformer contains editors for creating transform (.gxp) and dictionary (structure) files.
  • View. A view typically supports an editor. For example, when you are editing a Transform component, Output, Input, Mapping Builder, Mapping Properties, and Template views are also displayed in the Transform editor.

You use all three facilities in various combinations and at various points during the transformation development process. The workbench is the container of all the tools that are used to develop transformations, which are also called Transform components in iSM.

About iWay Transformer Editors

iWay Transformer contains editors that allow you to edit Transform project (.gxp) files, as well as its metadata, such as structure (dictionary) files. Editors are associated with resource types. As resources are opened in the workbench, the appropriate editor is opened:

  • Transform Editor. The Transform editor is used to edit transformations. It has two modes: Mappings and Template. You use Mappings mode to visually design and structure your transformation. Template mode allows you to view an XML representation of your transformation. The two modes are synchronized, and changes in one mode are immediately reflected in the other.
  • Dictionary Builder. The Dictionary Builder is used to edit dictionary (structure) files or ebix metadata for e-business and proprietary data formats (for example, FWF, CDF, and X12).

Setting iWay Transformer Preferences

How to:

When you start iWay Transformer for the first time, the iWay home directory must be set. We also recommend that you verify the iWay Transformer preferences that are in use. For more information on how to set the iWay home directory, see the iWay Integration Tools Suite User's Guide.

Procedure: How to Verify iWay Transformer Preferences

To verify iWay Transformer preferences:

  1. From the menu bar, click Window, and select Preferences, as shown in the following image.

    The Preferences dialog box opens, as shown in the next image.

  2. Expand Transformer.

    The Encoding and JDBC Driver categories are listed.

    The following image shows the Encoding preference options that are currently set for iWay Transformer.

    The Encoding category provides the option of customizing project and template encoding. The following options are available:

    • Character encoding. You can select the type of encoding to use for the characters in a file. By default, the character encoding in iWay Transformer is set to UTF-8.
    • File encoding. You can select the type of file encoding to use when saving or deploying project and template files to a system that uses a different language format. By default, the file encoding is set to the same value that is used by your operating system.

    The following image shows the JDBC drivers that are currently used by iWay Transformer.

    The JDBC Drivers category allows you to specify JDBC driver configurations that can be shared between applications and used by the @JDBCLOOKUP function and other database-related Transform functions.

  3. Verify or modify the iWay Transformer preferences according to your requirements, and click OK.

Transformer Workbench Toolbar and Shortcuts

In this section:

This topic provides an overview of the Transformer workbench toolbar and shortcuts.

Navigating the Transformer Workbench Toolbar

When you start iWay Transformer, the main toolbar is displayed at the top of the window, as shown in the following image. Some of the toolbar buttons are disabled until you open or create a Transform component.

The following table includes an image of each toolbar button that is related to the Transformer workbench and describes its function.

Button

Function

Creates a new Transform component.

Saves a Transform component.

Prints Transform component test results.

Starts iWay Service Manager.

Stops iWay Service Manager.

Launches the XPath Builder.

Debugs the Transform component.

Runs the Transform component.

Configures external tools to run the Transform component.

Searches across Transform component mappings and nodes.

Maps the input structure as a root of the output structure. A confirmation dialog box is displayed when you select this option. This option is available only in the Mapping Builder.

Optimizes mappings by removing all unmapped output nodes including groups with unmapped children. This option is available only in the Mapping Builder.

Toggles between showing and hiding the mapping lines between the input and output nodes. The mappings signify the relationships between the input and output nodes, where the particular input value is used to construct the value of the output node.

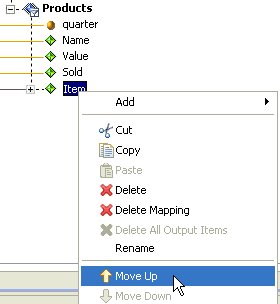
Moves the selected node up the output structure tree, under the same parent node.

Moves the selected node down the output structure tree, under the same parent node.

Navigating the Mapping Builder

In this section:

The Mapping Builder uses mapping types to specify how records and fields of one document structure relate to another.

Mappings Tab

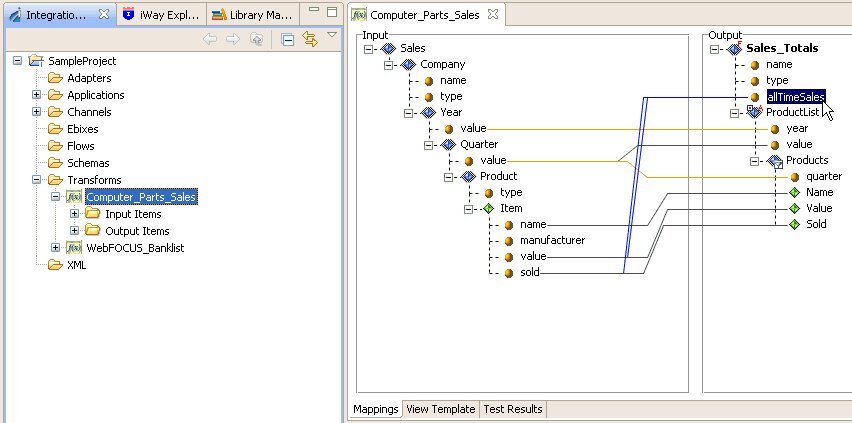
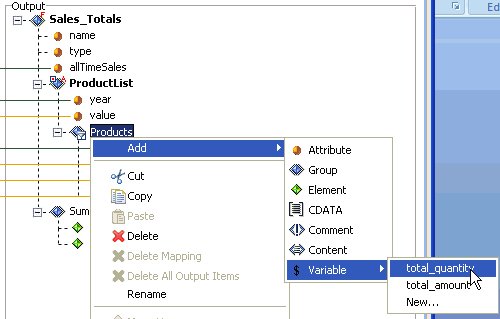
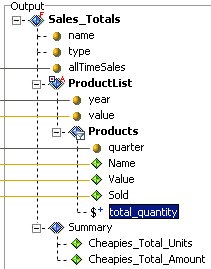
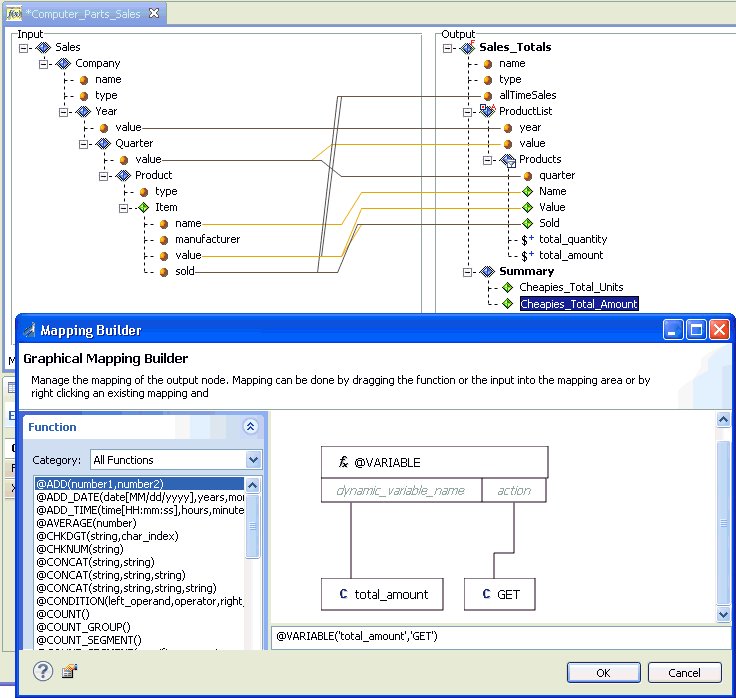
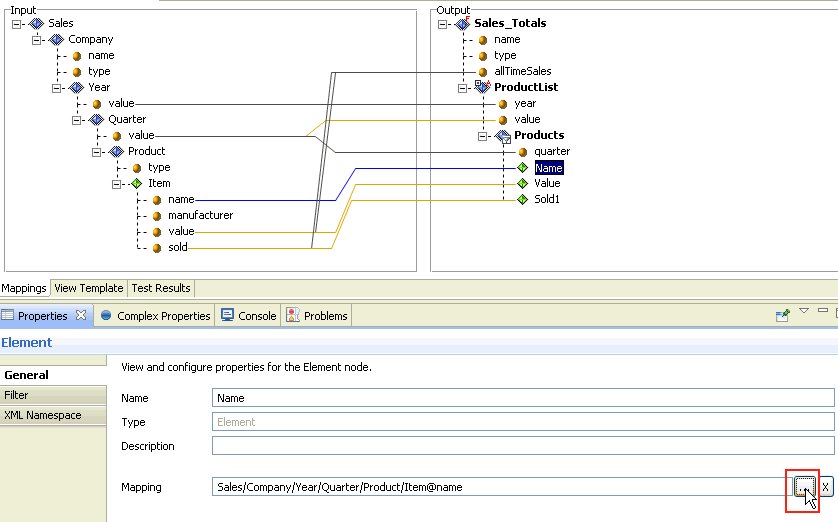
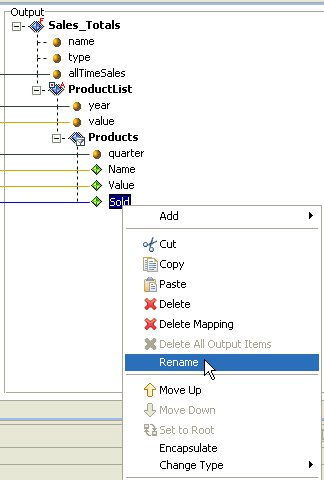
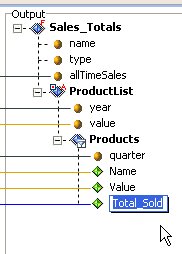
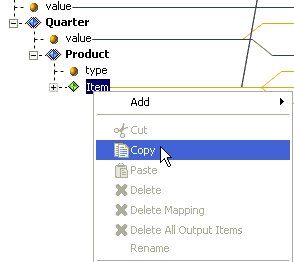
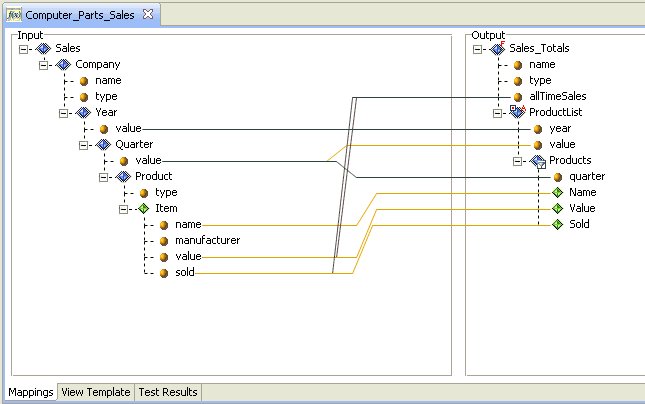
The Mappings tab allows you to design mapping rules for Transform components. You can quickly and easily accomplish mappings between individual nodes contained in structures of incoming and outgoing data, using drag and drop operations. The Mapping Builder interface supports one-to-one, one-to-many, and many-to-one mapping relationships, referring to the fields in the input and output documents, respectively.

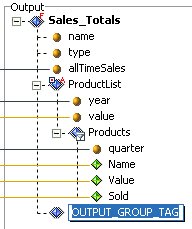
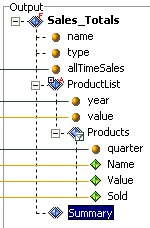
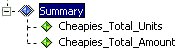
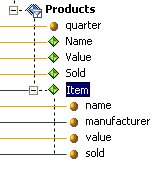
The following image shows sample input and output structures on the Mappings tab.

For more information on how to define mappings for Transform components using the Mappings tab, see Working With Mapping Builder.

View Template Tab

The View Template tab provides a read-only view of a Transform template, as an XML representation, or a serialized view of a Transform component.

The following image shows a read-only view of a Transform template on the View Template tab.

Test Results Tab

The Test Results tab displays the output document that is generated by your Transform component, as shown in the following image.

Using Keyboard Shortcuts

This following table lists keyboard shortcuts for commonly used tasks and functions.

Task or Function

Keyboard Shortcut

New

Alt+Shift+N

Close

Ctrl+W

Close All

Ctrl+Shift+W

Save

Ctrl+S

Save All

Ctrl+Shift+S

Undo

Ctrl+Z

Redo

Ctrl+Y

Cut

Ctrl+X

Copy

Ctrl+C

Paste

Ctrl+V

Delete

Delete

Select All

Ctrl+A

Find and Replace

Ctrl+F

Search

Ctrl+H

Run

Ctrl+F11

Debug

F11

Help

F1

Preparing iWay Integration Tools Suite

For more information on installing, configuring, and starting iWay Integration Tools (iIT) Suite, see the iWay Integration Tools Suite User's Guide.

Creating a Transform Component

How to:

This topic describes how to create a Transform component using the File menu, Integration Project context menu, or New button.

Procedure: How to Create a Transform Component Using the File Menu

To create a Transform component using the File menu:

  1. Click File, select New, and then click Transform from the context menu, as shown in the following image.

    The New iWay Transform wizard opens, as shown in the next image.

    For more information on creating a Transform component using the New iWay Transform wizard, see Configuring a New Transform Component.

Procedure: How to Create a Transform Component Using the Integration Project Context Menu

To create a Transform component using the Integration Project context menu:

  1. Right-click the Transforms folder in your Integration Project, select New, and then click Transform, as shown in the following image.

    The New iWay Transform wizard opens, as shown in the next image.

    For more information on creating a Transform component using the New iWay Transform wizard, see Configuring a New Transform Component.

Procedure: How to Create a Transform Component Using the New Button

To create a Transform component using the New button:

  1. Click the New button in the toolbar, as shown in the following image.

    The New dialog box opens, as shown in the following image.

  2. Expand iWay Integration, and then select Transform.

    The New iWay Transform wizard opens, as shown in the next image.

    You can skip the New iWay Transform wizard steps by clicking the Finish button once it is enabled. You can then manually alter the Transform project properties at your convenience.

    For more information on creating a Transform component using the New iWay Transform wizard, see Configuring a New Transform Component.

Navigating Resources

You can navigate Transform project resources in the Integration Explorer tab, as shown in the following image.

Browsing Mappings

How to:

This topic describes how to browse the mappings for a Transform project.

Procedure: How to Browse Mappings

To browse the mappings for a Transform project:

  1. Click the Mappings tab for your Transform project (for example, Computer_Parts_Sales), as shown in the following image.
  2. Select an output node in the Output pane (for example, the allTimeSales attribute).
    Properties of the selected output node are displayed in the Properties tab, as shown in the following image.
  3. Click the ellipsis button to the right of the Mapping field.

    The Mapping Builder opens, as shown in the following image.

Editing Mappings

In this section:

How to:

The example in this topic demonstrates how to edit output mappings to add a Summary node at the end of the root subtree to summarize the quantity and the amount of a sale. If you review the test results for the sample Computer_Parts_Sales Transform component, the filter set on the Product node ensures that the document contains only information on the Cheapies manufacturing brand. As a result, the summaries will reflect only Cheapies brand information.

The following image shows the filter that is set.

Procedure: How to Edit Mappings

To edit mappings for a Transform component:

  1. Click the Mappings tab, as shown in the following image.
  2. In the Output pane, right-click the Sales_Totals root group, select Add, and then click Group from the context menu.

    A new group node is added to the output structure, as shown in the following image.

  3. Change the default name for the group node to Summary, as shown in the following image.
  4. Add two elements to the Summary group, using the following names:
    • Cheapies_Total_Units
    • Cheapies_Total_Amount

    The following image shows how the Summary group will look.

    Now that the new output structure is configured, you need to configure variables to calculate the total values of the new elements (Cheapies_Total_Units and Cheapies_Total_Amount).

  5. Right-click the Computer_Parts_Sales Transform component in the Integration Explorer tab, and select Properties, as shown in the following image.

    The Properties dialog box for the Computer_Parts_Sales Transform component opens, as the next image shows.

  6. Expand Transform Properties in the left pane, and select the Variables category.
  7. Configure two numeric dynamic variables (total_amount and total_quantity). Ensure that the value for both variables is 0.

    You are now ready to add calculations within each product node, which will update the variables appropriately as the document is parsed.

  8. In the Output pane, right-click the Products group node, select Add, Variable, and then click total_quantity, as shown in the following image.

    The total_quantity variable is added to the Products group node, as shown in the next image.

    By default, the increment by 1 is the variable node that is created for the total_quantity variable. To calculate the total_quantity variable, you need to change it to increment by the quantity specified in a given node.

    The following image shows the functions available in the Mapping Builder.

  9. To calculate the total_amount variable, create a formula that multiplies the number of units sold by the cost of each unit, and use the ADD function to create a sum for the total.

    In the following image, the formula is shown, and the ADD function is selected from the list of functions on the left.

  10. Assign the final values for both variables to their respective total nodes at the bottom of the output structure, as shown in the following image.
  11. Test the updated Computer_Parts_Sales Transform component, and review the results, which are shown in the following image.

Using the Mapping Builder

How to:

The Mapping Builder is a tool available in iWay Transformer as part of the Mapping Builder facility. It allows you to construct an output node using various methods and formulas implemented in iWay Transformer as functions. You can access the predefined functions and the custom functions that you define, or build a statement containing several functions, if needed.

Procedure: How to Open the Mapping Builder

To open the Mapping Builder:

  1. In the Output pane of the Mappings tab, select an output node, as shown in the following image.
  2. Click the ellipsis button on the Properties tab.

    The Mapping Builder opens, as shown in the following image.

    For more information, see Using the Mapping Builder.

Renaming Mappings

How to:

To customize the output of your transform, you can rename an output structure node in your Transform component, if required.

Procedure: How to Rename Mappings

To rename mappings:

  1. Right-click an output structure node in the Output pane of the Mapping Builder, and select Rename from the context menu, as shown in the following image.
  2. Type a new name for the output structure node, as shown in the next image.

    Tip: The rename operation is also available if you double-click the name of the output structure node.

Copying and Moving Mappings

How to:

To modify the output structure of your transform, you can copy and move structure nodes in your Transform component, if required.

Procedure: How to Copy Mappings

Perform the following steps to copy an input structure node and paste it to the output structure:

  1. Right-click an input structure node (for example, the Item element) in the Input pane of the Mapping Builder, and select Copy from the context menu, as shown in the following image.
  2. In the Output pane of the Mapping Builder, right-click an output structure node (for example, the Products group node) to which you want to add the copied input, and select Paste from the context menu, as shown in the following image.

    A copy of the input structure node (for example, the Item element) is added to the output structure, as shown in the following image.

Procedure: How to Move Mappings

iWay Transformer provides a number of options for changing the order of output mappings.

Perform the following steps to rearrange an output node within the output structure:

Right-click an output structure node (for example, the Item element) in the Output pane of the Mapping Builder, and select Move Up from the context menu, as shown in the following image.

The output structure node is repositioned up by one level, as shown in the following image.

To reposition a selected output structure node down by one level, right-click the node, and select Move Down from the context menu. You can also click the Move Up and Move Down buttons on the toolbar to reposition nodes accordingly.

Running a Transform Component

How to:

Running a Transform component allows you to analyze the results of the transform.

Procedure: How to Run a Transform Component

To run a Transform component:

  1. Right-click the Transform component (for example, Computer_Parts_Sales) in the Transforms folder of your integration project, select Run As, and then click Transform Test, as shown in the following image.

    The Edit Configuration dialog box opens, as shown in the next image.

  2. Select the Server URL option in the Profile area, and then select an available URL that is used by iWay Explorer from the drop-down list.
  3. Click Apply.

    When the Apply button is grayed out, the option is applied.

  4. Click Run.

    The results are displayed in the Test Results tab, as shown in the following image.

Debugging a Transform Component

The Runtime Options tab allows you to debug a Transform component, as shown in the following image.

Working With Other Editors

For more information, see Dictionary Builder Tutorial.


iWay Software