Project Configuration Tutorial

In this section:

This topic provides a project configuration tutorial for iWay Transformer.

Configuring a New Transform Component

How to:

This topic describes how to configure a new Transform component.

Procedure: How to Configure a New Transform Component

To configure a new Transform component:

  1. Right-click the Transforms folder in your Integration Project, select New, and then click Transform, as shown in the following image.

    The New iWay Transform dialog box opens, as shown in the following image.

  2. Type a name and a description (optional) for your new Transform component.

    If required, you can change the preselected project folder by clicking Browse next to the Project Folder field.

  3. Select a target version of iWay Service Manager (iSM) from the Target Server Version drop-down list.
  4. Click Next.

    The Transform Type Selection pane opens, as shown in the following image.

  5. From the list in the Transform From section, select the format of your input, for example, XML.
  6. From the list in the Transform To section, select the format of your output data, for example, XML.
  7. Click Next.

    The XML Input pane opens with the Structure tab selected, as shown in the following image.

    Tip: You can skip the remaining steps by clicking the Finish button if it is enabled. You can then manually alter the Transform component properties at your convenience from the Properties dialog box.

  8. In the Structure File field, type the name of a DTD, XSD (schema), or XML file that represents the input dictionary.
    • Click the ellipsis button to the right of the field to browse the Eclipse workspace for the structure file.
    • Click the Import button to the right of the field to browse your file system for the structure file.
  9. Click Next.

    The XML Output pane opens with the Structure tab selected, as shown in the following image.

  10. In the Structure File field, type the name of the data dictionary that represents the structure of the output data (optional).
    • Click the ellipsis button to the right of the field to browse the Eclipse workspace for the structure file.
    • Click the Import button to the right of the field to browse your file system for the structure file.
  11. Click Finish.

    Your new Transform component is displayed in the iIT Eclipse workspace, as shown in the following image.

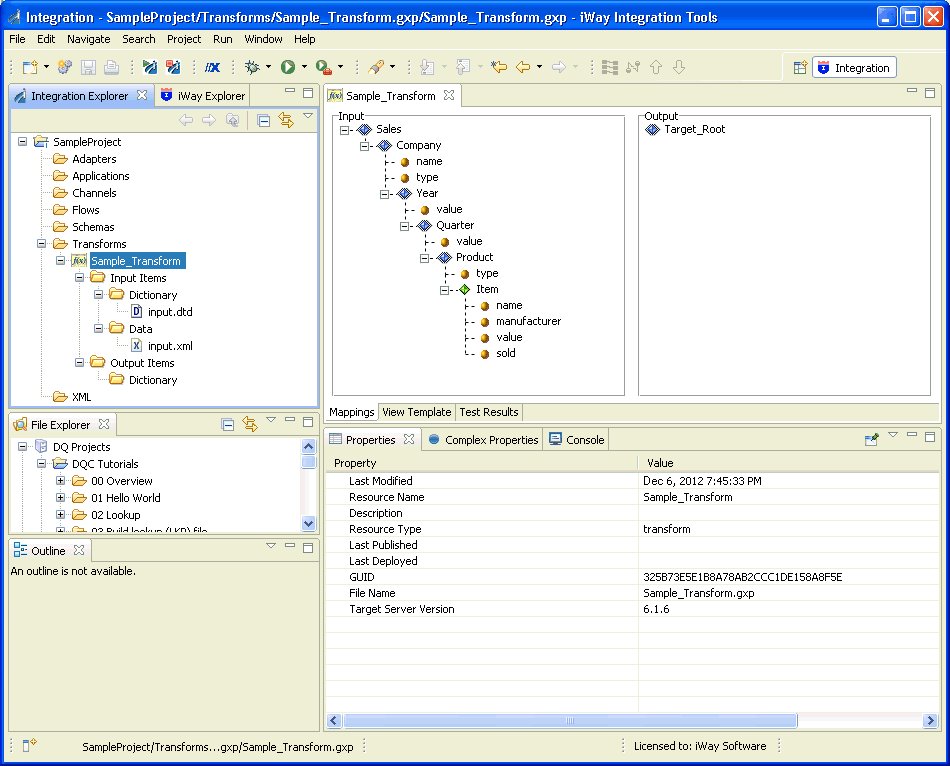
    The Transform component and any related resources (for example, structure files and input data) exist in the workspace subdirectory that you named during the creation process. For example:

    iIT_Home\workspace\SampleProject\Transforms\Sample_Transform.gxp

Configuring Transform Component Properties

In this section:

The Transform component Properties dialog box enables you to view or modify the set of properties defined for a Transform component, such as project creation date and custom functions.

To access the Transform component Properties dialog box, right-click a Transform component project name in the Integration Explorer pane, and select Properties from the context menu, as shown in the following image.

The Properties dialog box for the selected Transform component opens, as shown in the following image.

The Properties dialog box includes the following categories:

Resource

The Resource category displays system-level information about the Transform component resource file, as shown in the following image.

The following information is available:

  • Path
  • Type
  • Location
  • Size
  • Last Modified

You can set Read only, Archive, and Derived file access options for the resource if required. By default, the Archive option is set.

The Text file encoding section allows you to specify the type of encoding that is used for the characters in a file. By default, the character encoding is set to UTF-8.

Run/Debug Settings

The Run/Debug Settings category allows you to manage launch configurations that are associated with the resource that is currently selected.

The following image shows the Run/Debug Settings pane.

Transform Properties

The Transform Properties category includes basic information about the Transform component.

The following image shows the Transform Properties pane.

The following properties are listed:

  • Name. Name of your Transform component.
  • Type. Input and output format of your Transform component. If the format of the input or output is changed, the Type property will reflect those changes.
  • Description. Custom description for your Transform component.
  • Target Server Version. The target version of iWay Service Manager (iSM) that is selected for this Transform component.

@REPLACE Function

The @REPLACE Function category provides a way to instantaneously match and replace certain input data values. Each individually configured replace function works similarly to custom functions, in that you must first define the function and then apply it in the output node mapping value definition that you want to affect.

The following image shows the @REPLACE Function pane.

Custom Functions

The Custom Functions category enables you to manage the list of custom functions that you can build on-demand, when a predefined iWay Transformer function does not exist to perform the task that you require. You must write custom functions in Java and store them on your system so that they are available for use with iWay Transformer during design time. You must configure custom functions differently for use at run time.

The following image shows the Custom Functions pane.

Input

The Input category allows you to configure the input properties for the Transform component.

The following image shows the Input pane.

JDBC Data Source

The JDBC Data Source category enables you to manage the list of JDBC lookups used by the @JDBCLOOKUP function during transformation mappings. You can define multiple JDBC connections or add a connection from an existing project. In addition, you can specify any predefined function (for example, @SREG) as the URL.

The following image shows the JDBC Data Source pane.

Output

The Output category allows you to configure the output properties for the Transform component.

The following image shows the Output pane.

Variables

The Variables category enables you to manage the list of variables that can be used for your output node values. Using variables improves readability and usability of the output. You can use a defined variable in the output nodes mapping value through the @GETCONSTANT or @VARIABLE function.

The following image shows the Variables pane.

XML Namespaces

The XML Namespaces category enables you to load XML namespaces from other projects or to create your own.

The following image shows the XML Namespaces pane.


iWay Software