-
Create
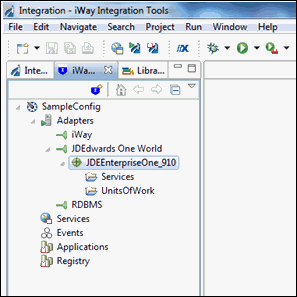
and connect to a J.D. Edwards EnterpriseOne target, as described
in Working With a Target.
-
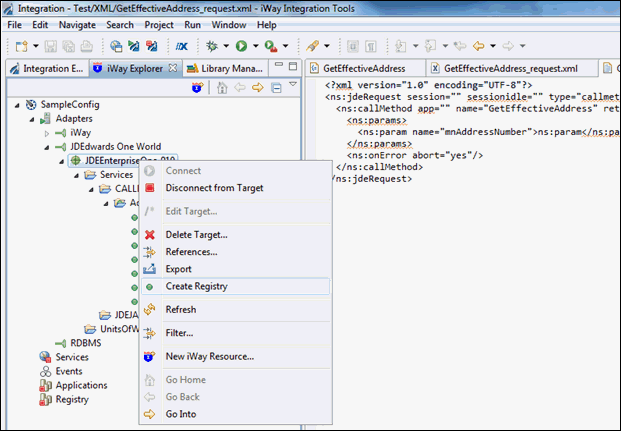
Right-click
the JDEEnterpriseOne_910 node (adapter target)
and select Create Registry from the context menu,
as shown in the following image.
A confirmation message is displayed, as shown in the following image.
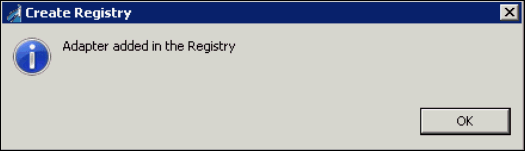
- Click OK.
-
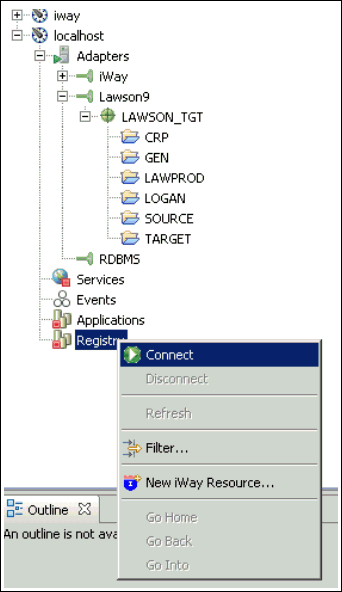
Right-click
the Registry node and select Connect,
as shown in the following image.
- Expand Registry, Components, and then Adapters.
-
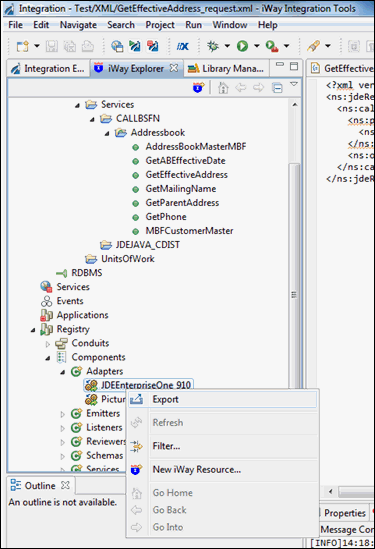
Right-click
the JDEEnterpriseOne_910 node (adapter target)
and select Export from the context menu,
as shown in the following image.
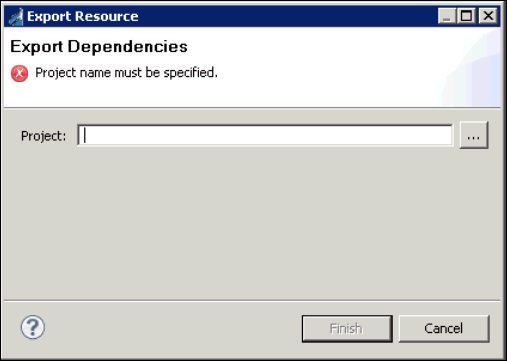
The Export Resource dialog box opens, as shown in the following image.
-
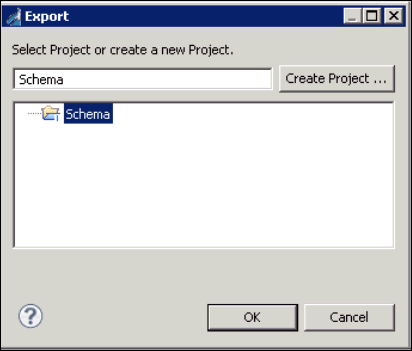
Click the ellipsis button to the right of the Project
field.
The Export dialog box opens, as shown in the following image.

-
Select the Schema folder.
Note: In this example, the Integration project is being called Schema, which is why the Schema folder must be selected.
-
Click OK.
The Export Resource dialog box opens, as shown in the following image.
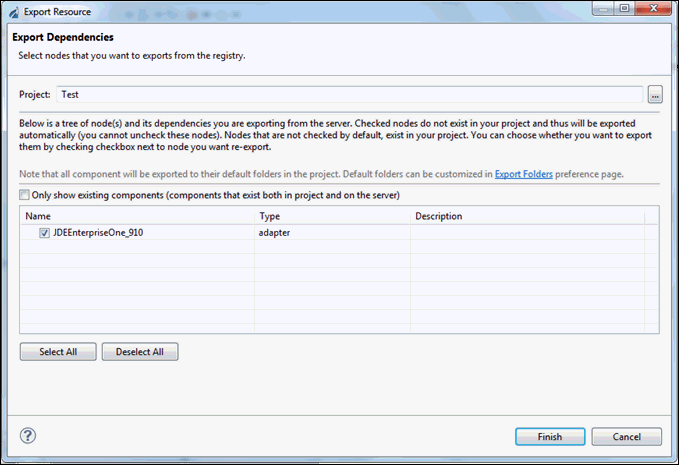
- Select JDEEnterpriseOne_910 and click Finish.
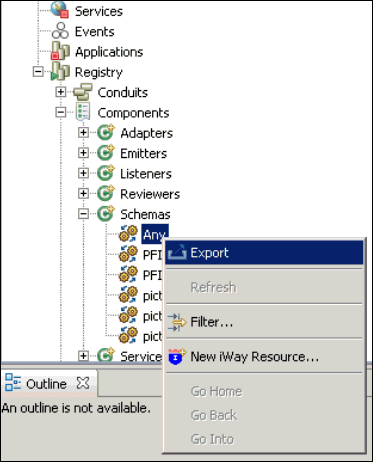
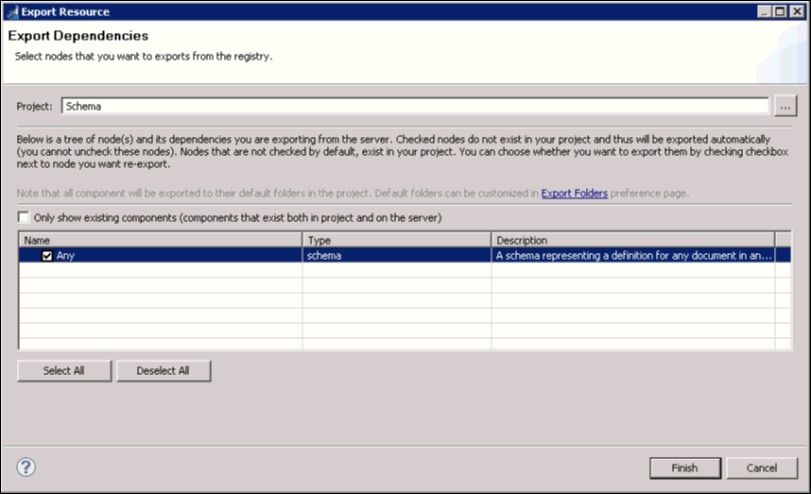
- Expand the Registry node, Components, and then Schemas.
-
Right-click Any and select Export,
as shown in the following image.
The Export Resource dialog box opens, as shown in the following image.

-
Click the ellipsis button to the right of the Project
field.
The Export dialog box opens, as shown in the following image.
-
Select the Schema folder and then
click OK.
The Export Resource dialog box opens, as shown in the following image.
- Select Any and then click Finish.
-
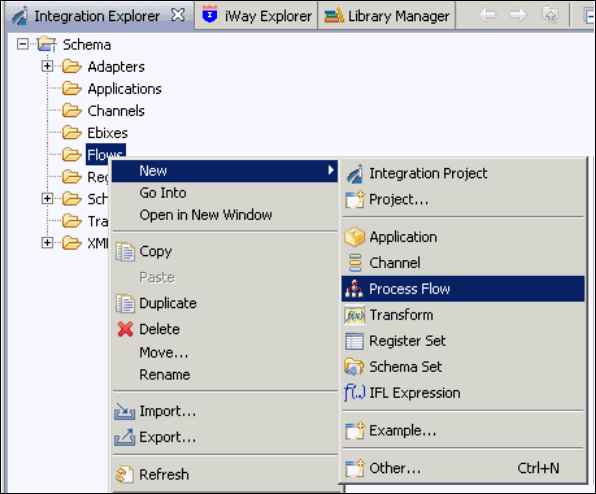
From the Integration Explorer tab, right-click Flows,
select New, and then click Process
Flow from the context menu, as shown in the following image.
The New Process Flow Wizard opens, as shown in the following image.
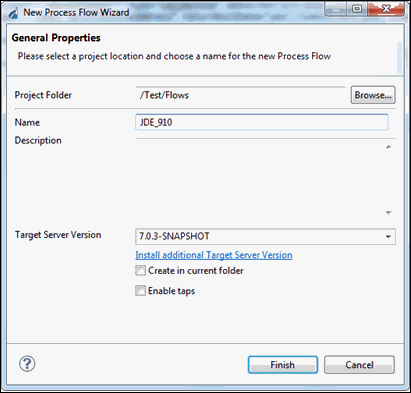
- Enter a name for the new process flow (for example JDE_910) and click Finish.
-
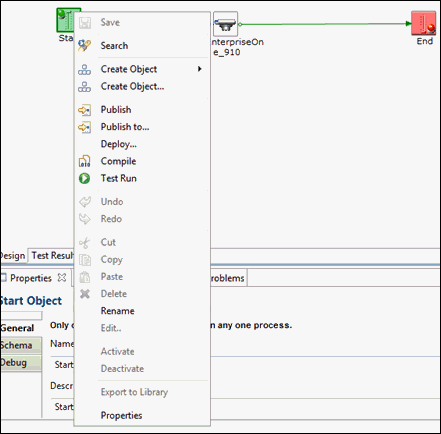
In the right pane, right-click the Start object and
select Properties from the context menu,
as shown in the following image.
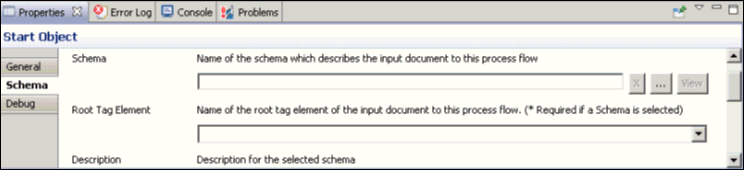
-
The Properties tab is displayed, as shown in the following image.
-
Select the Schema tab and then the ellipsis button to
the right of the Schema field.
The Select Schema dialog box opens, as shown in the following image.
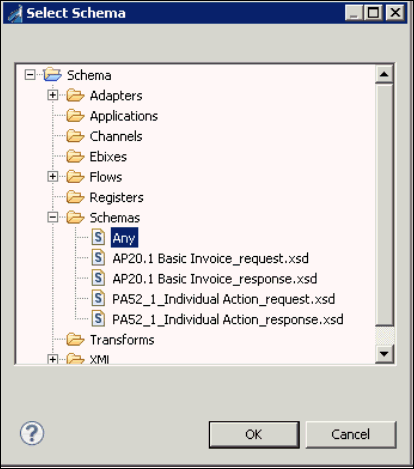
- Select the schema called Any and click OK.
-
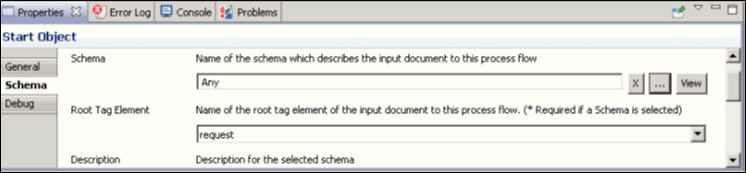
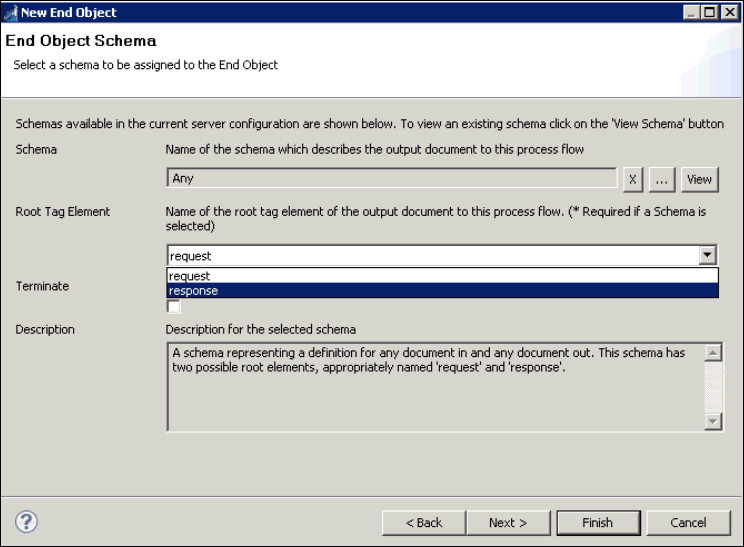
From the Root Tag Element drop-down list, select request,
as shown in the following image.
-
From the Integration Explorer tab, expand the Adapters folder,
and drag and drop the JDEEnterpriseOne_910 node
(adapter target) to the right pane, as shown in the following image.
-
From the Root Tag Element drop-down list, select response and
click Finish, as shown in the following image.
-
From the palette, select Relation and
create a relation between the Start object and the J.D. Edwards
EnterpriseOne adapter target object.
The Relation Properties dialog box opens, as shown in the following image.
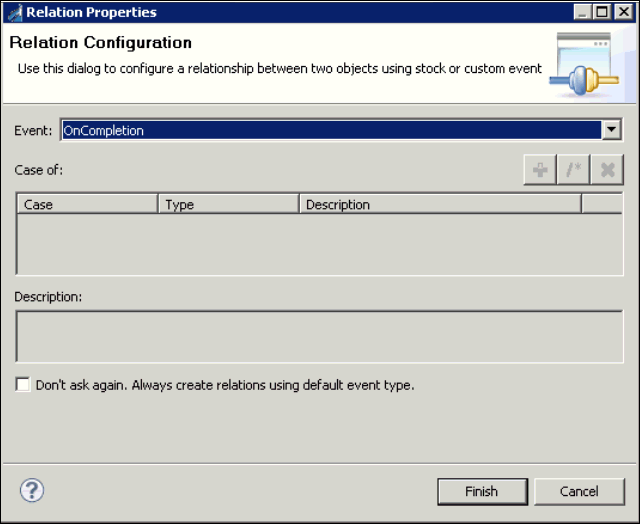
- From the Event drop-down list, select OnCompletion and click Finish.
-
Create a new relation between the J.D. Edwards EnterpriseOne
adapter target object and the End object, as shown in the following
image.
The Relation Properties dialog box opens, as shown in the following image.

- From the Event drop-down list, select OnSuccess and click Finish.
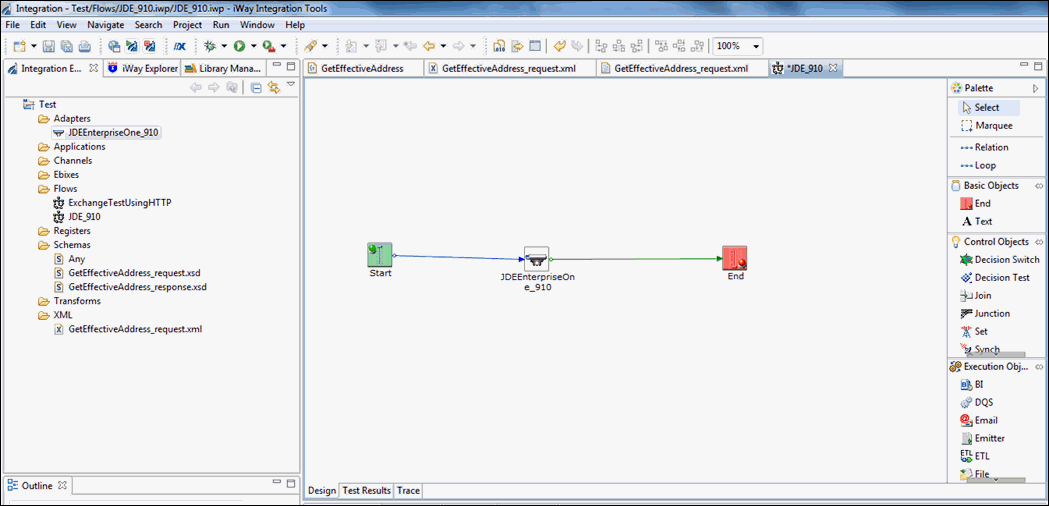
- Click Save.
-
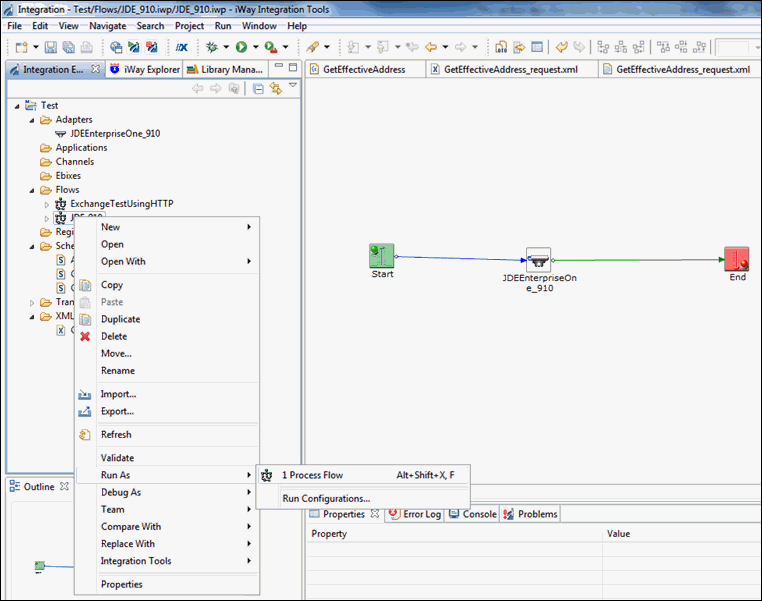
From the Flows folder, right-click the JDE_910 process
flow, select Run As, and then click Process
Flow from the context menu, as shown in the following image.
-
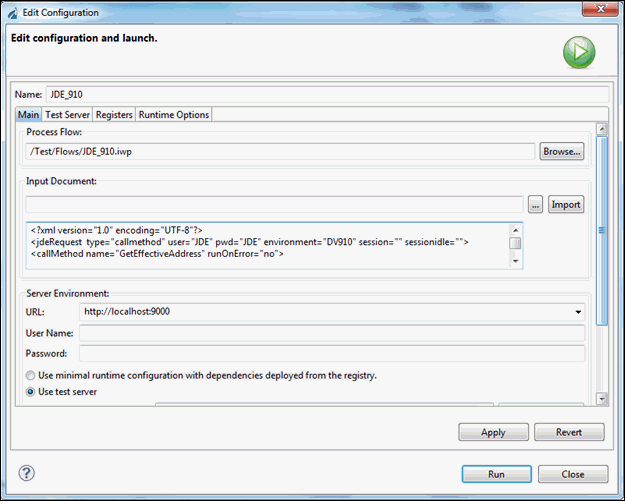
Copy the input request document for the GetEffectiveAddress
function and paste the document in the Input Document area, as shown
in the following image.
-
Click Apply and then click Run.
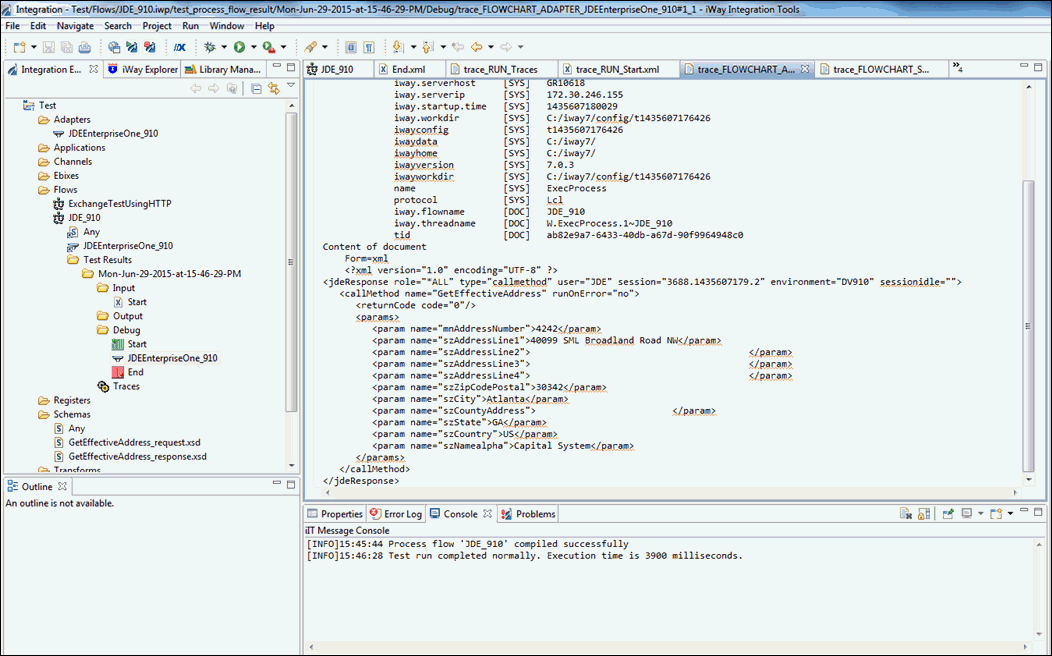
The response document for the GetEffectiveAddres function can be viewed by opening the End.xml file in the Output folder under the Test Results, as shown in the following image.
-
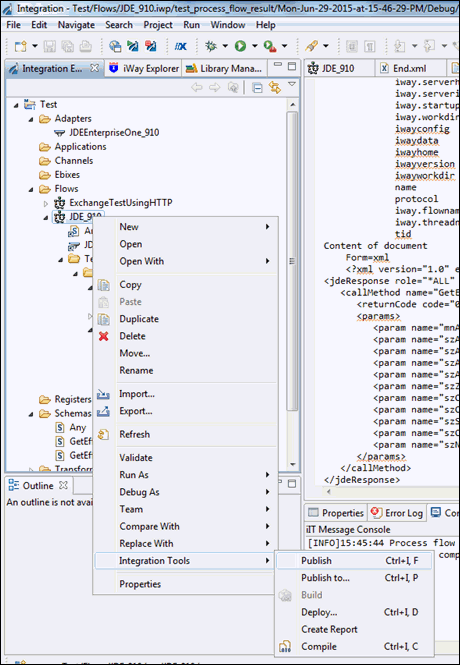
Right-click the JDE_910 process
flow, select Integration Tools and then click Publish from
the context menu, as shown in the following image.
The published process flow can now be associated with a channel route in the iWay Service Manager Administration Console.