To change the appearance of the mainframe application
more significantly than by using templates, the Telnet Designer
in web mode allows you to change the look and feel of the captured
mainframe application, as well as enhance the functionality. You can
move fields, extract screen data, and combine one or more screens
into one HTML screen.
The purpose of using JavaServer Pages is to convert mainframe
legacy screens using web elements. The result is an XML rules file
as discussed previously, as well as a JSP file for each screen to
which you want to apply a custom HTML page. The XML file contains
all the identification rules and the name of the JSP file associated
with the emulated screen.
x
Creating JavaServer Pages
The iWay Emulation Adapter (3270/5250) and its user-defined
JSP capability is an extension of the HTML translation capability.
With default HTML translation, you cannot control the appearance
of the HTML page. However, with JSP, you can customize an HTML page
so the screens on your mainframe system appear as a web application.
For example, you can add images, combo boxes, and check boxes to
customize your application.
You can create a JSP for every screen you want to change. The
adapter automatically translates screens you want to leave alone
using the default translation. For instance, if you want to change
the user ID and password screen and a menu screen, but leave all
other screens alone, you simply create two Java server pages. All
other screens accessed by the user appear in default HTML.
The iWay Emulation Adapter (3270/5250) enables you to control
the mainframe emulation session by associating one JavaServer Page
to many mainframe screens.
Note: You can also integrate other applications and data
sources with your existing mainframe system to add limitless functionality.
When the application finishes using the Telnet Designer, you
can click WEB3 to view the CICS menu screen JSP. All previous mainframe
screens are hidden.
You must add a JSP for each screen that is revamped and displayed
during a browser session. Use the Add JSP option to associate a
JSP with a mainframe screen or a set of mainframe screens.
As described previously, all screens for which you add a screen
identifier are hidden until the application displays a screen with
an associated JSP. After you add the JSP using the GUI Developer,
the JSP can be edited manually or used as input to any HTML editor.
Note: Use caution, because the JSP is not a pure HTML
file. It contains JSP-specific properties as well as iWay Emulation
Adapter (3270/5250) commands that must not be removed or modified.
The following procedure describes the steps required to create
a web application called WEB3.
x
Procedure: How to Identify a JavaServer Page in
a Web Application
To identify
a JSP in a web application:
-
Open
the iWay Emulation Adapter.
-
Right-click
the Sessions folder and select Emulation.
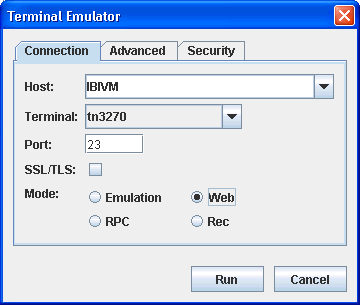
An emulator session starts. The Terminal Emulator appears
with the Connection tab active where you enter the connection parameters,
as shown in the following image.
Perform the following
steps:
-
In the Host field, type a name for the host.
-
From the Terminal drop-down list, select the terminal.
-
In the Port field, type the port number.
-
Click the Web option.
-
For more options, click the Advanced tab.
The Advanced tab of the Terminal Emulator opens. Make a
selection from the Language drop-down list. The Language selection
determines the national language character set that will be used
in your emulation session.
If you want to use a specific terminal
name (LU) or pool name (LU pool) with your mainframe connection,
type this value in the LU Name field. This option allows the mainframe
to dedicate specific connections and privileges to specific telnet ports.
-
Click Run.
This enables you to navigate through each mainframe screen.
-
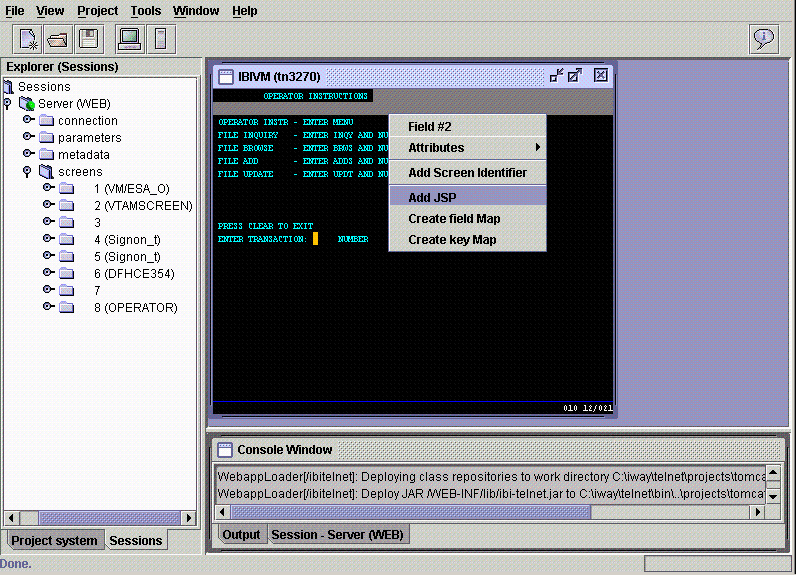
When
you come to a screen for which you want to create a JSP (for example,
the MENU screen), right-click anywhere in the screen and select Add
JSP.
Note: The Add JSP option is only available if you
have identified the screen or if it has been previously identified,
as indicated in the left pane as screen 8(OPERATOR). This indicates
that the adapter database was updated.
The following image
shows Telnet Designer with the Explorer session in the left pane
and a mainframe screen and its options in the right pane.
The Add JSP dialog
box opens, as shown in the following image.

-
In the
JSP Name field, type a name to identify the JSP, for example, WEB3.
-
Click Ok.
The web application file is created, for example WEB3.JSP.
Upon
deployment of the application (also called WEB3), the JSP is placed
into a directory called ibitelnet/WEB3 within the webapps directory
of the web server. All JSP that you create for the WEB3 application
are placed in the WEB3 folder when you deploy.
To ease development,
other options are available to identify the fields on a screen, including
the option to rename the PF/PA and AID keys associated with the
mainframe screen.
x
Creating a Field Map and a Key Map
The Create Field Map option is available only after
you add a JSP. The GUI Developer enumerates the fields on a screen.
The generated JavaServer Page has the default keyboard. After
you add a JSP, the Create Key Map option also is available. You
can redefine any key on the keyboard. The default keyboard is suppressed
after you create the first key map.
x
Procedure: How to Create a Field Map
To create
a field map:
-
Right-click
anywhere on the screen and select Create field Map.
The Field Map dialog box opens, as shown in the following
image.

To
work with a particular field in a mainframe screen, you must know
the field number. This information can be viewed in the pop-up menu
in any development mode.
To facilitate the development of
custom HTML pages (as JavaServer Pages), this option enables you
to associate a name to the field number.
-
In the
Field parameter Name field, type the field number and click Ok.
The information is placed in the generated JavaServer Pages
for further reference.
x
Procedure: How to Create a Key Map
To create
a key map:
-
Right-click
anywhere on the screen and select Create Key Map.
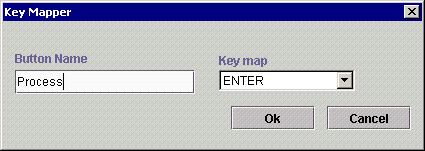
The Key Mapper dialog box opens, as shown in the following
image.
-
In the Button Name field, type a button name, for example,
Process.
-
From the Key map drop-down list, select a key, for example, ENTER,
to associate with the button.
-
Click Ok.
When
the web user clicks a button named Process, the ENTER key is executed.
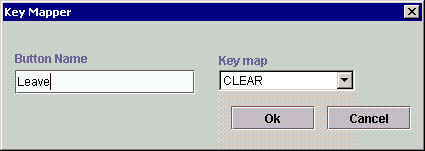
The
following image shows another example of the Key Mapper dialog box
that assigns a Button Name of Leave to the CLEAR function.
x
Procedure: How to View the iWay Emulation Adapter
(3270/5250) Web Application
To view
the iWay Emulation Adapter (3270/5250) web application:
-
In a
web browser, enter the appropriate URL to access the machine where
the iWay Emulation Adapter (3270/5250) web application is deployed, for
example:
http://localhost:8080/ibitelnet/index.html
For
deployment instructions, see Deploying Your Application on a Web Application Server.
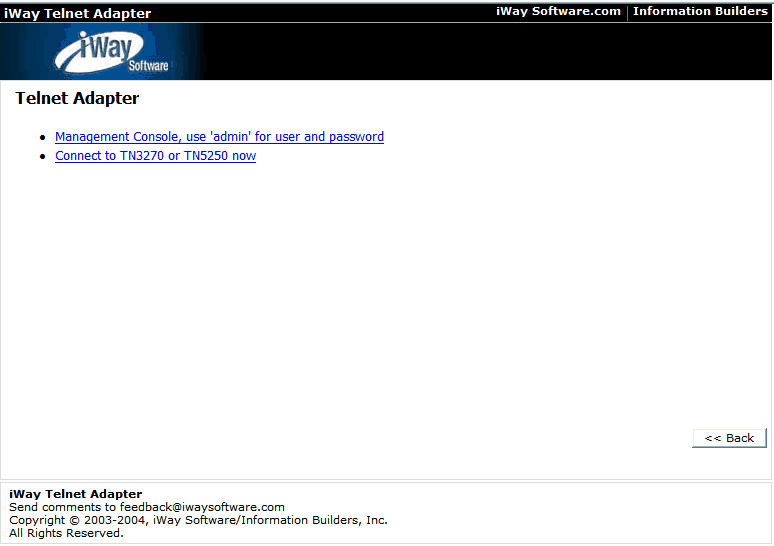
The default
HTML window for the iWay Emulation Adapter (3270/5250) opens.
-
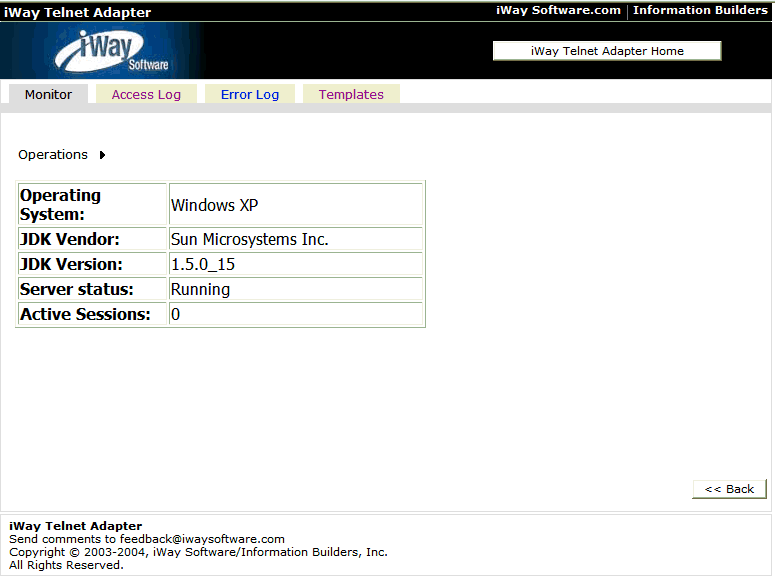
Click the Management Console link
and log on using admin as the user name and password.
The following page is displayed.
-
Click the Templates tab.
The Templates tab is displayed, which contains a list of
any available iWay Emulation Adapter (3270/5250) web applications.
For example:
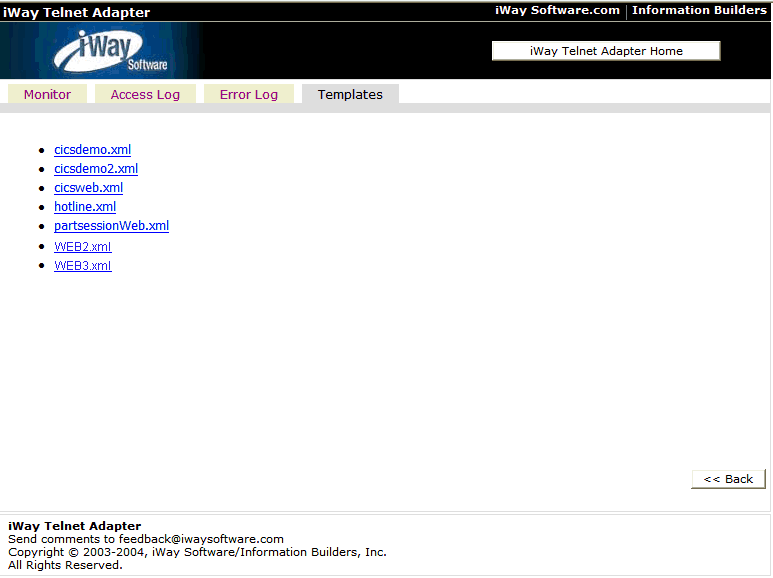
-
Click
the web application you want to view, for example, WEB3.xml.
A screen opens that enables you to edit the JSP or redesign
the application menu. The following image shows the WEB3 JSP and
the resulting CICS menu.
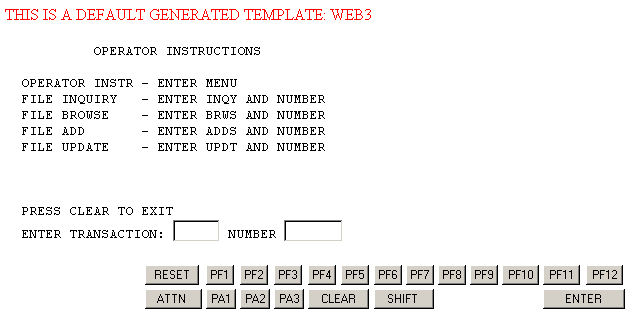
The
VTAM screen, CICS logon screen, and other screens were eliminated
from view. The following default message appears on the screen:
THIS IS A DEFAULT GENERATED TEMPLATE: WEB3
The
message means that the screen uses the JSP called WEB3.JSP. Now
you can edit the WEB3.JSP to completely redesign the look and feel
of this CICS menu screen.
Example: The Default WEB3.JSP File
The
following is the default WEB3.JSP file. Upon deployment using the
Telnet Designer, the file is located in the directory called ibitelnet/WEB3
within the webapps directory of the web server.
<HTML>
<BODY>
<font color="#FF0000">THIS IS A DEFAULT GENERATED TEMPLATE: WEB3</font>
<!-- THIS MUST ALWAYS BE HERE -->
<%@ include file="../templates/beginTemplate.jsp" %>
<!-- Default Translation -->
<pre>
<%= screen.paintHtml() %>
</pre>
<!-- Default keyboard -->
<%= screen.paintKeyboard(emulation) %>
<!-- THIS MUST ALWAYS BE HERE -->
<%@ include file="../templates/endTemplate.jsp" %>
</BODY>
</HTML>
Making modifications to the JSP can
change the look and functionality of the original CICS menu screen
as shown in the following image and as illustrated by the example
that follows.
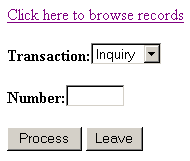
The
screen:
- Uses the JSP
called WEB3.JSP.
- Includes an
option to execute the BROWSE transaction (browse records).
- Includes a transaction
drop-down list with options to inquire, add, or update.
- Includes a Process
button that denotes the ENTER key (created a key map in the Telnet
Designer).
- Includes a Leave
button that denotes the CLEAR key (created a key map in the Telnet
Designer).
Example: The enriched WEB3.JSP File
The
following sample code for the enriched WEB3.JSP file illustrates
the enhancements in the previous example. The supplied JSP is called
cicsMenu.jsp and is located in the directory called ibitelnet/cicsdemo
within the webapps directory of the web server.
<HTML>
<HEAD>
<TITLE>CICS Demo Main Menu</TITLE>
</HEAD>
<BODY>
<!-- ------------------------ -->
<!-- THIS MUST ALWAYS BE HERE -->
<!-- ------------------------ -->
<%@ include file="../templates/beginTemplate.jsp" %>
<!-- BROWSE TRANSACTION
     creating hyperlink that will be equivalent to
     - Entering "brws" in the field 10
     - Issuing the attention key "ENTER"
-->
<br><%= screen.paintHyperlink("Click here to browse records", "ENTER",
10, "brws") %>
<!-- OTHER TRANSACTIONS
     Using the combo box to enter the transaction name to field 10
-->
<p><b>Transaction:</b><select name="10">
                      <option value="inqy">Inquiry
                      <option value="adds">Add
                      <option value="updt">Update
                      </select>
<!-- Painting field 12, which is an unprotected field for entering number
-->
<p><b>Number:</b><%= screen.paintField(12) %>
<!-- SCREEN MESSAGE -->
<%
String message = screen.getField(8).getValue().trim();
if (message.startsWith("PRESS CLEAR TO EXIT"))
message = "";
%>
<p>
<center>
<font color="#FF0000">
<b><%= message %></b>
</font>
</center>
<p>
<!-- CREATING BUTTONS FOR KEYBOARD STROKES -->
<%= screen.paintButton("Process", "ENTER") %>
<%= screen.paintButton("Leave", "CLEAR") %>
<!-- ------------------------ -->
<!-- THIS MUST ALWAYS BE HERE -->
<!-- ------------------------ -->
<%@ include file="../templates/endTemplate.jsp" %>
</BODY>
</HTML>


