This wizard that allows you to select the data source type, define selection criteria, and map selected columns to the node properties.
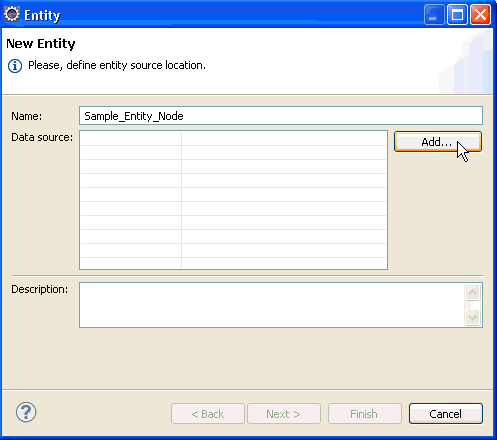
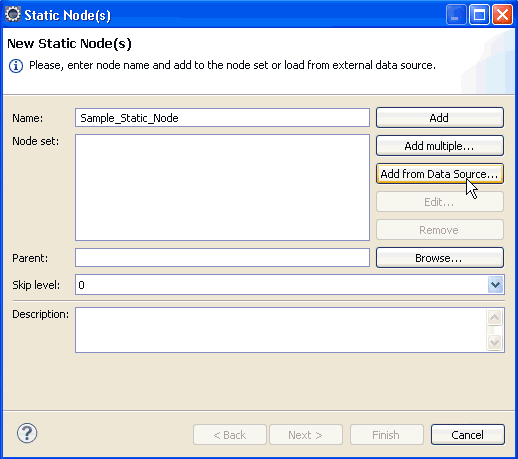
For the New Static Node(s) wizard, click Add from Data Source to open the Connection Details dialog.
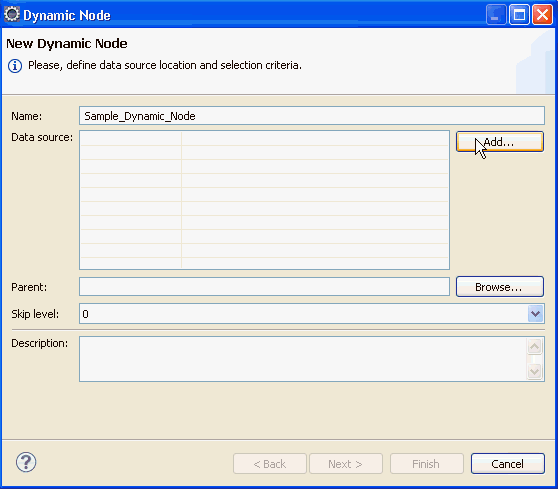
For the New Dynamic Node wizard, click Add to open the Connection Details dialog.
-
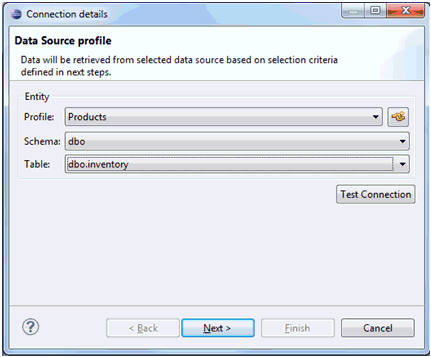
Select a data source type in the Connection Details
dialog, as shown in the following image.
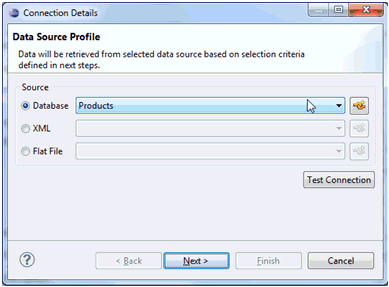
By default, the Database data source type is selected. You can create a new database connection profile by clicking the New Connection Profile button to the right of the field and define a connection as described in Configuring a Database Connection Profile.
The dialogs that are presented in the wizard vary depending on the selected data source type.
-
Define the data selection criteria.
Database data source type
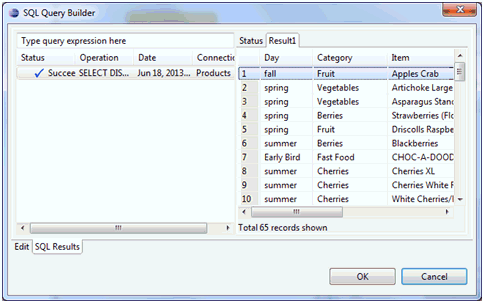
If the Database data source type is selected, you can manually enter an SQL query or build the query using the SQL Query Builder.
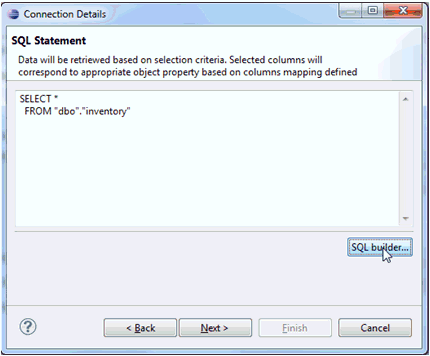
The SQL Query Builder allows you to select tables and pick specific columns, defining conditions, groups, and group conditions for the query.
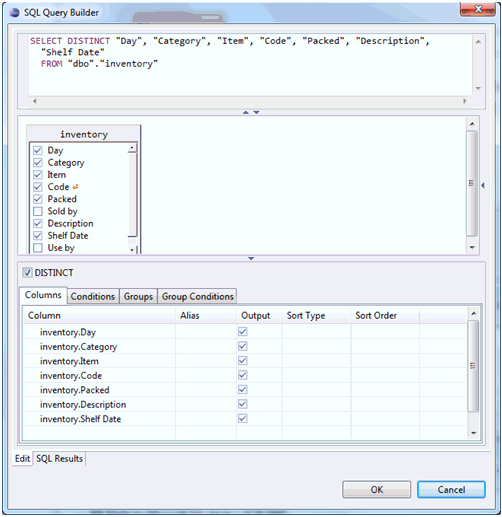
You can check returned results by running an SQL query, as shown in the following image.
XML data source type
If the XML data source type is selected, you can manually enter a relation expression or build the relation using the Relation Builder, as shown in the following image.
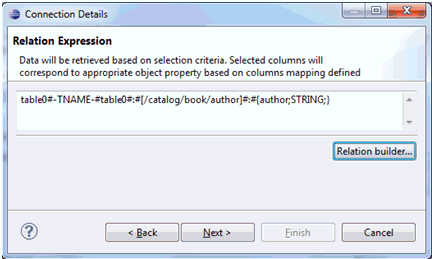
The Relation Builder allows you to select data from a specific XML source or another one with the same structure. Define a data set row mapping and create data set columns by selecting and adding items from the XML structure.
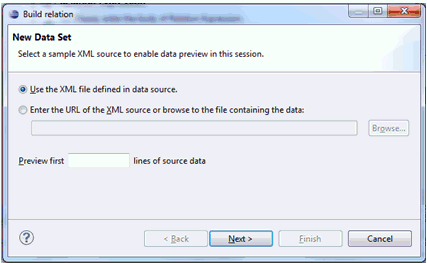
By default, Use the XML file defined in data source is selected. Additionally, you can use a different file that contains XML data with the same structure. To use a different file, select Enter the URL of the XML source or browse to the file containing the data. Type the path or browse to the file you want to use from the file system.
If the XML data file is large, you can reduce the number of rows while previewing data in the Report Designer.
The row mapping dialog defines a row element, as shown in the following image.
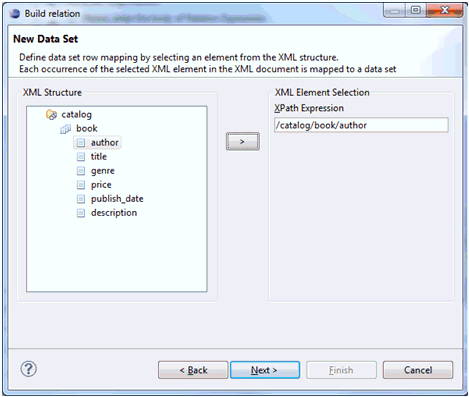
You must select an XML element in the XML Structure area and set the element as the row using the right arrow (>) icon. The row path will appear in the row mapping XPath expression.
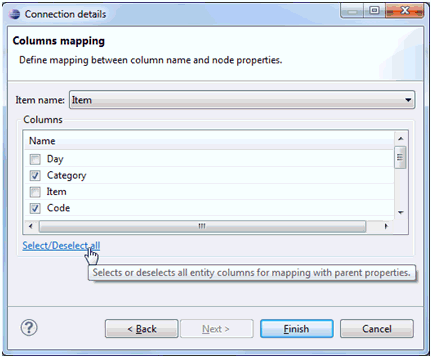
The column mapping dialog allows you to map XML elements to columns, as shown in the following image.
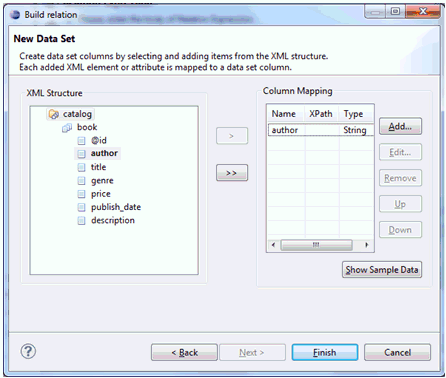
You must select an XML element or attribute in the XML Structure area to represent a data column using the single right arrow (>) or double right arrow (>>) icon. Column details will appear in the Column Mapping table. You can edit, move, or remove columns as required.
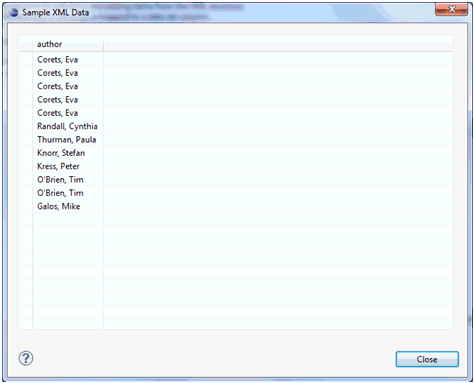
You can preview the results of the relation expression by clicking the Show Sample Data button.
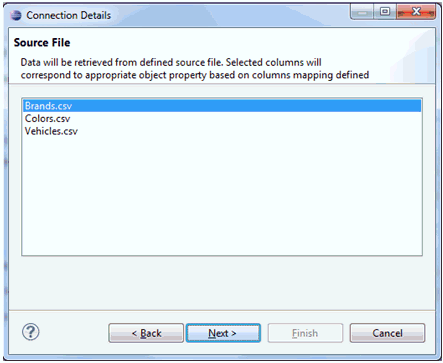
Flat File data source type
If the Flat File data source type is selected, you must select the source file from which to retrieve the data. Only files with .csv extensions can be used as a source.
-
Define the columns mapping.
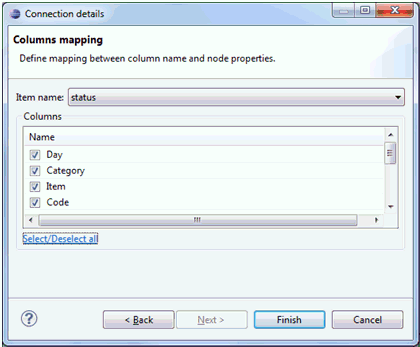
By default, the first column from the constructed query will serve as the node name, other columns will serve as node attributes. Columns can be checked and further used as node attributes with values (from the data source or manually entered) or as attributes for mapping.
- Click Finish.