To create your process flow and define the DQC service:
-
Start iWay Integration Tools.
For more information, see Starting iWay Integration Tools.
-
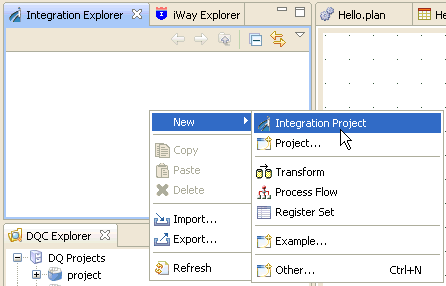
Right-click anywhere in the Integration Explorer tab,
select New, and click Integration Project from
the context menu.
The New Integration Project dialog box opens.

- Enter a new name for your Integration Project in the Project name field, for example, DQC_PFlow.
-
Click Finish.
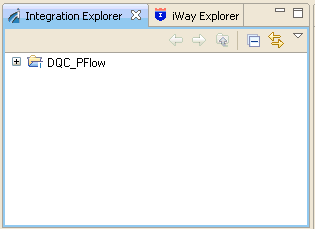
The new Integration Project node (DQC_PFlow) is added to the Integration Explorer tab, as shown in the following image.
-
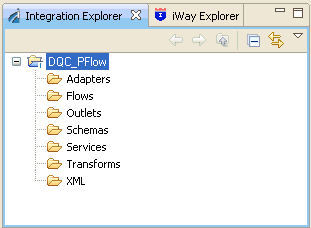
Expand the DQC_PFlow node to expose
the available resources that you can use.
-
Right-click the Flows folder, select New,
and click Process Flow from the context menu.
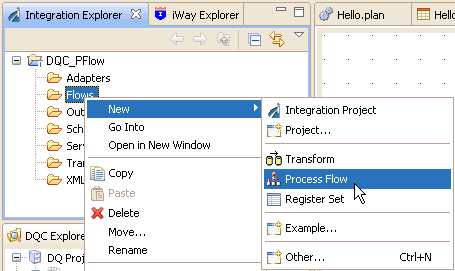
The New Process Flow Wizard opens.
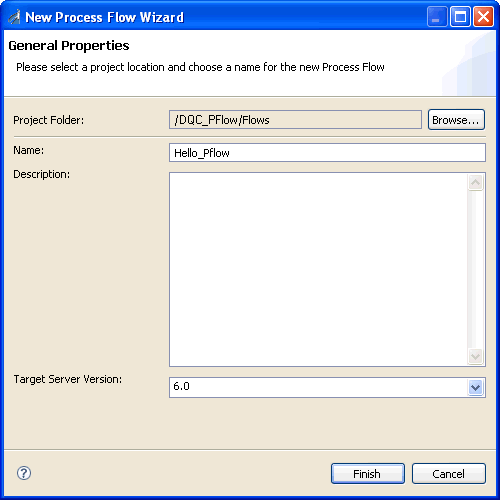
- Enter a new name for your process flow in the Name field, for example, Hello_Pflow.
-
Click Finish.
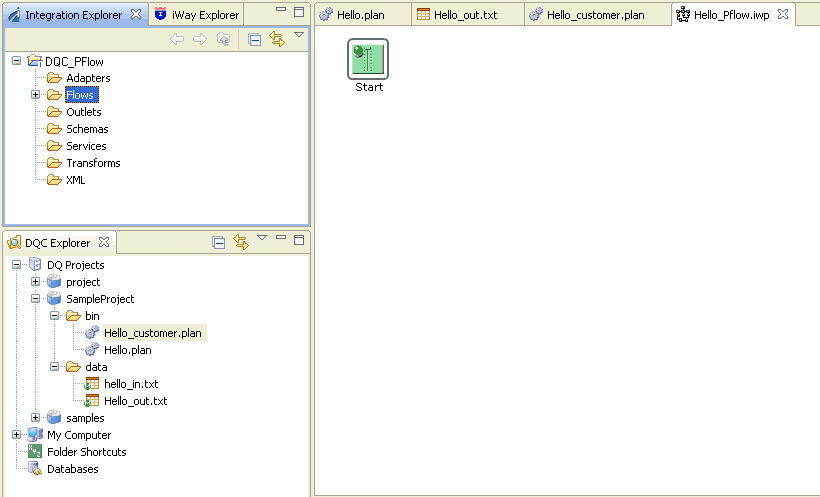
A new tab called Hello_Pflow.iwp is added to the iWay Integration Tools canvas area. The canvas area, which now functions as iWay Designer, displays a Start object by default, as shown in the following image.
-
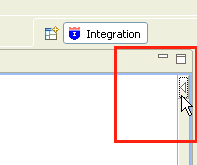
In the upper-right corner, click the Show Palette arrow
icon, as shown in the following image.
The Palette pane reveals all the available iWay Designer objects that you can use to construct your process flow.
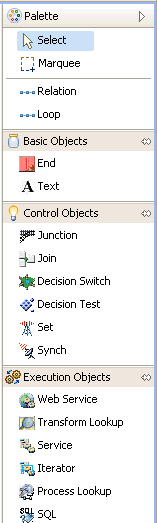
For more comprehensive information on how to configure and use these objects, see the iWay Designer User’s Guide.
-
In the right pane, expand the Basic Objects category
in the Palette pane and select the End object.
-
Click and drag the End object to the
canvas area.
The New End Object dialog box opens.

-
Click Finish.
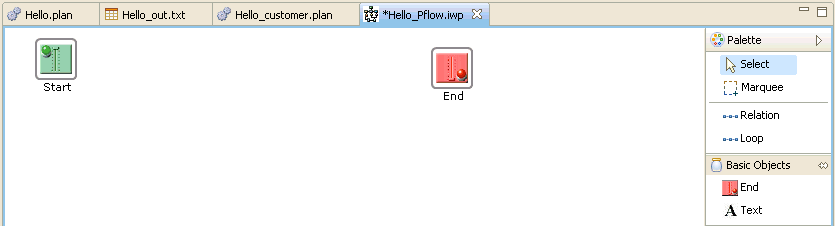
The new End object is added to the canvas area.
-
Select Hello_customer.plan in the DQC Explorer
tab.
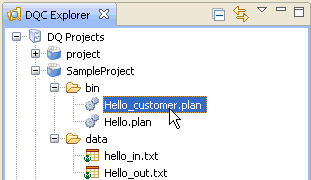
Note: The DQC plan you are selecting in this step must be identical to the value that was specified during the Data Quality Provider configuration process.
-
Click and drag Hello_customer.plan to
the canvas area, as shown in the following image.
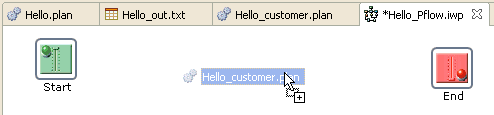
The New DQC Object (Name and Description) window opens.
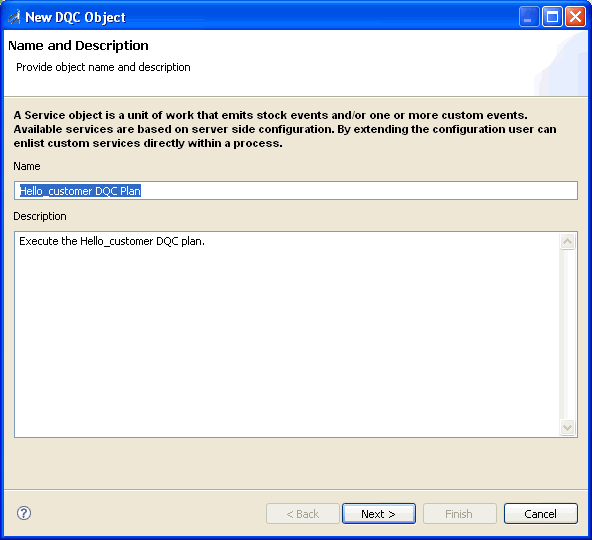
- Enter a new name for your DQC Service object in the Name field or accept the default value that is already provided.
-
Click Next.
The New DQC Object (Service Object Type) window opens.

- Verify that Data Quality Center Agent {com.ibi.agents.XDDQAgent} is selected from the Type drop-down list.
-
Click Next.
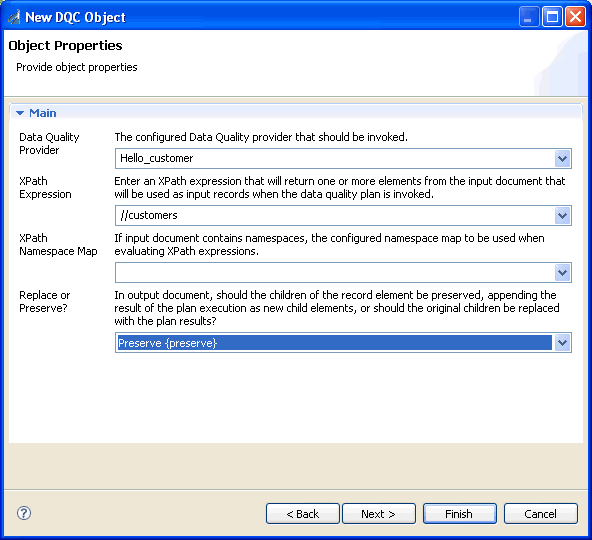
The New DQC Object (Object Properties) window opens.
-
Provide the appropriate settings for the Data Quality Center
Agent {com.ibi.agents.XDDQAgent}, as defined in the following table.
Setting
Value
Data Quality Provider
Hello_customer
XPath Expression
//customers
The XPath expression references a parent node that should contain the same elements used as input attributes of the DQC Plan.
XPath Namespace Map
This setting is not used. Leave it blank.
Replace or Preserve?
Preserve
The following example illustrates the relationship between the process flow XPath expression and the input document.
Sample input document for the process flow:
<customerGreeting>
 <customers>
    <firstname>Daniel</firstname>
    <lastname>Deutsch</lastname>
 </customers>
</customerGreeting>
XPath expression for the process flow using the sample input document:
//customers
All elements under the customers node (for example, firstname and lastname) will be sent to the DQC plan as input elements.
-
Click Finish when you have provided
all the appropriate settings for the Data Quality Center Agent {com.ibi.agents.XDDQAgent}.
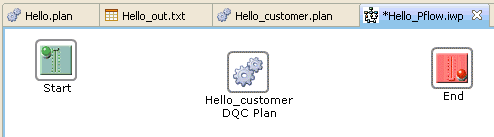
The new DQC Service object (Hello_customer DQC Plan) is added to the canvas, as shown in the following image.
-
Select the Start object, right-click
the DQC Service object (Hello_customer DQC Plan),
and select Create Connection from the context
menu.
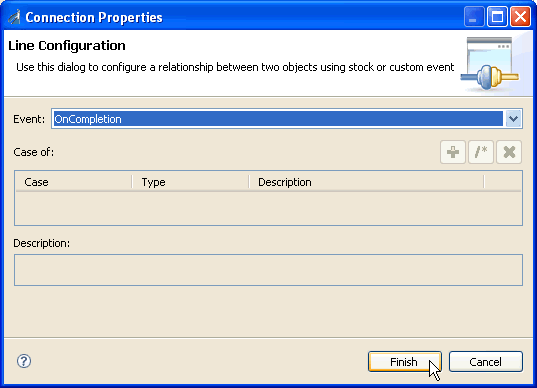
The Connection Properties dialog box opens.
-
From the Event drop-down list, select OnCompletion and
click Finish.
This option indicates that there are no conditions that affect the path, and that the path between the two objects will always be followed.
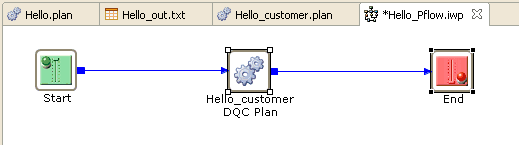
A line appears between the objects to indicate that a relationship has been established.
-
Select the DQC Service object (Hello_customer DQC Plan) object,
right-click the End object, and select Create
Connection from the context menu.
The Connection Properties dialog box opens.
-
From the Event drop-down list, select OnCompletion and
click Finish.
This option indicates that there are no conditions that affect the path, and that the path between the two objects will always be followed.
A line appears between the objects to indicate that a relationship has been established. The process flow is now complete, as shown in the following image.
-
Save your process flow by clicking Save in
the toolbar.
You are now ready to test your process flow.