Building Your First Plan Using iWay Data Quality Center

In this section:

This section describes how to build your first Plan using iWay Data Quality Center (DQC).


Top of page

x
Starting iWay Integration Tools

Perform the following steps to start iWay Integration Tools and access the DQC Explorer.


x
Procedure: How to Start iWay Integration Tools

To start iWay Integration Tools:

  1. Navigate to your iWay_Home directory where iWay Integration Tools is installed. For example:
    C:\Program Files\iWay60\iIT_DQC

  2. Double-click the iit.exe file.

    During the startup sequence, the Workspace Launcher dialog box is displayed and prompts you to select a workspace location. For example:

  3. Specify the workspace location you want to use for your projects or accept the default.
  4. Click OK when you are ready.

    iWay Integration Tools opens, as shown in the following image.

    By default, DQC Explorer is located in the left pane, as shown in the following image.


Top of page

x
Creating a New Project and Associated Project Folders

Perform the following steps to create a new project for iWay Data Quality Center (DQC) and associated project folders using the DQC Explorer.


x
Procedure: How to Create a New Project and Associated Project Folders

To create a new project:

  1. Right-click the DQ Projects node, select New, and click Project from the context menu.

    The New Project dialog box opens.

  2. Enter a new name for your DQC project in the Name field, for example, SampleProject.
  3. Click Finish.

    The new DQC project node (SampleProject) is added in the left pane, as shown in the following image:

  4. Right-click the SampleProject node, select New, and click Folder from the context menu.

    The New Folder dialog box opens.

  5. Enter a new name for your folder in the Name field, for example, bin.
  6. Click Finish.

    The new folder node (bin) is added in the left pane, as shown in the following image:

  7. Right-click the SampleProject node, select New, and click Folder from the context menu.

    The New Folder dialog box opens.

  8. Enter a new name for your folder in the Name field, for example, data.
  9. Click Finish.

    The new folder node (data) is added in the left pane, as shown in the following image:


Top of page

x
Constructing Your Plan Using DQC Components

The core of any DQC project is a Plan. A Plan defines the logic and rules to be applied to the input data in order to produce the desired output. Plans are created by placing Steps onto a canvas and connecting them together. Steps are data processing algorithms that can be used to read, write, transform and analyze data, among other actions.


x
Procedure: How to Create a Text File for Your Input

Existing files can be added to DQC for use as input data for a Plan, for example. Files can be added by dragging and dropping from the file system to the desired project in the DQC Explorer or by copying them from destination folder to the desired project folder inside the workspace folder in the file system.

The sample DQC Plan you are creating will read input values from a simple text file, apply basic logic, and produce a formatted output. Perform the following steps to create a simple text file for your input:

  1. Right-click the data node under the SampleProject node, select New, and click Text File from the context menu.

    The New Text File dialog box opens.

  2. Enter a new name for your text file in the Name field, for example, hello_in.txt.
  3. Click Finish.

    The new text file (hello_in.txt) is added in the left pane, as shown in the following image:

    In the right pane, a text file editor is opened in a new tab (hello_in.txt), which allows you to create your input text file.

  4. Enter the following text for your input text file:
    firstname;lastname
    John;Smith
    Daniel;Deutch

    For example:

  5. Save your input text file by clicking Save in the toolbar. You can also right-click anywhere in the text file editor and click Save from the context menu.

    You must now add metadata to the input text file.


x
Procedure: How to Add Metadata to the Text file

To use an input file in a Plan, it must first be assigned metadata describing the format of the data. Perform the following steps to add metadata to the input text file.

  1. Expand the data folder and double-click the hello_in.txt file in the left pane.

    The Edit File Metadata window opens.

    The Edit File Metadata window provides options for how to read the file, such as the type of delimiter used, the data types of each column, and whether the file contains header rows. The result data can be previewed in the lower panel of the editor to examine the results of the metadata settings.

  2. Click Update columns.

    The Update columns dialog box opens.

    This dialog box allows you to specify the line number from your text file that contains the column names you want to use.

  3. Enter 1 and click OK.

    You are returned to the Edit File Metadata window, which now contains the updated column names.

  4. Click OK.

    You are returned to the DQC Explorer.

    Notice that the hello_in.txt file node now has a small green icon attached. This green icon indicates that metadata has been added to the input file.

    You are now ready to create a DQC Plan.


x
Procedure: How to Create a DQC Plan

To create a DQC Plan:

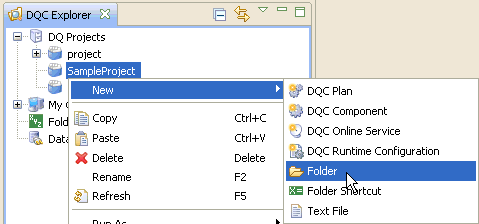
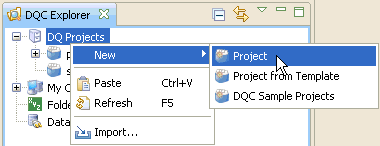
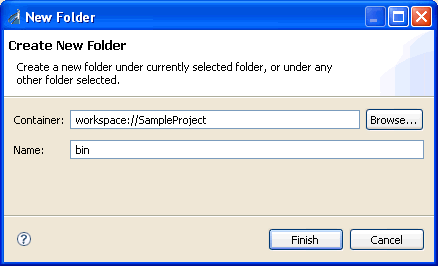
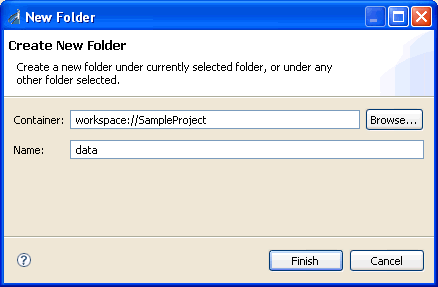
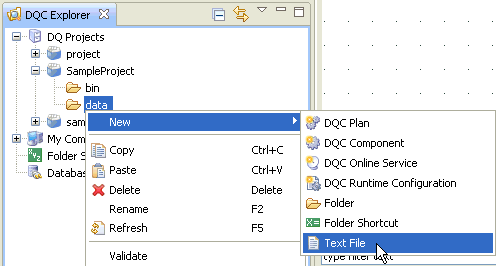
  1. Right-click the bin node under the SampleProject node, select New, and click DQC Plan from the context menu.

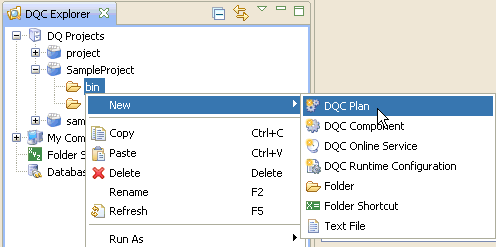
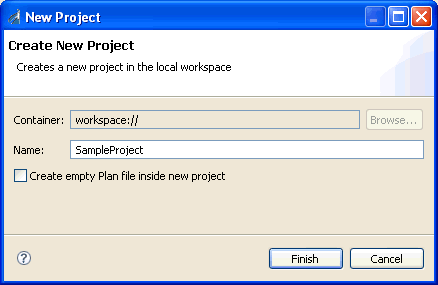
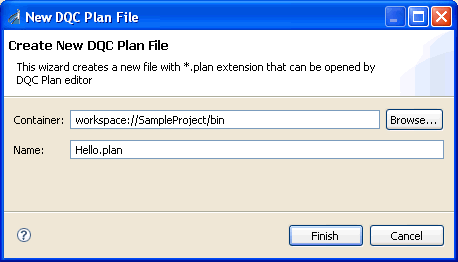
    The New DQC Plan File dialog box opens.

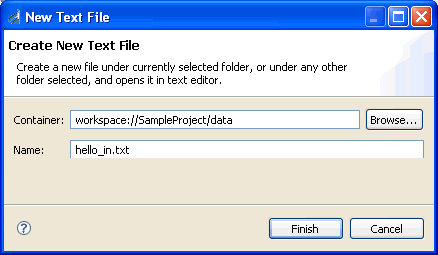
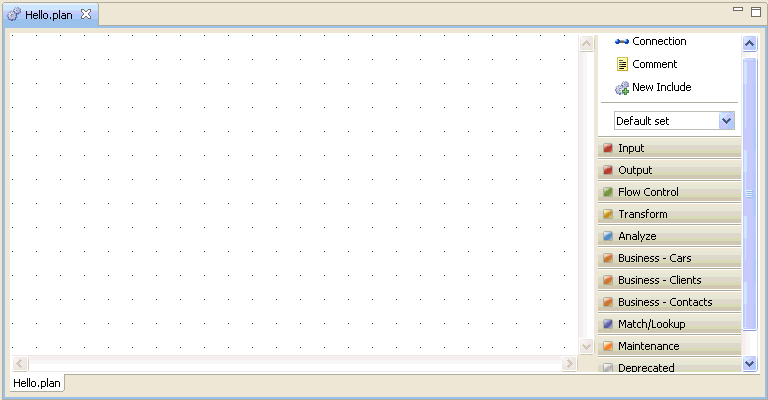
  2. Enter a new name for your DQC Plan in the Name field, for example, Hello.plan.
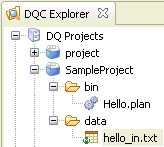
  3. Click Finish.

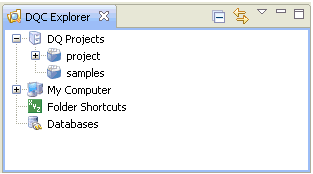
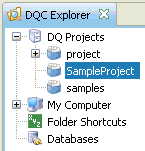
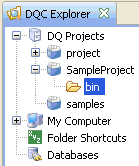
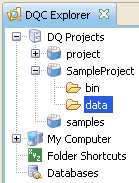
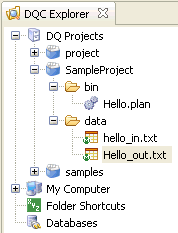
    The new DQC Plan (Hello.plan) is added in the left pane, as shown in the following image:

    In the right pane, the Plan editor consists of a canvas where the Plan logic is defined (by connecting Steps together) and a palette where the various Steps are listed.

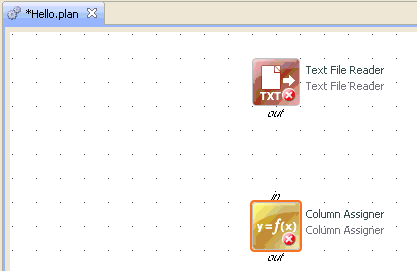
  4. In the left pane, click the hello_in.txt file node and drag it to the canvas.
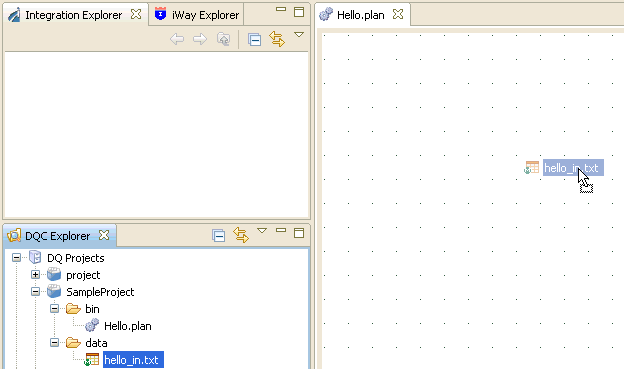
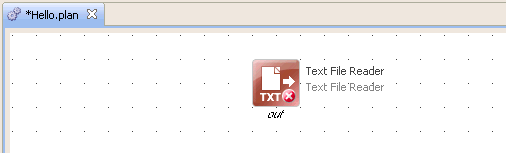
    A Text File Reader is generated, as shown in the following image.

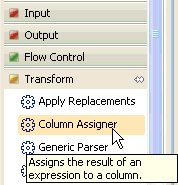
  5. In the right pane, expand the Transform category and select Column Assigner.

  6. Click and drag Column Assigner to the canvas area.

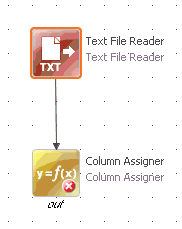
  7. Connect Text File Reader to Column Assigner by dragging from the "out" endpoint of Text File Reader to the "in" endpoint of Column Assigner.

    You can also select the Connection object from the palette in the right pane and select the output from Text File Reader and then the input from Column Assigner.

    The following image shows a completed connection between Text File Reader and Column Assigner.

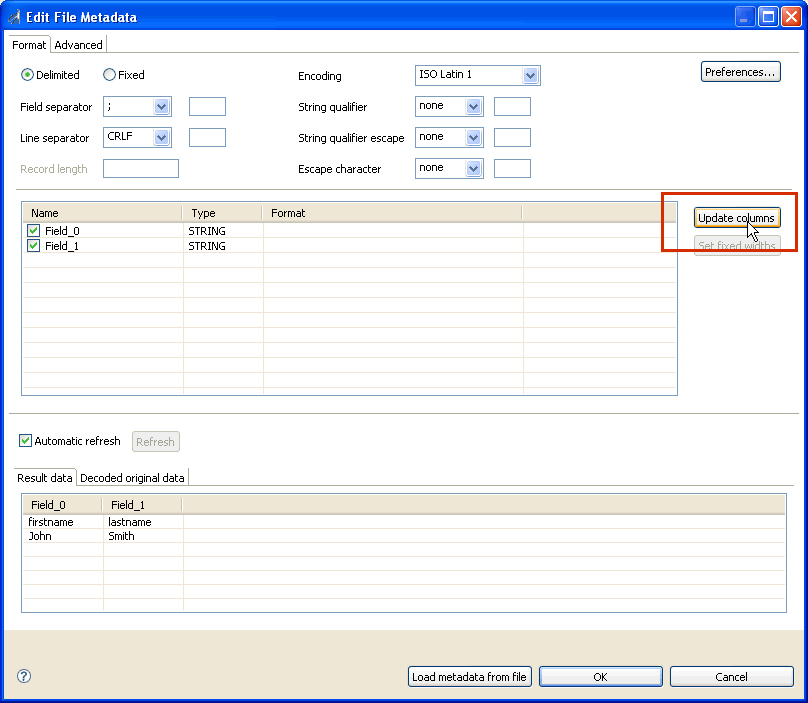
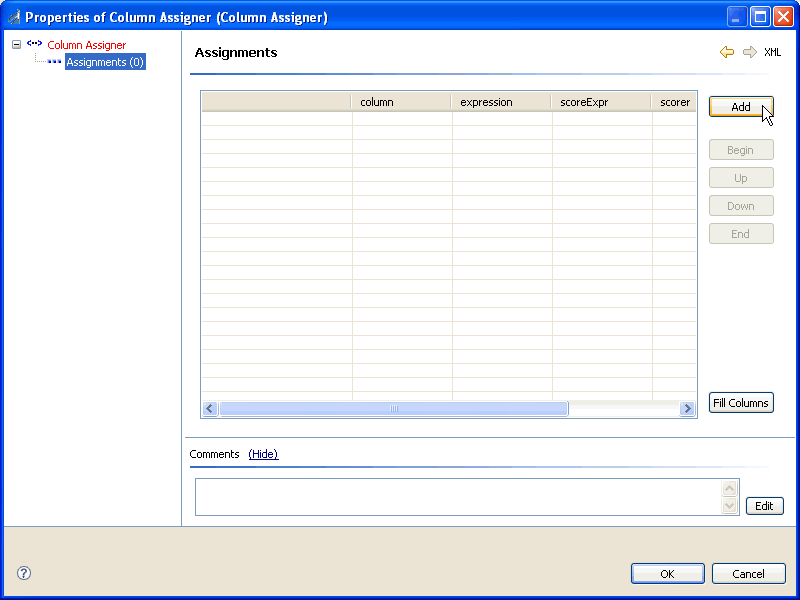
  8. Double-click Column Assigner.

    The Properties of Column Assigner window opens.

  9. In the left pane, select Assignments (0) and click Add in the right pane.

    The following configuration pane opens.

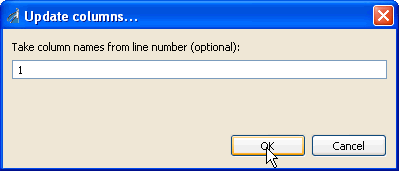
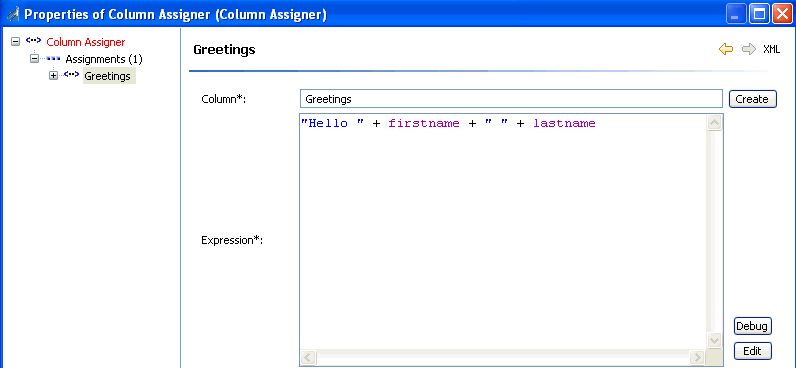
  10. Click Create to the right of the Column* field.

    The Create Shadow Column dialog box opens.

  11. In the Name field, enter Greetings and click OK.

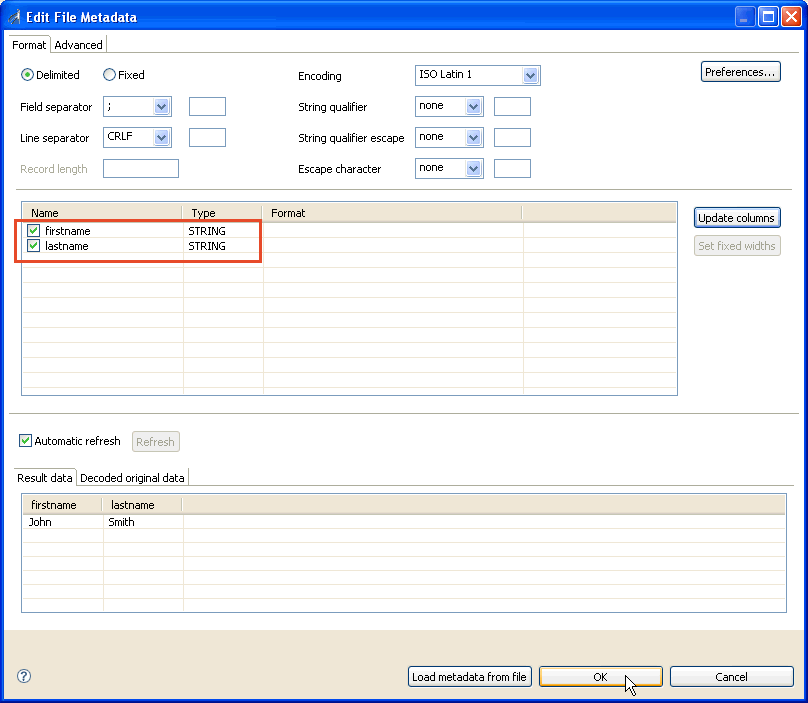
  12. In the Expression* field, enter the following expression:
    "Hello " + firstname + " " + lastname 

    Note: The values in the expression are case sensitive.
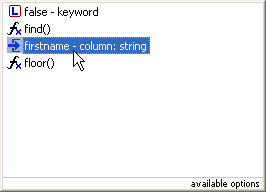
    Tip: As you are composing the expression, you can press Ctrl+Space to open a shortcut menu that provides a list of defined values that you can select from. For example:

  13. Once your expression is completed, click Create, and then OK.

    You are returned to the DQC Explorer.

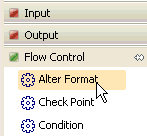
  14. In the right pane, expand the Flow Control category and select Alter Format.

  15. Click and drag Alter Format to the canvas area.
  16. Connect Column Assigner to Alter Format by dragging from the "out" endpoint of Column Assigner to the "in" endpoint of Alter Format.

    You can also select the Connection object from the palette in the right pane and select the output from Column Assigner and then the input from Alter Format.
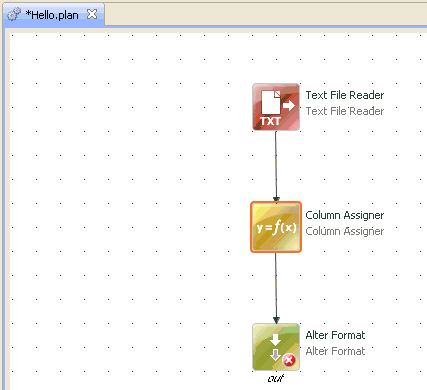
    The following image shows completed connections between Text File Reader, Column Assigner, and Alter Format.

  17. Double-click Alter Format.

    The Properties of Alter Format window opens.

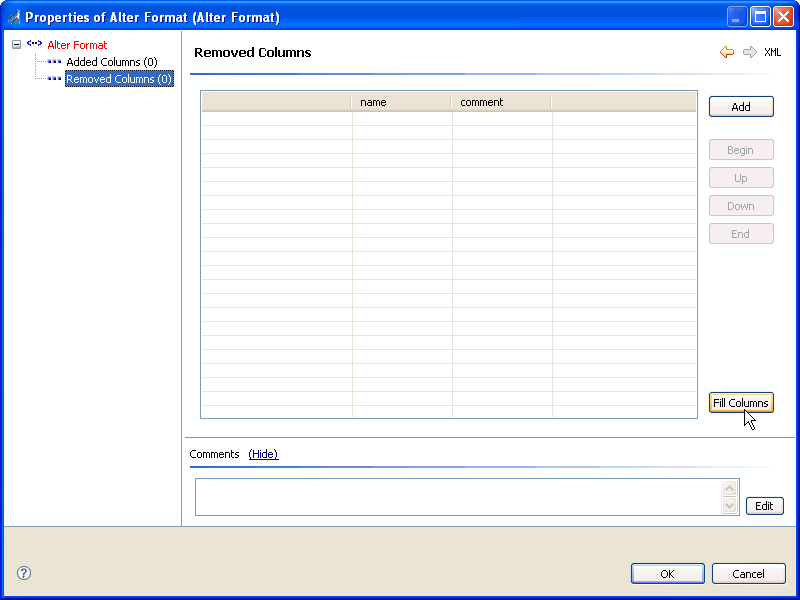
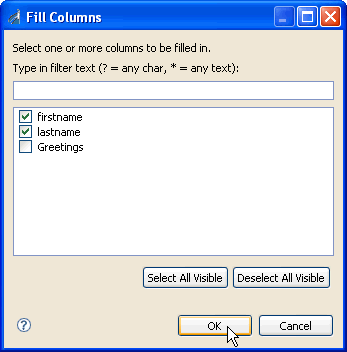
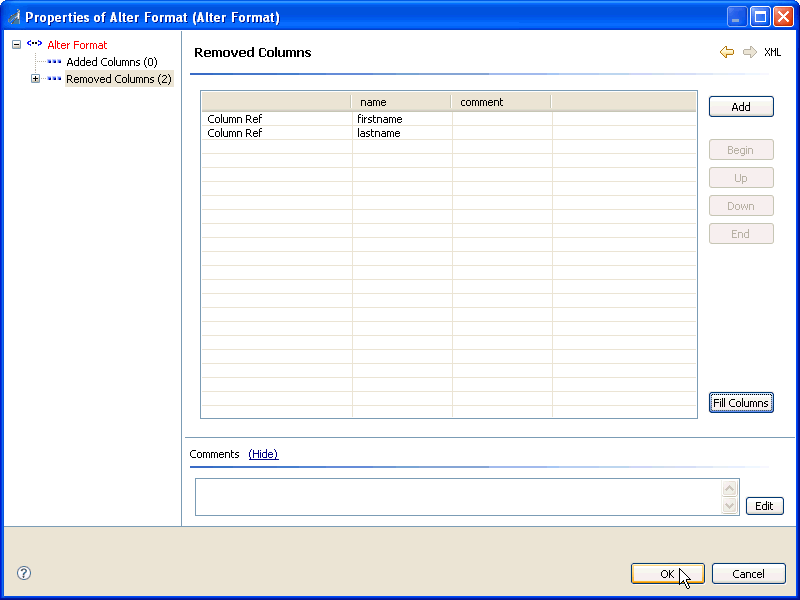
  18. In the left pane, select Removed Columns (0) and click Fill Columns in the right pane.

    The Fill Columns dialog box opens.

  19. Select the firstname and lastname column values.
  20. Click OK.

    You are returned to the Properties of Alter Format window.

  21. Click OK.

    You are returned to the DQC Explorer.

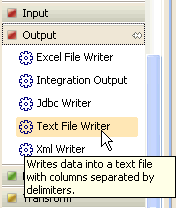
  22. In the right pane, expand the Output category and select Text File Writer.

  23. Click and drag Text File Writer to the canvas area.
  24. Connect Alter Format to Text File Writer by dragging from the "out" endpoint of Alter Format to the "in" endpoint of Text File Writer.

    You can also select the Connection object from the palette in the right pane and select the output from Alter Format and then the input from Text File Writer.
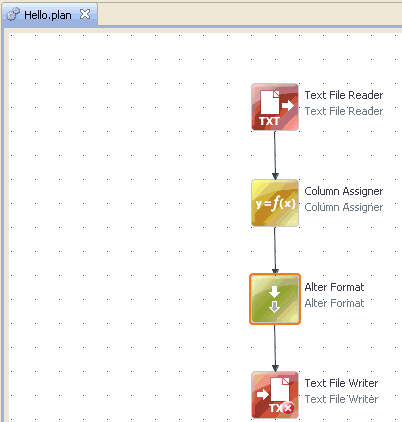
    The following image shows completed connections between Text File Reader, Column Assigner, Alter Format, and Text File Writer.

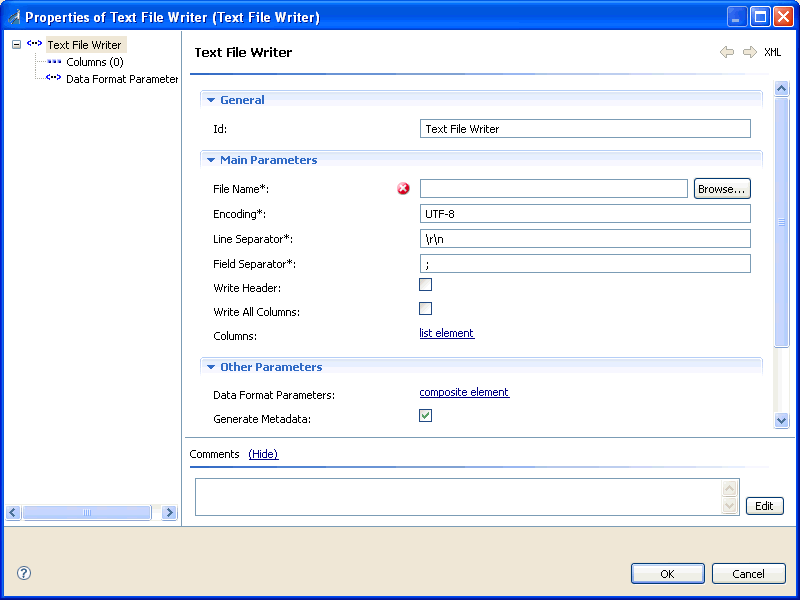
  25. Double-click Text File Writer.

    The Properties of Text File Writer window opens.

  26. Click Browse next to the File Name* field.

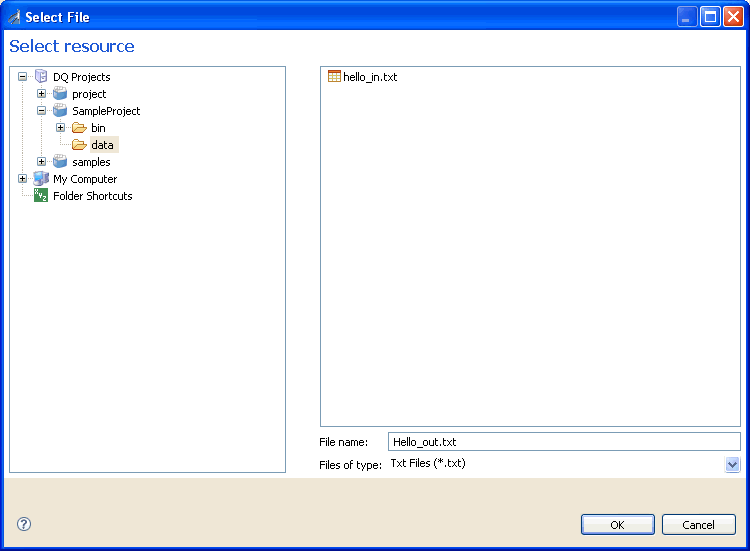
    The Select File dialog box opens.

  27. In the left pane, select the data folder.
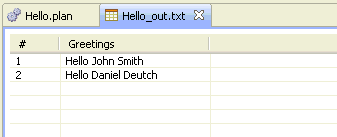
  28. In the right pane, enter Hello_out.txt in the File name field and click OK.

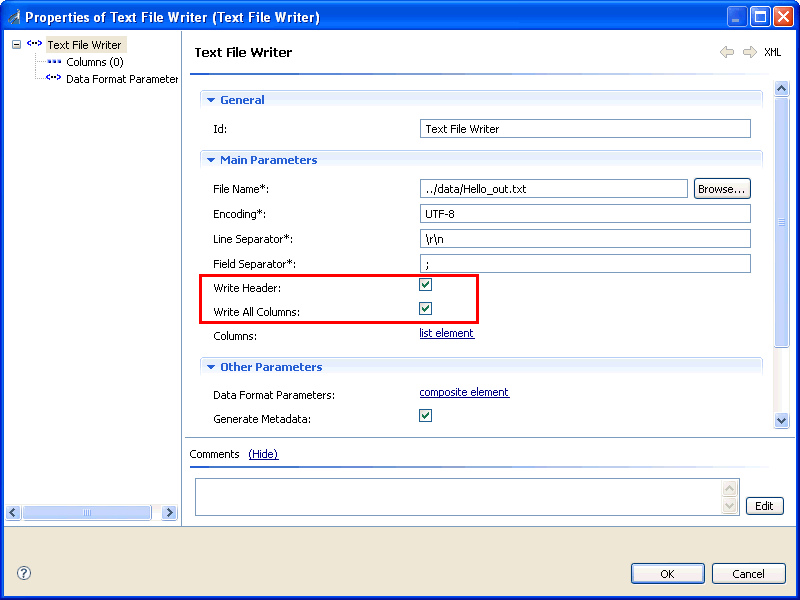
    You are returned to the Properties of Text File Writer window.

  29. Select the Write Header and Write All Columns check boxes.
  30. Click OK.

    You are returned to the DQC Explorer.

  31. Save your DQC Plan by clicking Save in the toolbar.

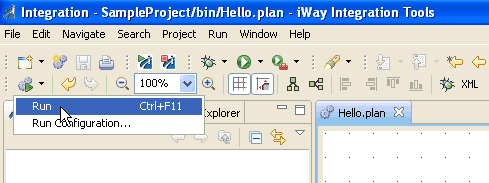
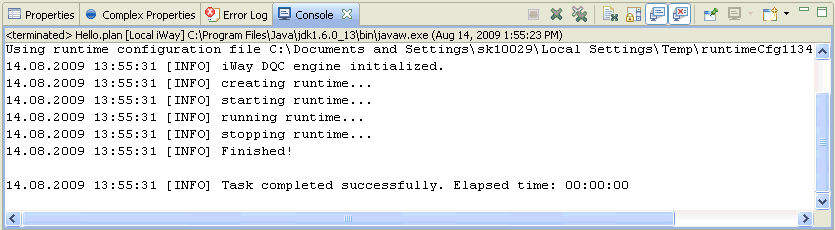
    Your DQC Plan is complete. You are now ready to test and run your DQC Plan.


Top of page

x
Testing and Running Your Plan

This section describes how to test and run your DQC Plan.


x
Procedure: How to Test and Run Your Plan

To test and run your plan:

  1. From the toolbar, select the down arrow next to the Run icon and select Run from the context menu.

    The DQC plan is compiled and tested. The Console tab displays the status of this process, as shown in the following image.

    A Task completed successfully message indicates that your DQC Plan is running properly and no errors have been generated.

  2. Right-click the data folder for your DQC Plan in the left pane and select Refresh from the context menu.

    A new output text file called Hello_out.txt is now available, which has been generated by your DQC Plan.

  3. Double-click the Hello_out.txt file.

    In the right pane, the content and formatting of the new output text file is displayed, as shown in the following image.


iWay Software