Testing Components

In this section:

Testing a Transform or Ebix component allows you to run it preliminary on the local or remote server and preview the output of your project prior to publishing.

Transformer provides the following for testing components as you design them:


Top of page

x
Single Testing

When you are using the single testing option, which is accessible by activating the Test Transform tab of the certain Transform project, the Transform component is run against a single input file. The output result appears in the Test Transform tab and can be printed out or saved on the local disk.

This feature is available for Transform components only.

Note: Make sure you are using the correct profile when testing your Transform component. For more information, see Configuring Profiles.


x
Transform Components

This section describes how to test a single Transform component.


x
Procedure: How to Test a Single Transform Component

To test a single Transform component:

  1. Click the Test Transform tab.

    The transform results appear in the Test Transform tab as shown in the following image.
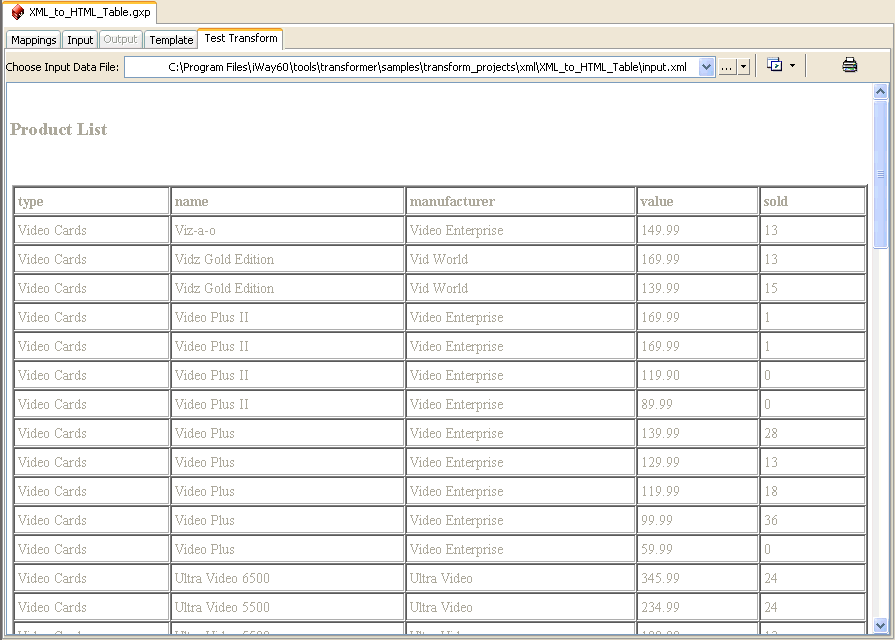
    The Choose Input Data File drop-down list allows you to select the path of a test data file that was previously used.

    To select another test data file from your file system, click the Browse button, as shown in the following image.

    Note: You can expand the drop-down list to see the locations of previously used test files and select a specific file, as shown in the following image.

    To select a project data file or remove all data files, click the down arrow next to the Browse button, as shown in the following image.

    To run the transformation and obtain or refresh the test results after you have selected a new input data file, click the Test Transform button, as shown in the following image.

    Note: To refresh the test results at any time, click the Test Transform button.

    To select a different test profile or configure a new test profile using the Test Management dialog box, click the down arrow next to the Test Transform button, as shown in the following image.

    To print the test results, click the Print button, as shown in the following image.


Top of page

x
Batch Testing

When you are using the batch testing option, the Transform or Ebix component is run against a series of files and the results are stored in the separate output files with indications of which transformations were processed successfully.

Note: Make sure you are using the correct profile when testing your Transform or Ebix component. For more information, see Configuring Profiles.


x
Transform and Ebix Components

This section describes how to use batch testing for Transform and Ebix components.


x
Procedure: How to Test More Than One Input File With One Transform Component

To test more than one input file with one Transform component:

  1. From the Transform menu, select Batch Test or click the Batch Test icon on the toolbar.

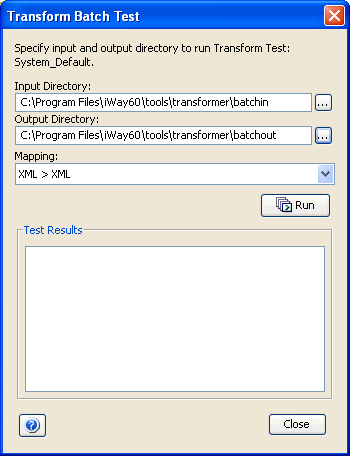
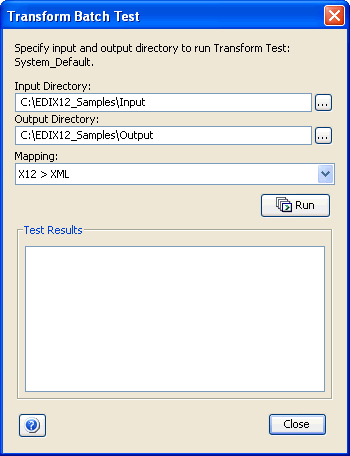
    The Transform Batch Test dialog box opens as shown in the following image.

    1. In the Input Directory field, type the path or browse to the directory for the input file on the local disk.
    2. In the Output Directory field, type the path or browse to the directory where you want the output files to be placed on the local disk.

      Note: The input and output directories must be pointing to different locations on the file system.

    3. From the Mapping drop-down list, select the type of mapping for example, XML > XML.
  2. Click Run.

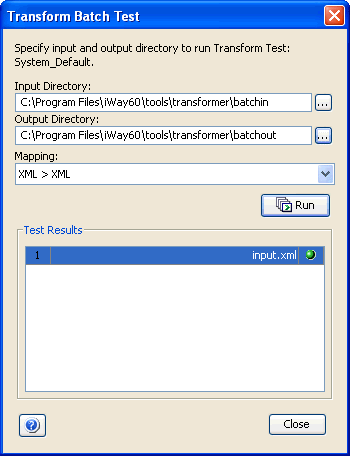
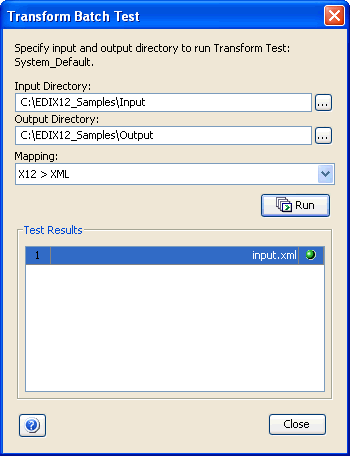
    The path to the test results file appears in the Test Results pane.

    A green marker next to the file indicates the input file was retrieved successfully, or the output file was created successfully.

    A red marker next to the file indicates that an error occurred during transformation.

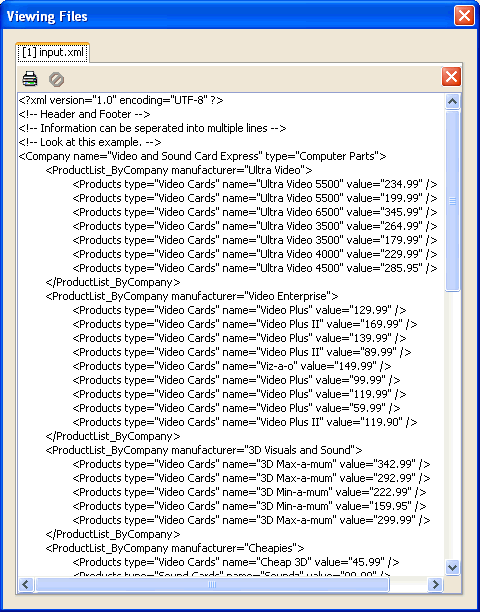
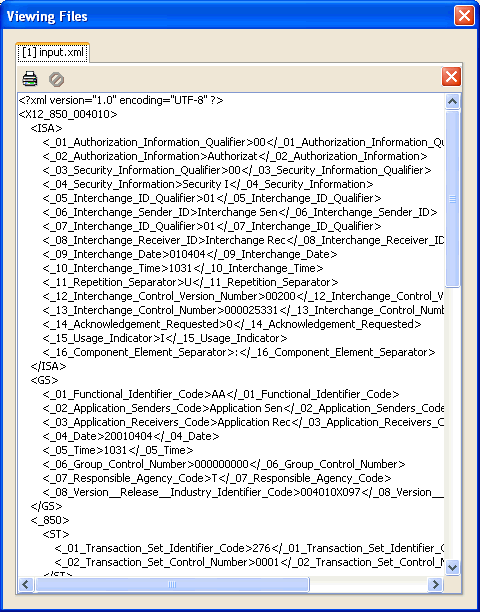
  3. Double-click the test results listing to see the content of the results file.

    The Viewing Files window opens.


x
Procedure: How to Test More Than One Input File Using Ebix Entry Project

Testing any of the available mappings in the Ebix Entry project works similar to batch testing for Transform projects:

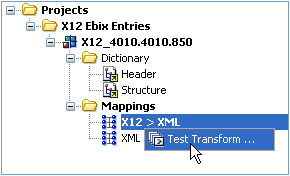
  1. Expand the Mappings folder in the Project Navigator pane, as shown in the following image.

  2. Right-click one of the available mappings, for example, X12 > XML, and select Test Transform from the context menu.

    The Transform Batch Test dialog box opens as shown in the following image.

    1. In the Input Directory field, type the path or browse to the directory for the input file on the local disk.
    2. In the Output Directory field, type the path or browse to the directory where you want the output files to be placed on the local disk.

      Note: The input and output directories must be pointing to different locations on the file system.

    3. From the Mapping drop-down list, select the type of mapping for example, X12 > XML.
  3. Click Run.

    The path to the test results file appears in the Test Results pane.

    A green marker next to the file indicates the input file was retrieved successfully, or the output file was created successfully.

    A red marker next to the file indicates that an error occurred during transformation.

  4. Double-click the test results listing to see the content of the results file.

    The Viewing Files window opens.


iWay Software