You must create a project before you can design a process
flow. If you have not created a project, see Creating a Project for instructions.
Creating a process flow in Designer is a drag-and-drop operation.
Every process flow begins with a Start object, which appears in
the workspace by default when you create a new process flow. A process
flow must also contain at least one end object, which you can add to
the workspace at any time. You cannot validate or publish a process
flow without an end object.
To create a process flow, you will include one or more of the
objects provided by Designer. After you add an object to the process
flow, you then establish a relationship between it and the previous
object in the flow. This relationship defines how and under what conditions
to route the document through the process flow.
x
Procedure: How to Create a Process Flow
To create
a process flow:
-
Connect
to the repository from which you want to work.
-
Expand
the project you want to work with.
-
Click
the Processes folder and choose New from
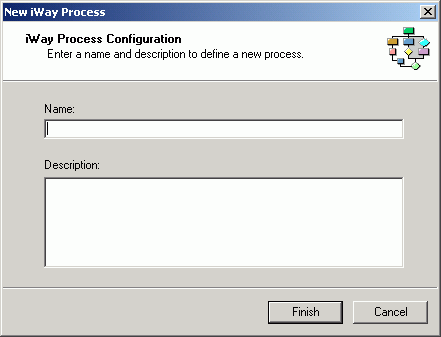
the File menu, or right-click the Processes folder and select New Process.
The iWay Process Configuration dialog box opens, as shown
in the following image.
-
In the
Name field, type a descriptive name for the process flow.
-
In the
Description field, type a brief description of the process flow.
This is optional.
-
Click Finish.
The new process flow appears under the Processes folder,
the workspace displays a Start object, and the Properties pane appears
on the right displaying the properties of the Start object. The
following image is an example of this display for a new process
flow named Order.
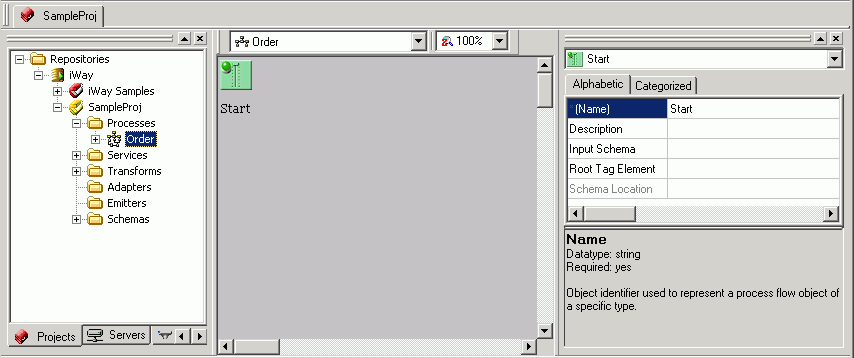
You are
ready to add objects to the process flow.
x
Adding Objects to a Process Flow
Once you have created a process flow, you can continue
to modify its design by adding objects according to your requirements.
Every process flow requires at least one End object to terminate
the flow. This section describes how to include an object in your
process flow. For details about each object available to you in
iWay Designer, see Defining Objects in a Process Flow.
x
Procedure: How to Add an Object to the Process Flow
To add
an object to the process flow:
-
From
the Object toolbar, click the object icon you want to add and either
drag it to the workspace or click a blank area of the workspace.
Note: You can also right-click a blank area of the
workspace, point to New Object, and choose the object you wish to
add from the drop-down list.
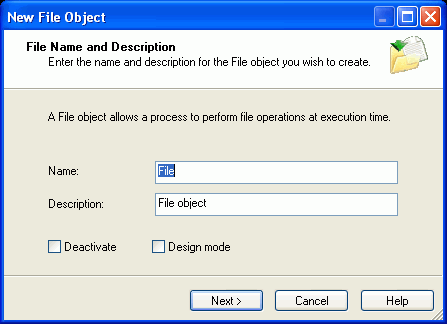
The New (type) Object dialog
box for the selected object opens. The following image shows an
example of this dialog box for a new File object.
See Defining Objects in a Process Flow for details on defining the objects
that are available in Designer.
-
In the
Name field, type a name for the object or accept the default.
-
In the
Description field, type a brief description of the object or accept the
default.
Depending on the object you are adding, this dialog box
also includes the following options:
-
Deactivate -
suppresses the function of any Execution or Debug object. This can
be useful for debugging or if a service external to the flow is unavailable.
A deactivated object is drawn with a red slash through it and can
be re‑activated through the object’s right‑click menu or Properties
dialog box.
-
Design mode -
allows you to add an object to a process flow without fully defining
its parameters, enabling rapid object placement during a joint application
development (JAD) session or if all the object details are not yet
known. When you check the Design mode option, the Next button is
changed to Finish since further configuring is unnecessary at this
time. When the Design Mode menu item is active, Design mode is the
default setting for all newly created objects. Objects created in
Design mode are drawn in black and white rather than their normal
color scheme.
Warning: If you set a configured
object to Design mode, its configuration parameters will be lost.
Note: The
run-time behavior of a deactivated object and a Design mode object
are identical, but a deactivated object is fully configured.
-
Click Next.
Depending on the object you choose, there are one or more
dialog boxes that present the parameter options for the object.
-
When
you are done defining the object, click Finish.
The new
object appears in the workspace. You can drag it to any position
in the workspace.
x
Building Relationships Between Objects
The relationship between two or more objects in a process flow
is represented by a color-coded line with an arrow that directs
the flow of the XML input document. You define the relationships
between objects as you build your process flow. If necessary, you
can change the line properties, just as you can the object properties,
of an existing process flow.
This section explains how to create a relationship between objects
and how to edit existing relationships.
x
Procedure: How to Build a Relationship Between Objects
To build
a relationship between objects:
-
Select
the object that will originate the document, then hold the Shift
key to select the object that will receive the document.
-
Right-click
the object that will receive the document and select Build
Relation from the drop-down list.
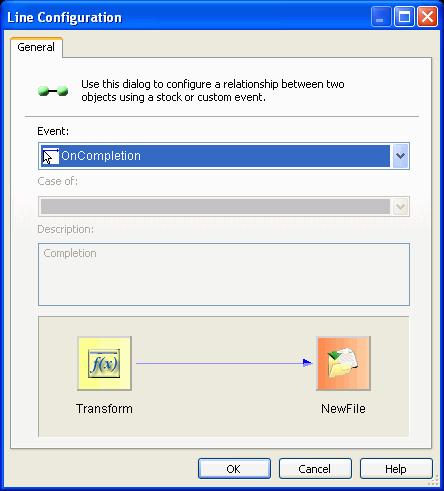
The Line Configuration dialog box opens. The bottom of
the dialog box shows the two objects joined by a color-coded line
with an arrow indicating the direction of the document flow. The
following image is an example of this dialog box showing two objects,
Transform and NewFile, with an OnCompletion relationship.
-
Select
the event for these objects from the Event drop-down
list.
The default (stock) events that appear depend on the objects
you are working with. For instance, the first relationship you build
between a Start object and another object allows only the OnCompletion
event for that relationship. The lines in the workspace that represent
the relationship between two objects are color coded for quick identification.
The following list describes the available events and the corresponding color.
OnCompletion (blue
line) - indicates there are no conditions; always follow the path.
OnError (red
line) - follow the path if there is a JAVA exception.
OnSuccess (green
line) - follow the path if there is a normal completion.
OnCustom (brown
line) - allows you to customize the path condition.
OnFailure (red
line) - follow the path if a coded error occurs, for example, an
agent that is coded to issue an error when it is unable to connect
to a server.
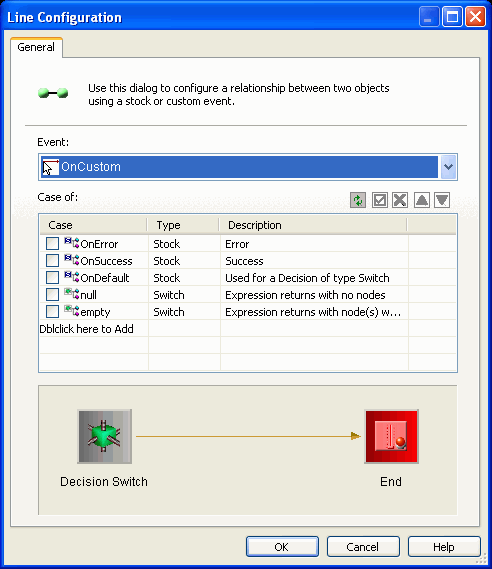
If you select OnCustom, a list of Case
of options becomes available allowing you to customize
the event for a particular condition, such as true or false. The
following image shows this dialog box for the line configuration
between a Decision Switch object and an End object, and contains
an Event drop-down list and a table with three columns; Case, Type,
and Description.
-
Click OK.
A line
appears between the two objects to indicate a relationship is established.
x
Procedure: How to Edit the Relationship Between Objects
If you
want to change the properties of an existing relationship:
-
Right-click
the line that represents the relationship you want to edit.
-
Select Line
Properties from the drop-down list.
The Line Properties dialog box opens, as shown in the following
image. This dialog box provides an Event drop-down list, Case of
and Description fields, and a representation of the two objects
joined by a line.
-
Change
the property, as needed.
-
Click OK.
The new line properties
are now in place.
x
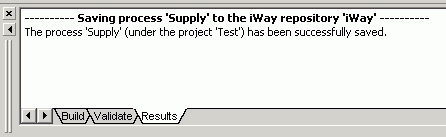
To save a process flow, highlight the process flow node
and select Save from the File menu, or right-click
the process flow node and select Save from
the drop-down list.
The Results tab of the Message Log pane displays a status message.
An example of a message display is shown in the following image.