Configuring and Connecting to a Repository

How to:

Along with the default repository (localhost) that is automatically configured when Designer is installed, you can manually configure additional repositories on other hosts. Before you can work with projects or process flows on a server, you must have a repository configured and you must connect to that repository.

Note: To support repository concurrency control, each Designer user must have their own user ID on the iWay Server. To create additional users on the iWay Server, see the iWay Service Manager User’s Guide, Version 5 Release 6 SM.


Top of page

x
Procedure: How to Configure a Repository

To configure a repository:

  1. In the Projects pane, right-click the Repositories node and choose New.

    You can also click the Repositories node and choose New from the File menu.

    The iWay Repository Configuration dialog box opens, as shown in the following image.
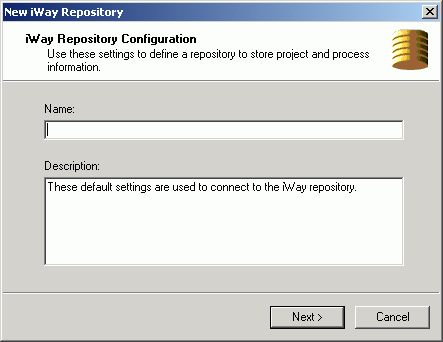
  2. In the Name field, type a name for the repository.
  3. In the Description field, type a brief description of the repository. This is optional.
  4. Click Next.

    Another iWay Repository Configuration dialog box opens, as shown in the following image. This dialog box provides the location and connection fields used to identify and access the repository.
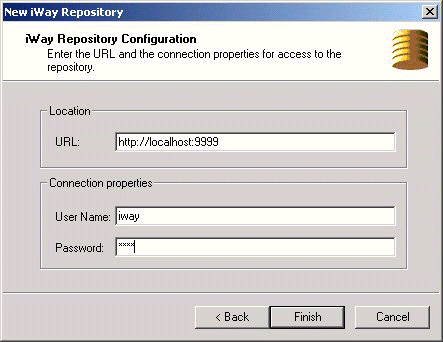
  5. In the Location URL field, type the address to the Service Manager console.

    The URL address format is http://host:port, where host is the machine where iWay Service Manager resides and port is the port number to access iWay Service Manager. The default address is http://localhost:9999.

    Note: The iWay Service Manager you want to access must be up and running.

  6. In the Connection properties fields, type a valid user name and password to access the iWay Service Manager identified in the previous step, for example, the default user name and password of 'iway'.

    Note: When two or more instances of Designer will be used to connect to the same iWay Server, each instance should be configured to connect to that server using a different user ID.

  7. Click Finish.

The new repository appears under the Repository node in the Navigator pane.

Top of page

x
Procedure: How to Connect to a Repository

To connect to a repository:

  1. In the Navigator pane, click the Projects tab.
  2. Expand the Repository node and right-click the repository to which you want to connect.
  3. Select Connect from the drop-down list.

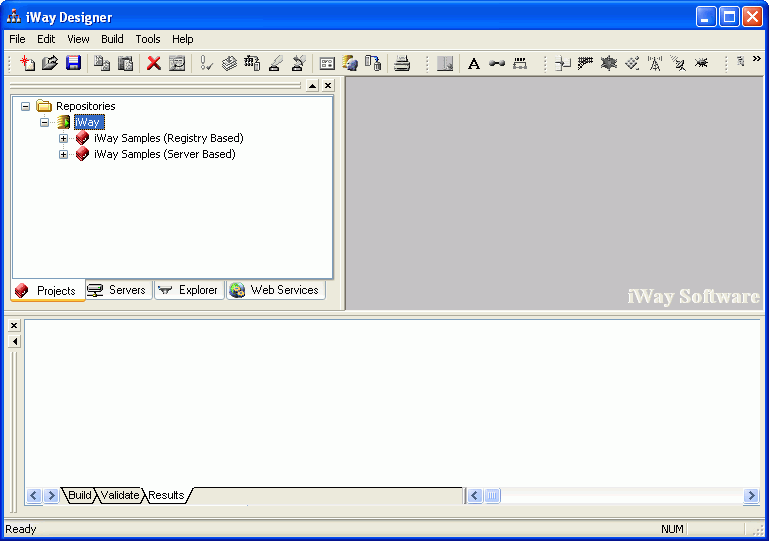
    A message appears in the Message Log pane that you have successfully connected to the repository. The repository node in the Navigation pane expands to display the projects in that repository. The repository node also includes a green area to indicate you are connected to that repository.

    The following image shows these elements under the default repository named iWay. This repository holds default sample projects that are Registry based and Server based. The Registry is a repository in which to design your process flows. Once tested and ready for deployment, you must publish them to a server-based repository where they are then available for use.

    Note: The first time you connect to a server repository, your view of it within Designer will be empty. If you want to work with existing projects in that server’s repository, use the import option to make Designer aware of them. For more information, see Importing to a Repository.


iWay Software