In this section: How to: |
The Report Library interface Library Reports interface provides access to all content in the library that you have permission to view. The Library Reports interface, shown in the following image, displays the Library Reports navigation tree in the left pane and the details of the selected item in the right pane.
Note:
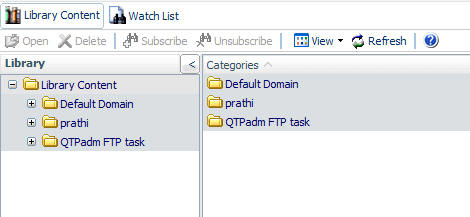
Reports are stored in the library under categories that you designate when creating a schedule. (If a category is not specified when creating a schedule for either a Standard Report or My Report, then the domain name under which the report was created in Managed Reporting is used as the category.) The top of the navigation tree in the left pane is titled Library Contents, and when expanded, displays the categories under which your reports reside as branches of the tree. This information also appears in the right pane. Categories and reports are listed alphabetically.
Each category folder contains report folders for that category, and each report folder contains the versions of the report generated by the report schedule. The report folder name is the same as the description given to the schedule that generated the report. If the report bursts, the report folder contains a folder for each burst value and the report versions reside in those folders.
In the Library Reports interface, select an item in the left pane to see the contents and information about that item in the right pane. When you select a category folder, a list of reports in the category appears in the right pane. When you select a report folder, all versions of that report that are currently in the library appear in the right pane. When you select a report version in the left pane, the actual report appears in the right pane.
The right pane displays a list of report folders that appear under that category. The following image shows an example of a selected category and the summary information for the reports that appear under that category.
The category folder summary information includes:
Note: You can sort the columns in ascending or descending order by clicking the column heading.
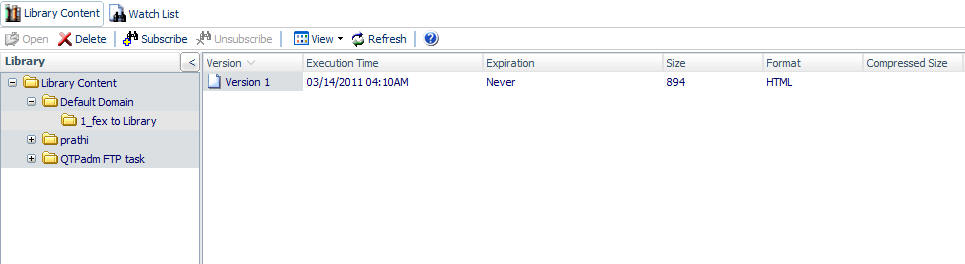
The following image shows an example of a report selected in the navigation pane and the list of report(s) in the right pane.
The report summary information includes:
If a report bursts, the report folder contains a separate folder for each burst value.
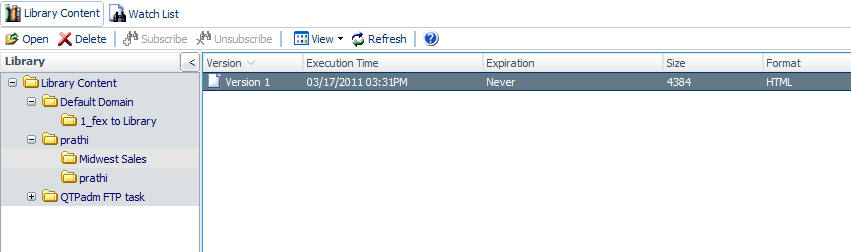
In the following image, the left pane shows that the report folder contains the folders for each report burst on the product code value, while the right pane provides summary information about these burst reports.

The burst report summary information includes:
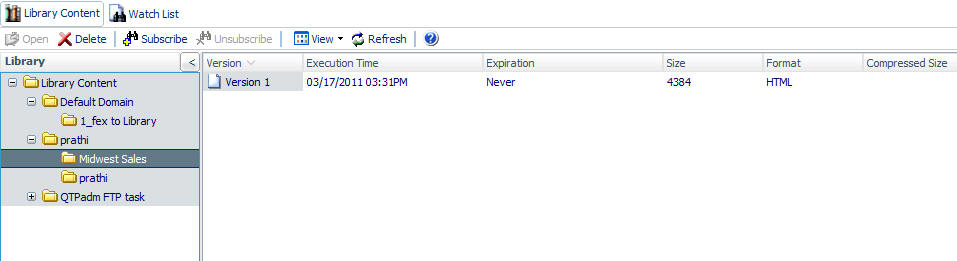
Select a burst report folder in the left pane to display report summary information of the versions for that burst value in the right pane, as shown in the following image. This is the same report summary information that is displayed for any report folder.
The following image is an example of a report displayed in the right pane.

In this section: |
The Report Library On-demand Paging feature enables you to view a report one page at a time from the Library while the Web server holds the remaining pages and feeds them at your request. This feature is useful for large reports because it decreases the amount of time you must wait before you can begin viewing the report.
On-demand Paging reports open from the Library inside the WebFOCUS Viewer. This tool provides the framework to view report pages and allows you to search for specific pages or information in the report.
To enable the On-demand Paging feature, reports must be distributed in the On-demand Paging format (HTML ODP). You must select HTML ODP as the format when creating a schedule for a report to be distributed in the On-demand Paging format. HTML ODP is available as a format when Library is selected for distribution.
Note: When HTML ODP is selected as the format, the Distribution Server adds SET WEBVIEWTARG=OFF to the procedure to control the behavior of the frames in the Library. SET WEBVIEWTARG does not override ON TABLE SET WEBVIEWTARG. Therefore, the scheduled procedure should not contain an ON TABLE SET WEBVIEWTARG statement.
You can open an On-demand Paging report inside the Report Library or in a separate window, as follows:
The following image is an example of an On-demand Paging report opened with the WebFOCUS Viewer in the Library pane.
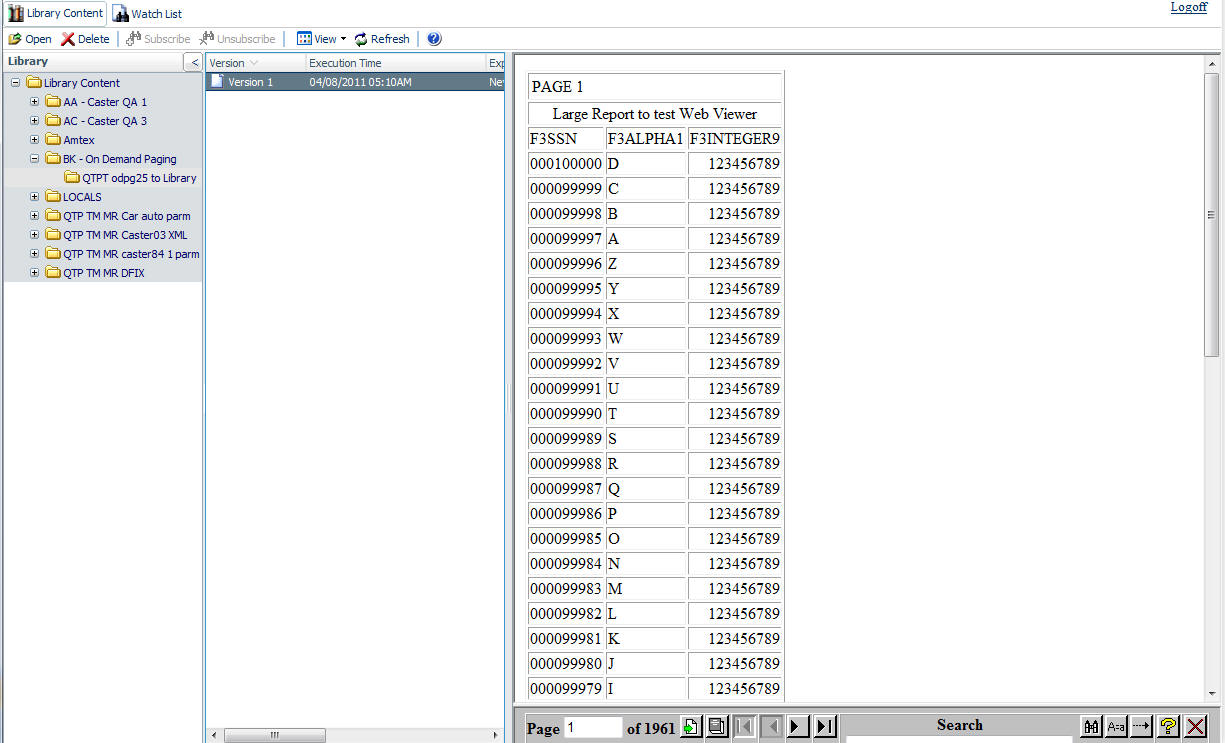
The WebFOCUS Viewer control panel, shown in the following image, appears at the bottom of the WebFOCUS Viewer.

The controls enable you to:


The Viewer Control Panel contains controls that offer several ways to search your report. Using the Viewer search controls, you can select a string of information, such as a phrase that occurs in your report or a group of numbers, and search for each occurrence of that string. You can further customize your search by matching capitalization of words exactly (a case-sensitive search) or by controlling the direction of your search (either forward or backward from your starting point in the report). Use these controls to search your report:


Notice that the WebFOCUS Viewer displays the Match Case button with a red line across it to indicate that it is active.
or
The WebFOCUS Viewer searches the report and underlines the first occurrence of the string.
You want to use the Viewer Control Panel to navigate a long report called Coffee Sales to find occurrences of the string "Kona," a type of coffee that you sell. After you run the report, WebFOCUS displays the first page of the report in the Viewer.
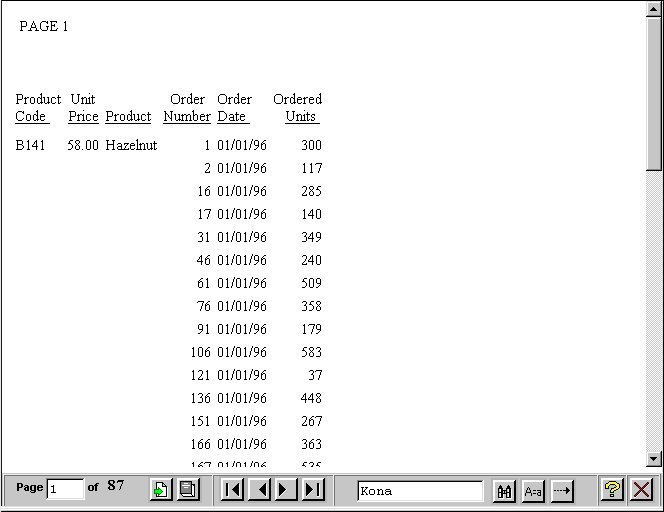
The WebFOCUS Viewer returns your report with the first occurrence of your search string underlined, as shown in the following image.

| WebFOCUS |