Procedure: How to Clone a Schedule
- In the Schedules tab, select the schedule you want to clone.
-
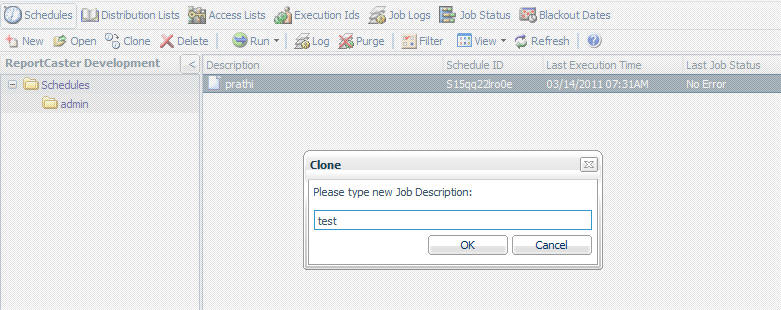
Click Clone.
The Clone window opens, as shown in the following image.
-
Type a description
of the new schedule in the Job Description field (for example, Midwest
Sales) and click OK.
The following image shows the new cloned schedule in the Schedules window. Note that the cloned schedule is disabled by default, as specified in the Next Run Time column.

-
Enable the
cloned schedule, as follows:
- Open the schedule in the Scheduling tool by clicking Open or by double-clicking the schedule.
-
Click the Advanced tab. The Advanced tab
is shown in the following image.
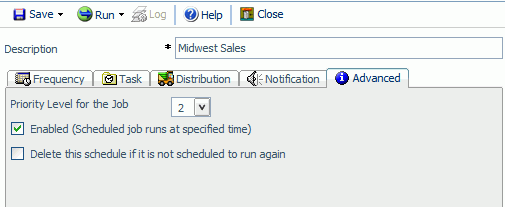
- Check the Enabled (Scheduled job runs at specified time) check box.
- Make any other changes you want to the schedule and then click Save.
- Click Close to return to the Schedules tab.
-
Click Refresh.
The cloned schedule appears as active in the list of schedules, as shown in the following image.
