In this section: |
This section describes the options available in the Report Options section of the Scheduling Tool. You can set these options to send the report in a specific format (for example, HTML, EXL2K, and so on), whether or not you want to burst the report and if so, the burst values the report will use, and specify parameter values to pass to the report when it runs.
The following image shows the Report Options section of the Scheduling Tool.
The burst feature enables you to break a report into sections and distribute relevant sections to individual users. To burst the report, select the Burst this Report check box. Burst values can be specified in a Distribution List.
The Save Report As option allows you to rename the schedule output to a more descriptive name. This is useful if you are distributing output in e-mail attachments.
In the Execution ID field, specify a valid ID that is authorized to execute procedures on the server running the report.
Note: After the schedule is saved, this execution ID will be available from the Execution ID drop-down list for future scheduling.
Note: You can change the password of a selected execution ID by clicking Set Password and typing a new password for the ID.
Select the format of the report from the Send the Report in this Format drop-down list of the Scheduling Tool, Report Options area.
Use the following guidelines when selecting a format:
When scheduling a chart or graph report, the available formats will depend on which tool was used to create the report. When the report was created using:
For detailed information about each format, see Report Formats.
How to: |
If the report you are scheduling contains parameters, they are listed in the Report Options section of the Scheduling Tool. The following image shows the Report Options section for a report with parameters.
The report parameter name automatically appears in the Parameter Name column. The value or possible values of the parameter available to you in the Reports Options section depends on the report procedure. The report procedure either assigns no value to a parameter, assigns a default value, or provides a selection of values from which you can choose.
The possible presentation of report parameters in the Report Options section are:
When you access the report Scheduling Tool, parameters with default values have no check mark next to their name and the default value listed in the Parameter Value column. Parameters that offer a choice of values have a check mark next to their name and the Parameter Value column remains blank until you select the value. The following image shows a parameter with a default value (REPORTNAME) and parameters that provide a choice of values (DEPARTMENT and Job Code).
To override a default value, check the box next to the parameter name, then click the name to open the Parameter Editor window, where you can enter another parameter value. For details on changing a parameter value, see How to Define a Parameter Value in the Scheduling Tool.
To create a new parameter for this schedule, click in the row next to the check box without a parameter name, as shown in the following image, and follow the instructions in How to Define a Parameter Value in the Scheduling Tool.
To select all parameters in the parameter list, check the box next to Parameter Name.
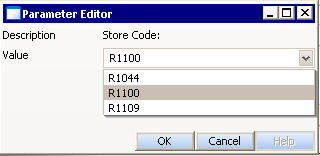
To change a parameter default value, assign a new value to a report parameter, or create a new parameter:
Note: If the parameter has a default value, it appears in the Value field.
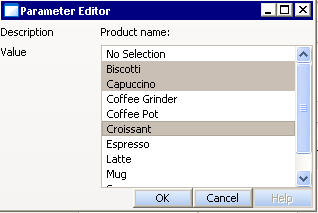
The following image shows the editor for a new parameter.
The value appears in the Parameter Value column next to the parameter, as shown in the following image.
Parameters with a grayed-out check mark next to the parameter name provide a list of values from which you can choose.
| WebFOCUS |