-
From
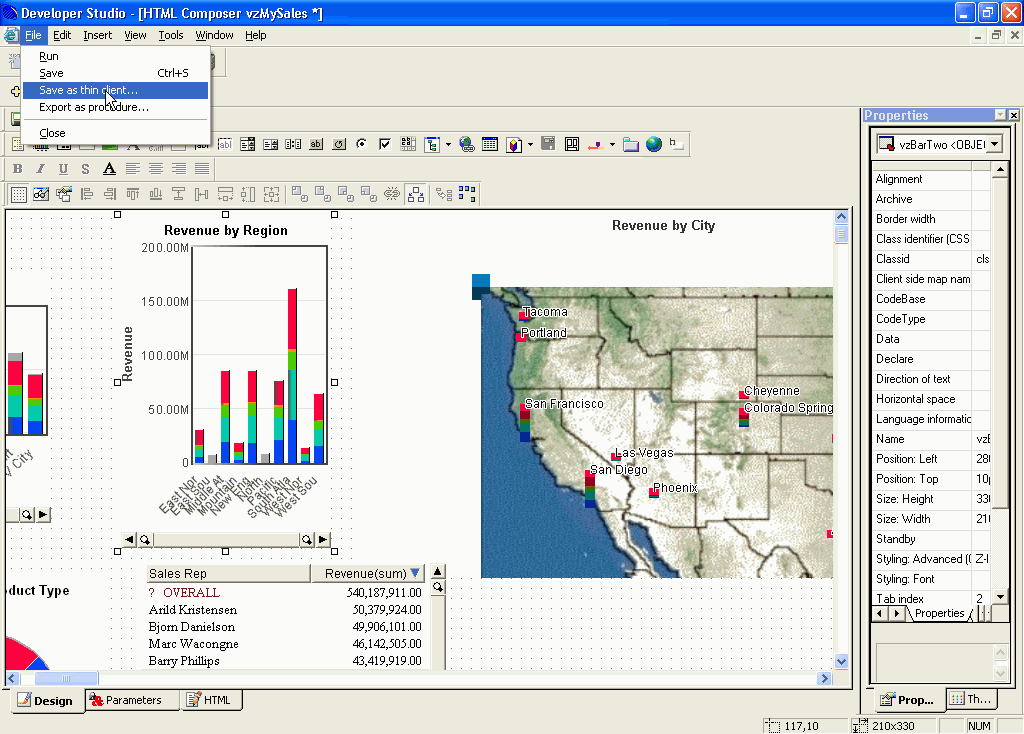
the HTML Composer, select Save as thin client from
the File menu.

The Specify Name dialog box opens.
-
Enter
a name and click Open.
Tip: Entering the same name as the current file will overwrite that file. To retain a copy of the current file, supply a different name for the deployed file.
- If the file does not yet exist, you are prompted to create the file. Click Yes.
-
Go to
the Developer Studio Explorer window and select the application project.
In order to deploy the thin-client files, your project needs to
be able to see them. To do this, you must add the XML and TXT file
extensions to your project.
To add these file extensions to your project:
- Right-click the application project and select Properties.
- Click the Edit Filters tab.
- Click the Add New File Type Filter(s) button. The New Filter dialog box opens.
- Scroll to XML, select it, and click OK.
- Click the Add New File Type Filter(s) button again, select TXT, and click OK.
- Click OK to close the Properties dialog box.
-
Click
the Binoculars
 button
to display all files in your project path. Find the XML file and
the HTM files for your project. This is the name you used when you
saved the file as thin client from the HTML Composer.
- Select and then right-click both files, and choose Add to Project from the menu.
-
From
the deploy drop-down list select New Deploy Scenario.
The New Scenario Wizard opens. For complete details on how to use the New Scenario Wizard, see the Creating Reporting Applications With Developer Studio manual or click Help from the wizard to view the online documentation.
You do not need to specify a starting object to deploy thin-client files.
- Run the Deploy Scenario.
-
On the
machine where the WebFOCUS Client and the Visual Discovery Server
(ADVIZOR Server) are installed, copy the HTM and XML files to the
following directory:
drive:\Program Files\ADVIZOR Server
-
Execute
the thin-client Web page by entering the following in your browser
http://server/ASI/htmpagename.htm
where:
- server
Is the name of the Web server hosting the thin-client page.
- htmpagename
Is the name of the thin-client HTM file.