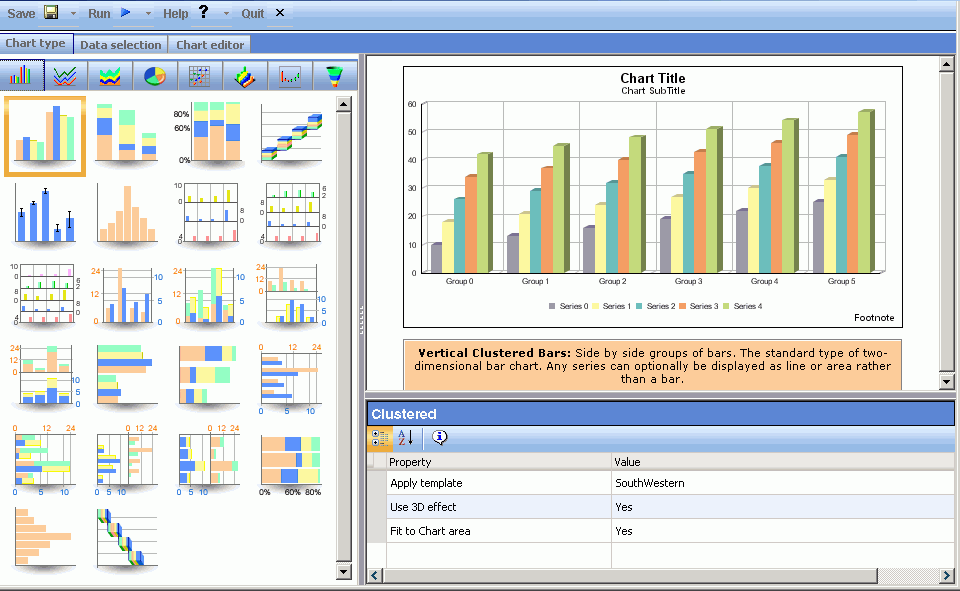
Accessing Advanced Graph Assistant
When Advanced Graph Assistant opens, the tool appears,
as shown in the following image.
You may access the Advanced Graph Assistant from Developer Studio
and the Managed Reporting environments.
x
Procedure: How to Access Advanced Graph Assistant From Managed Reporting Domain Builder
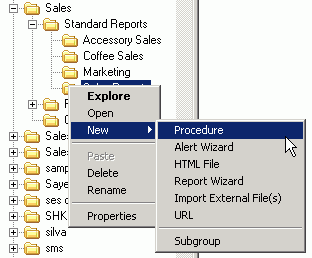
You
can access Advanced Graph Assistant from Domain Builder in the Managed
Reporting Applet interface when creating a new Standard Report procedure.
-
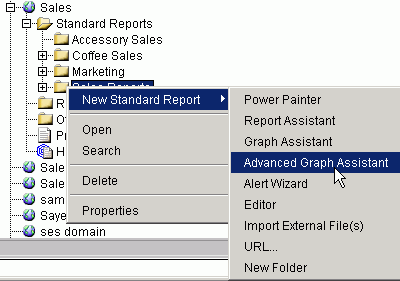
In Domain
Builder, right-click a Standard Reports Group, select New
Standard Report, and click Advanced Graph Assistant,
as shown in the following image.
The
New Standard Report dialog box opens.
-
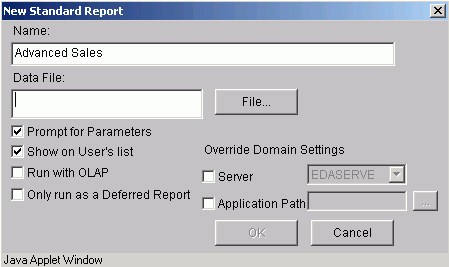
Type
a graph name in the Name field of the dialog, as shown in the following
image.
-
Click
the File button to the right of the Data
File field to browse for a data source.
Note: If you know the exact name of the desired
data source, you can type it in the Data File field, and then skip
the next step.
-
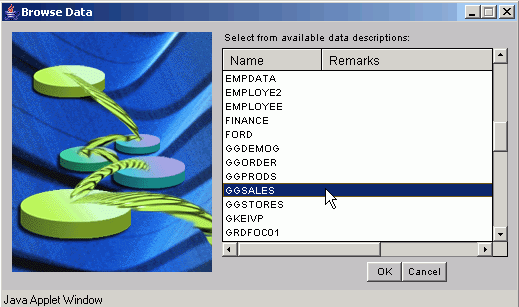
In the
Browse Data dialog box that opens, select the desired data source,
as shown in the following image, then click OK.
-
Click OK,
and the Advanced Graph Assistant opens.
x
Procedure: How to Access Advanced Graph Assistant From Managed Reporting Domains in Developer Studio
You can access Advanced Graph Assistant
from Managed Reporting domains in Developer Studio when creating
a new Standard Report procedure.
-
Expand
the tree structure in Developer Studio, and log on to the Managed
Reporting domains environment.
-
Select
a domain, and expand the Standard Reports folder.
-
Right-click
a Standard Report Group folder, select New,
and select Procedure, as shown in the following
image.
The
New Standard Report Procedure dialog box opens.
-
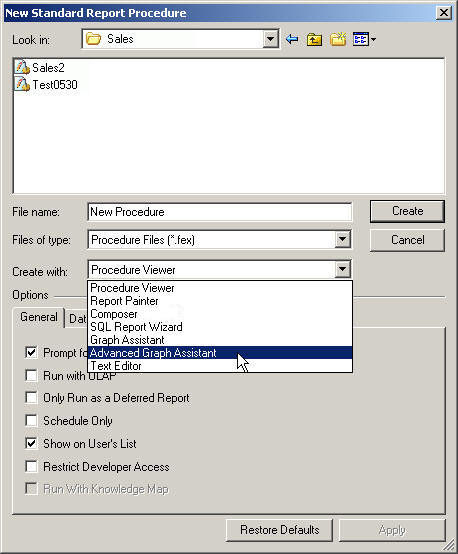
Type
a File name for the procedure and select Advanced Graph
Assistant from the Create with drop-down list, as shown
in the following image.
-
Click
the Create button.
The WebFOCUS Table List dialog box opens.
-
Select
a data source and click OK.
The Advanced Graph Assistant opens.
x
Procedure: How to Access Advanced Graph Assistant From Procedures in a Developer Studio Local Environment
You can access
Advanced Graph Assistant in Developer Studio when creating a new
Procedure in a local project.
-
In Developer Studio, right-click the Procedures folder,
select New, and select Procedure.
The Add
Procedure dialog box opens.
-
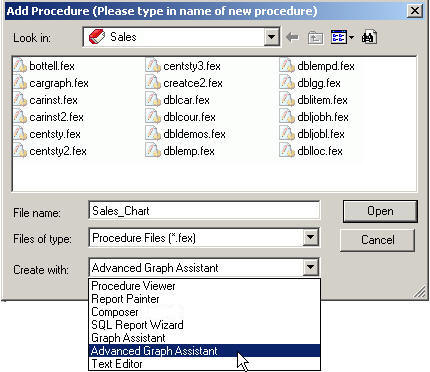
Type
a File name for the procedure and select Advanced Graph
Assistant from the Create with drop-down list, as shown
in the following image.
-
Click Open.
The Open (data source) dialog box opens.
-
Select
a data source and click Open.
The Advanced Graph Assistant opens.
x
Procedure: How to Access Advanced Graph Assistant From Procedure Viewer in a Developer Studio Local Environment
You
can access Advanced Graph Assistant in Developer Studio from Procedure
Viewer in a local environment.
-
Open
an existing procedure in Developer Studio.
The Procedure Viewer opens.
-
Click
the component connector (yellow diamond) in Procedure Viewer and
select Advanced Graph from the component
connector toolbox, as shown in the following image.

The
Open (data source) dialog box opens.
-
Select
a data source and click Open.
The Advanced Graph Assistant opens.
x
Procedure: How to Access Advanced Graph Assistant From Procedures in a Developer Studio Remote Environment
You
can access Advanced Graph Assistant in Developer Studio when creating
a new Procedure, while working in a remote environment.
-
Expand
the tree structure in Developer Studio and open an application folder
in a remote environment.
-
Right-click the Procedures folder
and select New Procedure.
The New Procedure File dialog box opens.
-
Type
a File name for the procedure and select Advanced Graph
Assistant from the Create with drop-down list.
Click Create.
The WebFOCUS
Table List dialog box opens.
-
Select
a data source and click OK.
The Advanced Graph Assistant opens.
x
Procedure: How to Access Advanced Graph Assistant From QuickLinks in Developer Studio
While
working in Developer Studio, you can access Advanced Graph Assistant
from the QuickLinks dialog box which is not open by default.
-
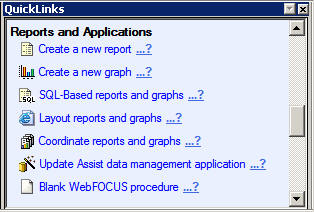
If the
QuickLinks dialog box is not displayed, click View at
the top of the Developer Studio window, then select Quick
Links.
The QuickLinks dialog box opens, as shown in the following
image.
-
In the
Reports and Applications section of the QuickLinks dialog box, click Create
a new graph to access Advanced Graph Assistant.
x
Procedure: How to Open Graph Assistant Graphs With Advanced Graph Assistant
You can access
Advanced Graph Assistant from a Standard Reports graph that was
previously created with the Graph Assistant graph tool.
-
In a Standard Reports folder, right-click
a graph created with Graph Assistant.
The right-click pop-up menu opens, as shown in the following
image.
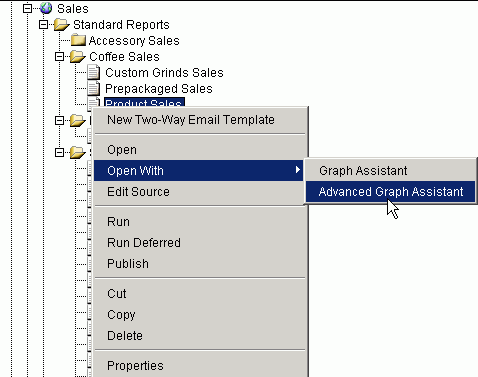
-
Select Open
With, then select Advanced Graph Assistant from
the pop-up menu that appears to the right.