In this section: |
Normally, a Web server returns an entire report to a browser. The browser waits until it receives all of the report before displaying it.
On-demand paging allows you to download one page of a report to a browser instead of the entire report. The Web server holds the remaining pages until the user requests them. This feature shortens the time the user waits to see the first page of a report. It is especially effective for long reports.
On-demand paging is implemented in the WebFOCUS Viewer. It requires that report output be formatted as HTML, which is the default setting for a request submitted through the WebFOCUS Client.
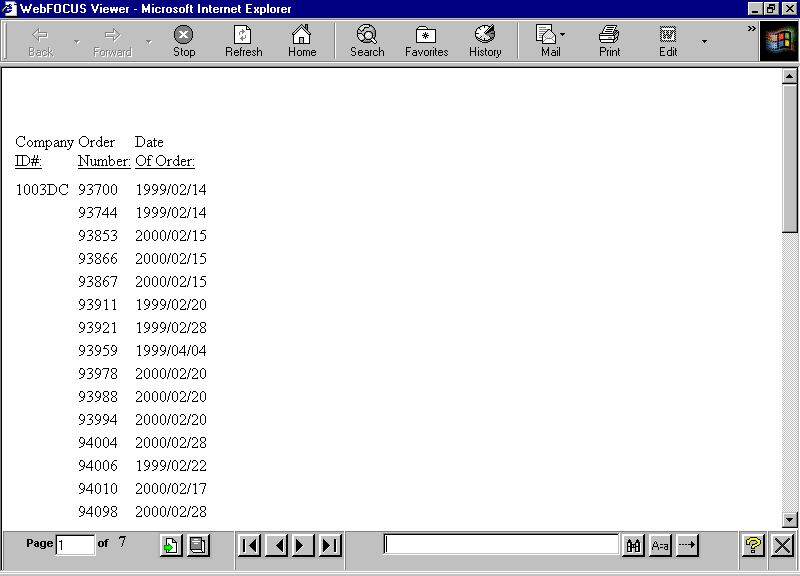
The following is a report displayed in the WebFOCUS Viewer.
How to: |
The WebFOCUS Viewer is a browser window divided into two frames:
The Report Frame is the larger upper frame that contains one page of output.
The Control Frame contains the controls used to navigate the report and to search for a string in the report. The navigational controls allow you to display the next or previous page, the first or last page, or a specific page.
SET WEBVIEWER = {OFF|ON}
ON TABLE SET WEBVIEWER {OFF|ON}
or
ON TABLE SET WEBVIEWER {OFF|ON}where:
Disables on-demand paging; WebFOCUS downloads the entire report to a standard browser window. OFF is the default value.
Enables on-demand paging. WebFOCUS downloads the first page of a report to the browser in the WebFOCUS Viewer. The number of lines displayed at one time depends on Windows desktop settings (resolution).
The procedure and launch page for this example are run in WebFOCUS. They must be tested and run in this environment.
Procedure:
SET WEBVIEWER=ON
TABLE FILE CENTORD
PRINT ORDER_NUM ORDER_DATE
BY STORE_CODE
WHERE STORE_CODE EQ '1003DC'
ON TABLE SET PAGE-NUM OFF
ON TABLE SET STYLE *
TYPE=REPORT, GRID=OFF,$
ENDSTYLE
END
How to: Reference: |
You can specify a target frame in which to open the WebFOCUS Viewer, and a home page that displays when you close the WebFOCUS Viewer.
SET WEBVIEWTARG = {target_frame|OFF}where:
Is the name of an existing frame in the browser or one of the following reserved HTML target frames:
_blank opens the WebFOCUS Viewer in a new browser window. This is the default for reports that do not have accessibility enabled.
_self opens the WebFOCUS Viewer in the same frame as the anchor.
_parent opens the WebFOCUS Viewer in the immediate parent frame that contains the anchor.
_top opens the WebFOCUS Viewer in the current browser window.
Opens the WebFOCUS Viewer in the frame from which you ran the report. This is the default for reports that have accessibility enabled.
Note: For more information on enabling accessibility, see ACCESSPDF.
SET WEBVIEWHOME = {home_URL|OFF}where:
Is a valid URL that displays an HTML page when you close the WebFOCUS Viewer.
Displays a blank browser window when you close the WebFOCUS Viewer. You must enter another URL to run another report. OFF is the default value.
The Close button, located on the Control Frame, closes the WebFOCUS Viewer and removes the report from the Web server. The page the browser displays next depends on the WEBVIEWTARG and the WEBVIEWHOME settings, as follows:
How to: |
You can issue commands that specify whether the WebFOCUS Viewer displays the All Pages, Help, and Close buttons.
The following image shows the WebFOCUS Viewer Control Bar:

The All Pages button is the second button to the right of the Page number information. The Help and Close buttons are the last two buttons.
SET WEBVIEWALLPG = {OFF|ON}or
ON TABLE SET WEBVIEWALLPG {OFF|ON}where:
Displays the All Pages button. ON is the default value.
Does not display the All Pages button.
SET WEBVIEWHELP = {OFF|ON}or
ON TABLE SET WEBVIEWHELP {OFF|ON}where:
Displays the Help button. ON is the default value.
Does not display the Help button.
How to: |
You must clear the browser cache before printing a report locally using the Print button on the browser toolbar. You must also activate the window by clicking it before using the Print button.
Use the procedure that applies to your browser to clear the cache.
How to: |
To enable the Goto Last Page button in the WebFOCUS Viewer with certain versions of Microsoft Internet Explorer, complete the following procedure.
The Settings dialog box opens.
| WebFOCUS |