-
In the
Schedules window, select the schedule you want to clone.
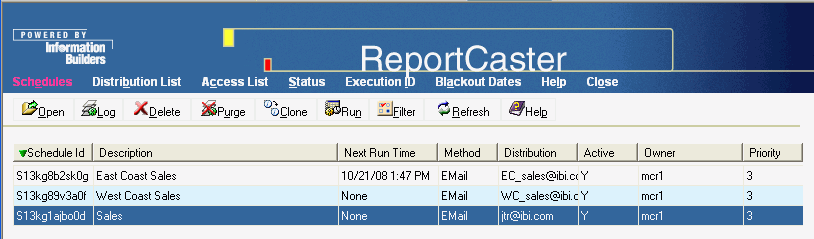
The following image shows the Sales schedule selected in the Schedules window.
-
Click Clone.
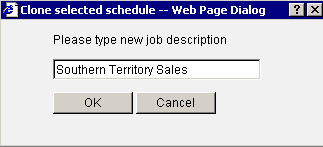
The following image shows the Clone selected schedule -- Web Page Dialog box that opens, prompting you to type a new description for the cloned schedule.
-
Type
a new schedule description (for example, Southern Territory Sales) and
click OK.
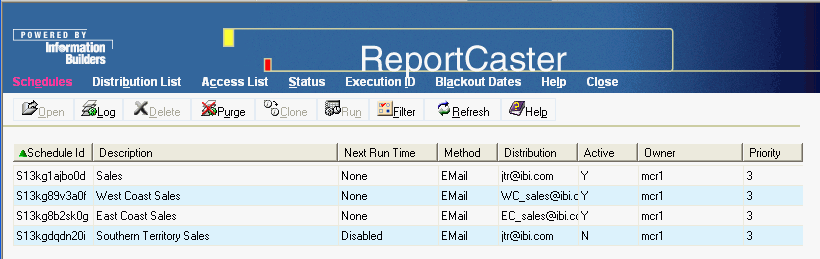
The following image shows the new cloned schedule in the Schedules window. Note that the cloned schedule is disabled by default, as specified in the Next Run Time column.
-
To enable
the schedule, perform the following steps:
-
Edit the schedule by clicking Open or
by double-clicking the schedule.
The Edit Schedule window opens, displaying the Schedule tab.
- Check the Enabled check box.
-
Make any other changes you want to the schedule and then click Save.
The Updated Schedule Successfully message appears.
- Click Close to return to the Schedules window in the ReportCaster HTML User Interface.
-
Click Refresh.
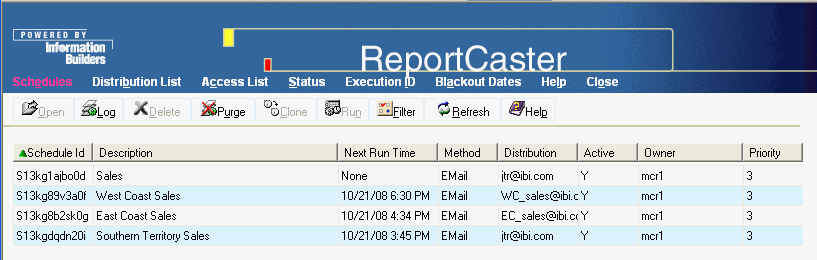
The following image shows that the Southern Territory Sales schedule is active in the Schedules window. If the only change you made was setting the schedule to enabled, it contains the same properties as the Sales schedule from which it was cloned.
-
Edit the schedule by clicking Open or
by double-clicking the schedule.