xSetting the Connection Properties
The first time you access the
ReportCaster Change Management interface, the Change Management Source Properties window opens and displays the target Repository
information, and blank fields related to the source Repository information.
Youmust provide
the source Repository information needed to make the connection
between the two Repositories.
Once this connection information is saved, you will always connect
to the repository designated in the source fields when you access
the Change Management interface. Once in the Change Management interface,
you can change the source connection information whenever you want
to connect to a different source repository.
x
Procedure: How to Set Connection Properties
Use the following procedure to set or change the connection
properties to the source ReportCaster
Repository.
-
If the Change
Management Source Properties window is not already open, click Source
Properties in the Change Management interface.
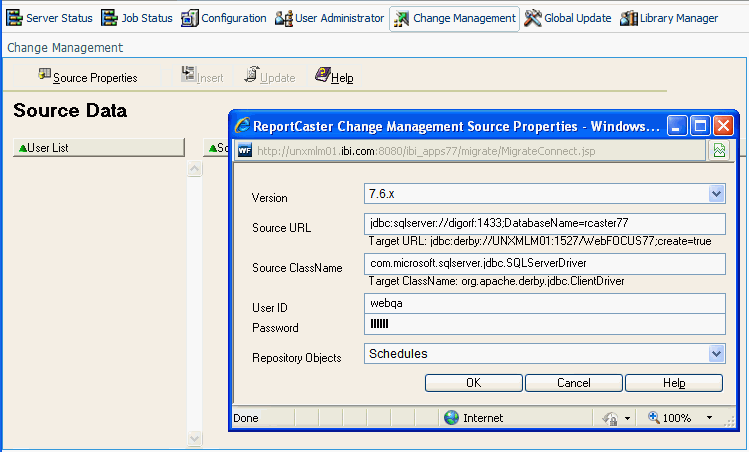
The ReportCaster
Change Management
Source Properties window automatically displays the target Repository information
and if previously saved, the source Repository information. The
following image is an example of the Source Properties window that
opens when using the Change Management interface for the first time
from the target environment.
Information about the ReportCaster Repository you are currently
logged into (Target URL and Target Class Name) automatically displays
in the Source Properties window. Once you save the source Repository
information (Source URL, Source Class Name, User ID, and Password)
you will enter in this procedure, that will also be displayed whenever
you open the Source Properties window.
-
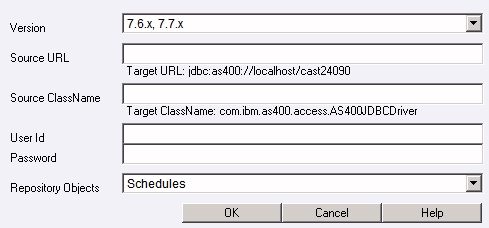
From the Version
drop-down list, select the release version of the source ReportCaster Repository data.
Note: Currently,
the only available release version is 7.6.x.
-
In the Source
URL field, type the URL to the source ReportCaster
Repository.
-
In the Source
ClassName field, type the name of the Java class to connect to the ReportCaster database.
-
Click OK.
The connection properties are saved and
you can now work in the Change Management interface.
xUsing the Change Management Interface
This section describes how to use the ReportCaster
Change Management
interface to transfer ReportCaster
data to another Repository.
The interface enables you to move only one type of repository object
for one user at a time.
x
Procedure: How to Move Data Between ReportCaster Environments
-
Log on to ReportCaster in the target environment
(the environment that will receive the data).
-
Access the Change Management interface from
the ReportCaster Administration Interface, by clicking the Change Management
tab as shown in the following image.
-
Click Source Properties to open the
Source Properties window, as shown in the following image.
-
Define the
Source Report Broker
ReportCaster Repository by clicking
the Source Properties button on the Change Management toolbar.
The Change
Management Source Properties window displays the information needed to
connect to the source ReportCaster
Repository.
When you access Change Management for the first time, you must set
the source Repository properties.
-
From the Repository Object drop-down
list, select the type of data you want to move. The selections are:
- Schedules
- Distribution Lists
- Access
Lists
-
Click OK.
The ReportCaster
interface displays
a list of users found in the source repository, as well as a series
of headings related to the type of Repository object you selected.
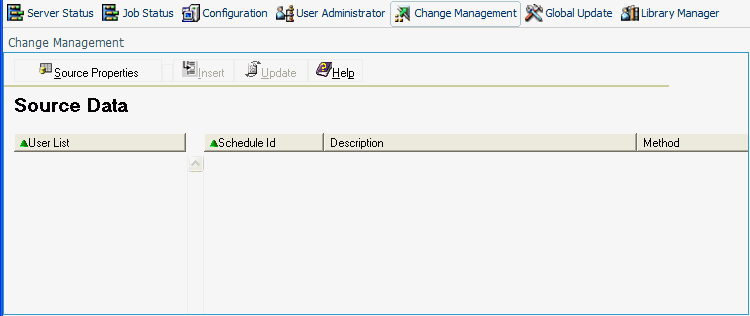
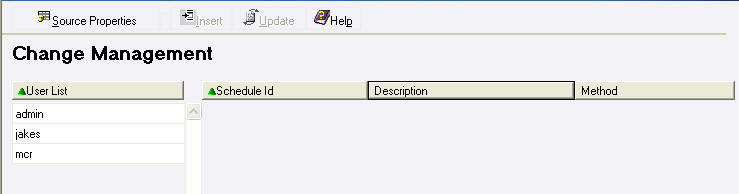
The following image shows
the Change Management interface when you select Schedules as the
Repository Object.
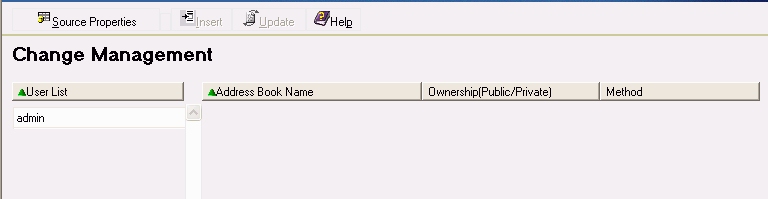
The
following image shows the Change Management interface when you select Distribution
Lists as the Repository Object.
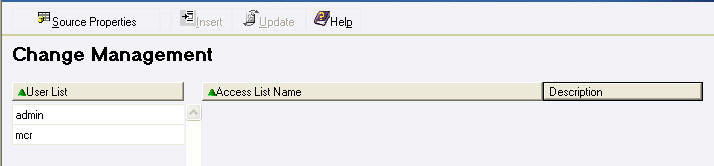
The following image shows the Change
Management interface when you select Access List as the Repository
Object.
-
In the left
pane, select a user whose repository data you want to move.
Note: You can
select only one user for each transfer of data.
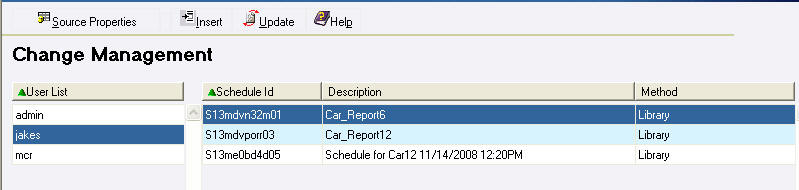
The right pane displays the related
repository objects owned by the selected user. The following image
is an example of a list of schedules for a specific user.
-
Select the
items you want to move to the target repository. (Select multiple
items using the Shift and Ctrl keys.)
-
Click one of the following:
-
Insert - to add the selected source records
to the target repository if that record does not already exists.
-
Update - to add the selected source records
to the target repository and overwrites any corresponding records
that exist in the target repository.
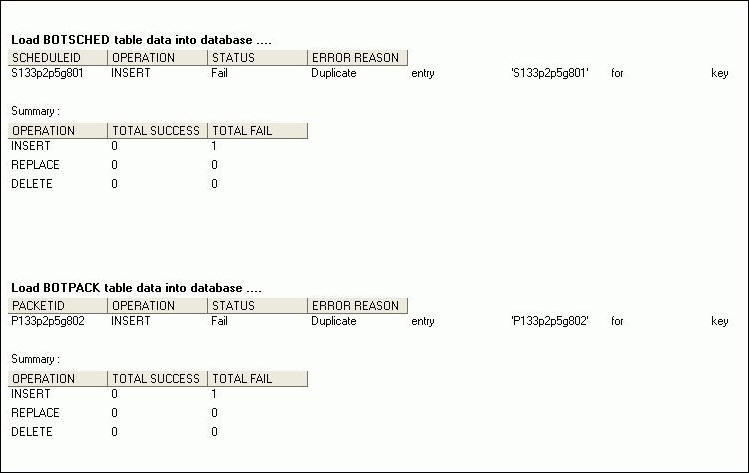
Note: Duplicate records cannot exist in the ReportCaster Repository.
A window opens and displays the status and summary of operations
on each repository table that was involved in the data transfer.
The information includes the operation (insert or update), whether
or not the operation was successful, and if it failed, a brief explanation.
This information is saved in a log file (changemgmt.log)
on the Distribution Server in ibi\WebFOCUS77\ReportCaster\log. A
new log is created each time you click Insert or Update,
so the latest log file is time stamped and renamed with a .bak file
extension.
-
If you want to save the log to a location other than the log
directory, select Save As from the File menu
in the browser window.
-
To continue
transferring the selected Repository object for another user, select
a user in the left pane. If you want to transfer a different Repository
object, click Source Properties in the Change
Management interface toolbar to open the Source Properties window,
and follow Steps 3 through
8.
x
Reference: Change Management Logs
This
section provides examples of the Change Management log files that indicate:
- A successful transfer
of ReportCaster data to the target Repository.
- An error in the transfer because the
data being transferred already exists in the target repository.
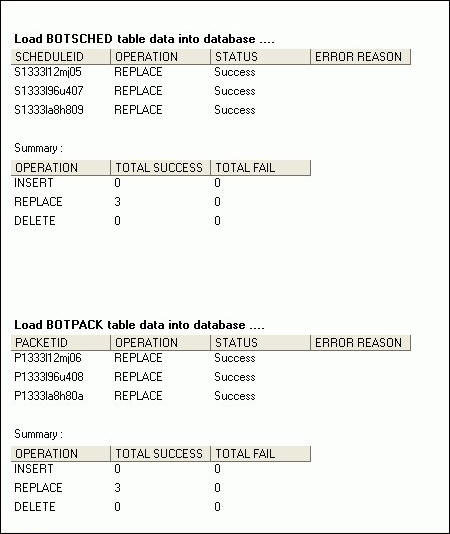
Example: Log of Successful Data Transfer
The following is an example of a log
file indicating a successful transfer of records. It provides details
for each repository table involved in the transfer.
Example: Log of Failed Data Transfer
The following is an example of a log
file indicating that a record already exists in the target Repository.