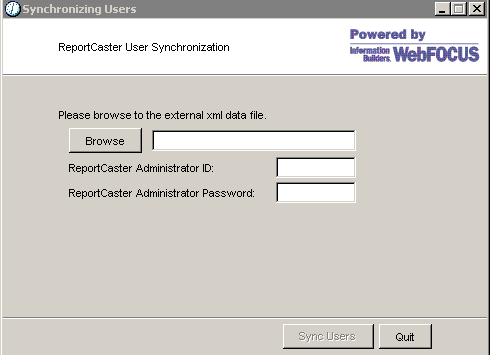
You may want to use the synchronize external users utility
in the following scenarios:
x
Reference: DTD for the XML Transaction File
The
XML data file must be created in the format described by the following
DTD:
<?xml version=\"1.0\" encoding=\"ISO-8859-1\"?>
<!-- DTD for DSTSynchronize input -->
<!DOCTYPE user_synch [
<!ELEMENT user_synch (notify?, (delete_user | delete_group |
remove_user_from_group | create_user | create_group |
add_user_to_group)*)>
<!ATTLIST user_synch function (complete | increment) \"increment\">
<!ATTLIST user_synch on_error (ignore | rollback) \"rollback\">
<!ELEMENT notify (mailhost, mailfrom, notify_email+)+>
<!ELEMENT delete_user (user_name?)>
<!ELEMENT delete_group (group_name?)>
<!ELEMENT remove_user_from_group (user_name?, group_name?)>
<!ELEMENT create_user (user_name, user_description?, user_pass?,
user_email, user_status?, user_role, user_capability*)>
<!ELEMENT create_group (group_name, group_description?)>
<!ELEMENT add_user_to_group (user_name, group_name)>
<!ELEMENT user_name (#PCDATA)>
<!ELEMENT user_description (#PCDATA)>
<!ELEMENT user_pass (#PCDATA)>
<!ELEMENT user_email (#PCDATA)>
<!ELEMENT user_status (#PCDATA)>
<!ELEMENT user_role (#PCDATA)>
<!ELEMENT user_capability (#PCDATA)>
<!ELEMENT group_name (#PCDATA)>
<!ELEMENT group_description (#PCDATA)>
 ]>
Example: Creating the XML Transaction File
When
loading the ReportCaster user IDs, the XML transaction file should
contain create_user, create_group, and add_user_to_group tags. Use
a text editor (for example, Notepad) to create the XML file. The
following sample XML file creates two user IDs and two groups, and
adds the user IDs to the groups. The passwords for the user IDs
are left blank since password validation will be handled externally.
<?xml version="1.0" encoding="UTF-8"?>
 <user_synch>
  <create_user>
   <user_name>admin</user_name>
   <user_description>Administrator - Default</user_description>
   <user_pass></user_pass>
   <user_email></user_email>
   <user_role>admin</user_role>
   <user_capability>library</user_capability>
   <user_capability>schedule</user_capability>
  </create_user>
  <create_user>
    <user_name>webgts</user_name>
    <user_description>webgts-for trusted</user_description>
    <user_pass></user_pass>
    <user_email></user_email>
    <user_role>user</user_role>
    <user_capability>schedule</user_capability>
  </create_user>
  <create_group>
    <group_name>EndUsers</group_name>
    <group_description>Authorized Caster Users</group_description>
  </create_group>
  <create_group>
    <group_name>Administrators</group_name>
    <group_description>Authorized Administrators</group_description>
  </create_group>
    <add_user_to_group>
    <user_name>admin</user_name>
    <group_name>Administrators</group_name>
    </add_user_to_group>
    <add_user_to_group>
    <user_name>webgts</user_name>
    <group_name>EndUsers</group_name>
    </add_user_to_group>
 </user_synch>
x
Procedure: How to Run the Synchronize External Users Utility on UNIX and z/OS
-
Start
the ReportCaster Distribution Server.
-
Go to
the WebFOCUS77/ReportCaster/bin directory.
-
Open the following file in a text editor:
/install_directory/ibi/WebFOCUS77/ReportCaster/bin/addextusers
It contains a script similar to the
following:
java -cp /install_directory/ibi/WebFOCUS77/ReportCaster/bin/SCHMigration.jar
ibi.broker.DSTSynchronize /install_directory/ibi/WebFOCUS77/ReportCaster/user.xml admin "" hostname:port
-
Adjust this script to point to the
file you created while following the information provided in the
example in How to Use the Synchronize External Users Utility rather than
the following file:
/install_directory/ibi/WebFOCUS77/ReportCaster/user.xml
-
If you
set a password for the default ReportCaster administrator, replace
the ““ with the password.
-
If you
change any other defaults, substitute accordingly.
-
Save
your changes and exit the file.
-
Execute the file:
./addextusers
Note: Since
this file contains the default password for the ReportCaster administrator,
it should be kept secure. You may want to change permissions to
700.
Example: Running the Synchronize External Users Utility
When you successfully run the synchronize
external users utility, you should receive a message similar to
the following:

The
ReportCaster user IDs are added to the ReportCaster Repository.