-
Install
AquaLogic Interaction JSR-168 Container on the same machine
where your BEA AquaLogic Portal Server is installed.
Note: Information Builders does not provide
this container. You must acquire this container from BEA.
-
Explode
opspt.war files located in
\ibi\WebFOCUS77\worp\components\ops\aqualogic
to a temporary directory, for example c:\aqualogic.
-
Copy
the files under
aqualogic\ptjsr168\1.0\devkit\WEB-INF\lib
to
c:\aqualogic\WEB-INF\lib
-
Because
of a known issue in AquaLogic Interaction JSR-168 Container, you
must hard code all necessary portlet values inside the portlet.xml
file, which is located in
c:\opspt\WEB-INF
-
Open
the portlet.xml file and make the following changes for each portlet
<preference>
    <name>trustedkey</name>
    <value></value>
    <read-only>false</read-only>
</preference>
to
<preference>
    <name>trustedkey</name>
    <value>1169656392736</value>
    <read-only>false</read-only>
</preference>
Note: The trusted
key value is found in the cgivars.wfs file, located in the following
directory of the machine where WebFOCUS is installed:
\ibi\WebFOCUS77\client\wfc\etc
Search the cgivars.wfs file for the IBIMR_TRUSTED_KEY
parameter. The value is the trusted key.
-
If necessary, modify the default context path from ibi_apps to the
new context path. For example:
<preference>
   <name>contextpath</name>
   <value>/ibi_apps</value>
   <read-only>false</read-only>
</preference>
-
Rewar
your changes and name your new .WAR file opspt.war.
-
Deploy
this .WAR file to the same application server where your BEA AquaLogic
Portal is installed.
-
Logon
to the BEA AquaLogic Portal Server as an administrator.
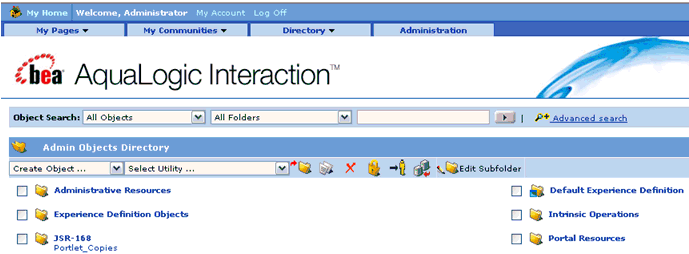
The AquaLogic Interaction console opens,
as shown in the following image.
-
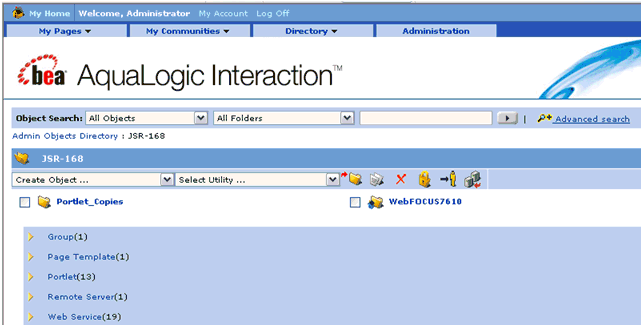
Select
the JSR-168 folder.
The contents of the folder are displayed, as shown
in the following image.
-
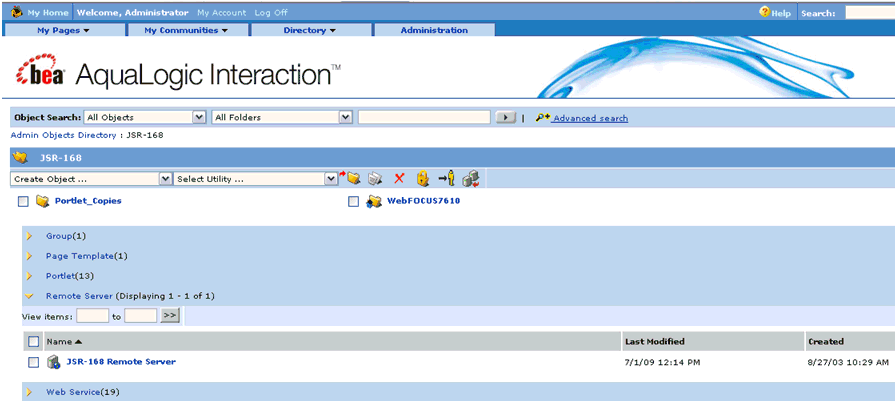
Click
Remote Server.
The following pane opens.
-
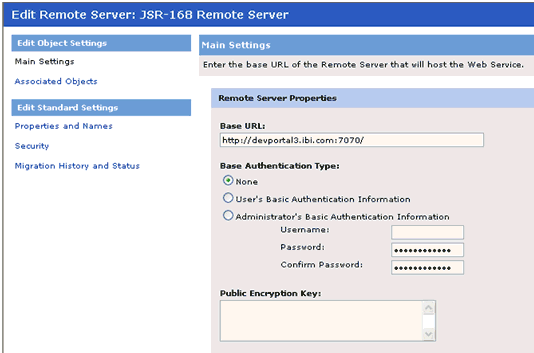
Select
JSR-168 Remote Server.
The Remote Server Properties pane opens.
-
Verify
the Remote Server authentication information of the server where
your BEA AquaLogic Portal is installed.
-
Return
to the previous pane, and select Web Services
- Remote Portlet from the Create Object drop-down list.

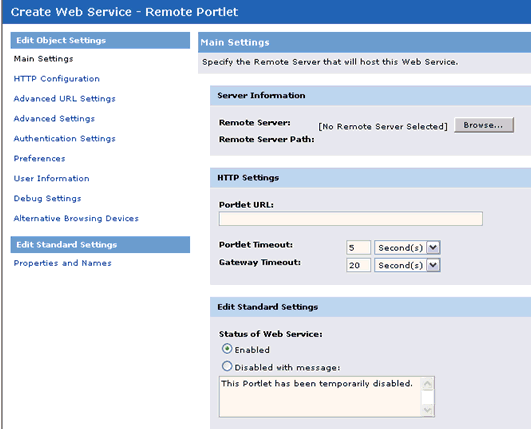
The Create Web Service - Remote Portlet pane
opens.
-
In the
Server Information section, click Browse next
to the Remote Server field.
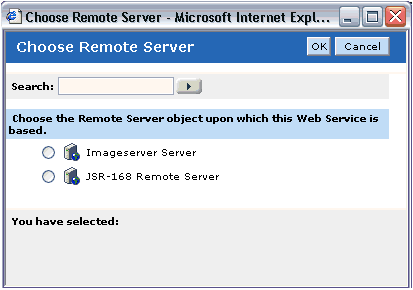
The Choose Remote Server dialog box opens.
-
Select
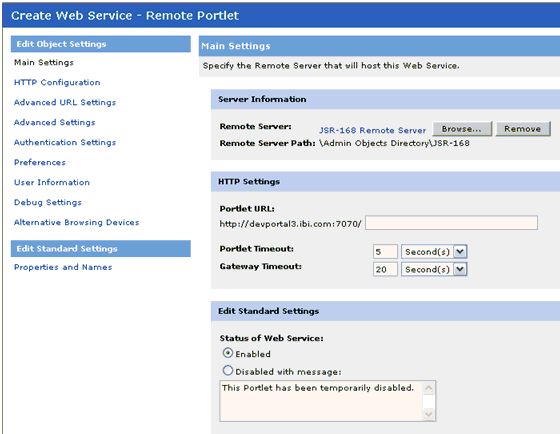
JSR-168 Remote Server from the
list of available objects and click OK.
You are returned to the Create Web Service
- Remote Portlet pane.
-
In the
HTTP Settings section, enter the following URL in the Portlet
URL field:
opspt/portlet/name_of_portlet/mode/view
where:
- name_of_portlet
-
Is the name of the Portlet you are deploying,
such as Domain, DeferStatus, Favorites, Quicklinks, Report or
Output. For example:
opspt/portlet/Domain/mode/view
-
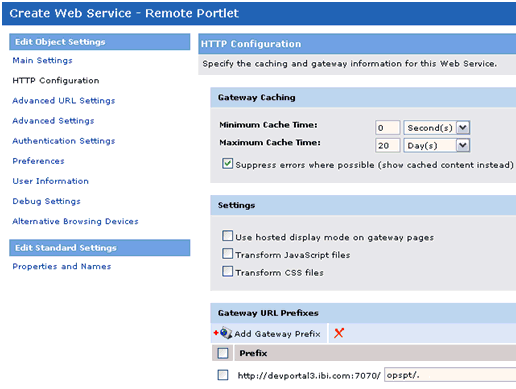
Click
HTTP Configuration from the
Edit Object Settings list in the left pane.
-
Add
the following prefix in the Gateway URL Prefixes section:
opspt/
-
Click
Finish.
The Save Object dialog box for the new Web Service
opens.
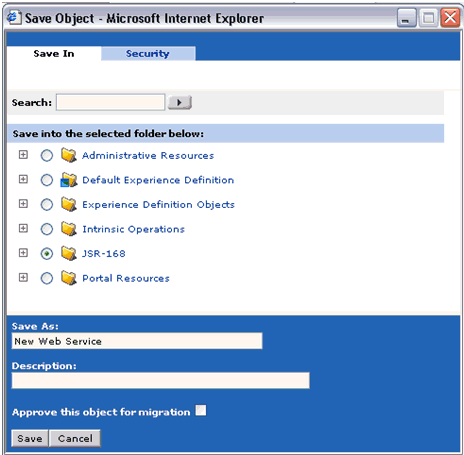
Perform the following steps:
-
Select the folder where you want to save the Web Service,
for example, JSR-168.
The most recently used folder is automatically
selected.
-
Provide a name for the Web Service in the Save As field,
for example, Domainsrv.
-
Provide a brief description (optional).
-
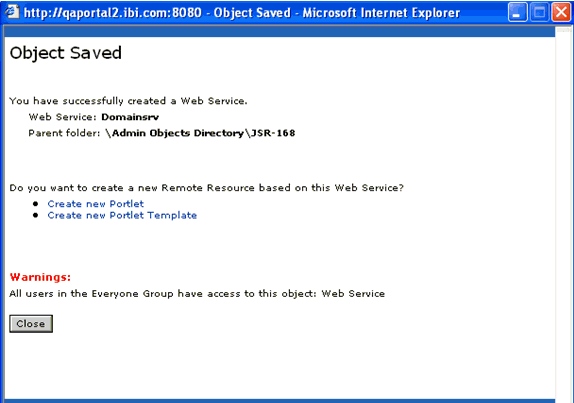
Click
Save.
The Object Saved dialog box opens, as shown
in the following image.
-
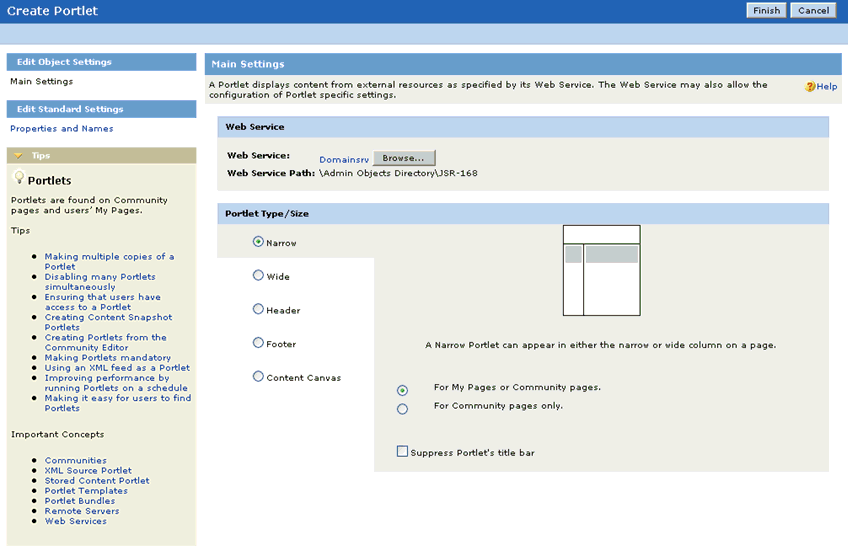
Click
Create new Portlet.
The Create Portlet pane opens.
-
Click
Finish.
The Save Object dialog box for the portlet
opens.
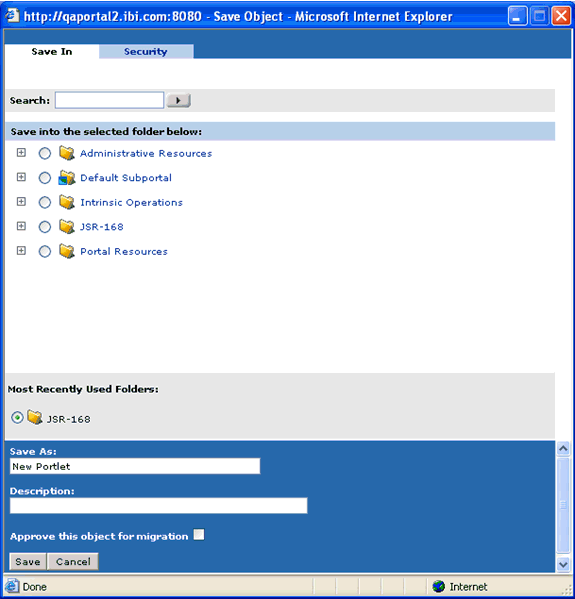
Perform
the following steps:
-
Select the folder where you want to save the portlet,
for example, JSR-168.
The most recently used folder is automatically
selected.
-
Provide a name for the portlet in the Save As field,
for example, WFDomain.
-
Provide a brief description (optional).
-
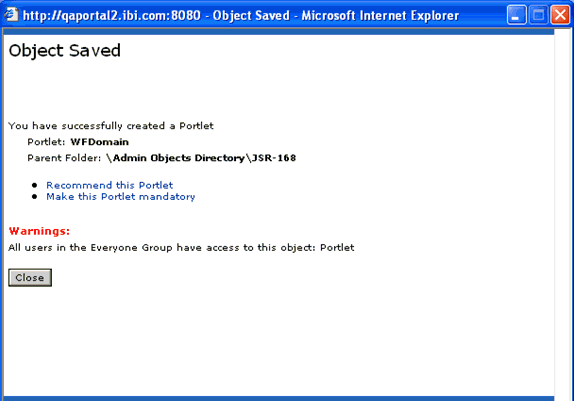
Click
Save.
The Object Saved dialog box opens, as shown
in the following image.
-
Click
Close.
The new portlet is now included in the list
of available portlets for the BEA AquaLogic Portal.

-
Repeat
steps 18 to 31 for each WebFOCUS portlet you want to configure.
For more information on adding these portlets
to the portal page or BEA AquaLogic Portal community, see your BEA
AquaLogic Portal Server documentation.


