You can create Dashboard content pages that contain
content blocks, and the ReportCaster, Report Library, Watch List,
and Deferred Status user interfaces. Accessing the ReportCaster,
Report Library, Watch List, or Deferred Status interface from its
own Dashboard content page is different than accessing the interface
from banner hyperlinks, which open a new browser window when the
hyperlink is clicked.
You can add content pages for
the ReportCaster, Report Library, Watch List, and Deferred Status
interfaces to a Public view for authenticated users. When authenticated users
inherit the Public View as their My View, they will see the content
pages. These content pages are hidden from Public Users.
Content pages appear as tabs that display the name of the content
page across the top of the content area. Content pages can be viewed
by clicking the appropriate tab.
Using content pages enables you to:
- Expand the
amount of space you have to display content in Dashboard.
- Organize Dashboard
content.
- Keep the default
view created by the Dashboard Administrator and create your own personalized
content pages.
Content pages are optional. If you have only one content page,
tabs do not appear in the actual Dashboard view when you add content
blocks.
You can create a content page and add a report to it through
the Personalize menu, or through the Publish option in Standard
Reports and My Reports drop-down menus, as explained in Publishing Reports to Content Pages in Dashboard.
Users can create any number of content pages and design the page
layout. Administrators can also customize the color of content page
tabs (background and text color). For details, see Selecting Content Layout
and
Customizing Dashboard.
When creating content pages, note that:
- You can rearrange
the order of the pages using the Move Left, Move Right, and Set
Default buttons in the Content window. The Set Default button promotes
the current page to the first page.
- Only one output
block is allowed per page.
- When Dashboard
opens, only the reports on the current content page are executed. All
other reports are executed when you click the respective content
page tab.
- Reports on
content pages do not automatically refresh when tabbing from one
page to another. To refresh a report, click the Refresh button
in the toolbar for that report.
x
Procedure: How to Create Content Pages
-
Select the Personalize link in the banner,
then select Content from the submenu that appears.
The Content window opens.
-
From
the Content window, click:
-
Add
Page to add a page that contains content blocks.
-
Add
Library Page to add a page that contains the Report
Library user interface. You can also add the Watch List interface
after adding a library page.
-
Add
Schedules Page to add a page that contains the ReportCaster
user interface.
-
Add
Deferred Status Page to add a page that contains the
Deferred Status user interface.
Note: When creating a Public View,
the Add Library, Schedules, and Deferred Status buttons are available.
However, these pages are not displayed on the Public page if they
are included in the Public View. They will show for any user who inherits
the Public view as their My View when they log in to Dashboard.
Additionally, users who do
not have access to ReportCaster or Report Library will not be able
to view the Library or Schedule pages. The Library Page will display
in Public Views if the Public User has been given Library privileges.
-
Enter
the tab name in the Page Description text box.
-
Click Update.
When a
page is added, it is added as the last page. You can rearrange the order
of the content pages using the Move Left, Move Right, or Set Default
buttons. The Set Default button promotes the current page to the
first page.
Note: When creating a content page, wait
until all page items appear before using the buttons on the page.
If an error occurs due to premature use of the buttons, refresh
the page using your browser Refresh button.
xPublishing Reports to Content Pages in Dashboard
The Publish option provides
a single-step method to add a report to a launch block within a
content page in Dashboard. This option is available to users with
the ability to personalize the view.
The Publish option is only available for Standard Reports and
My Reports when you right-click a report in the Dashboard Domain
Tree or from any of the following Dashboard items:
- Favorites list
- Recents list
- Floating Domain Tree
- Domain Search results
Note: The Publish option is also available from a saved
Standard Report or My Report opened in InfoAssist. For details on
using InfoAssist, see the WebFOCUS InfoAssist User's Manual.
To publish a report to a content page in Dashboard, right-click
the Standard Report or My Report and select Publish.
The content page and content block appear immediately in Dashboard.
You can edit or delete the content block as you would any other
content block.
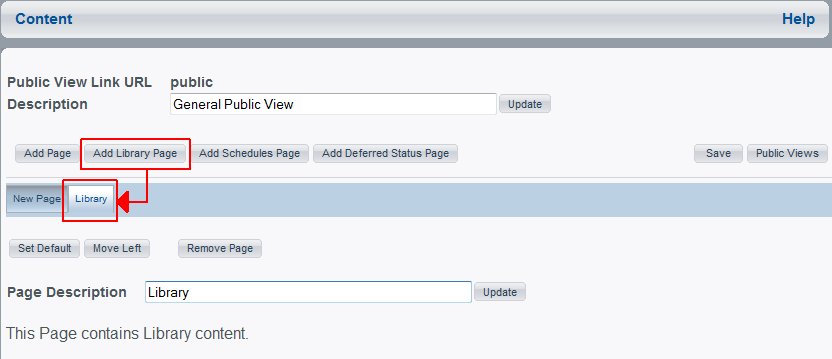
xCreating Library Content for a Public View
When creating content for a public view, the Administrator can
add a Library page to the View. Clicking the Add Library
Page button in the View Builder adds the Library tab,
as shown in the following image.
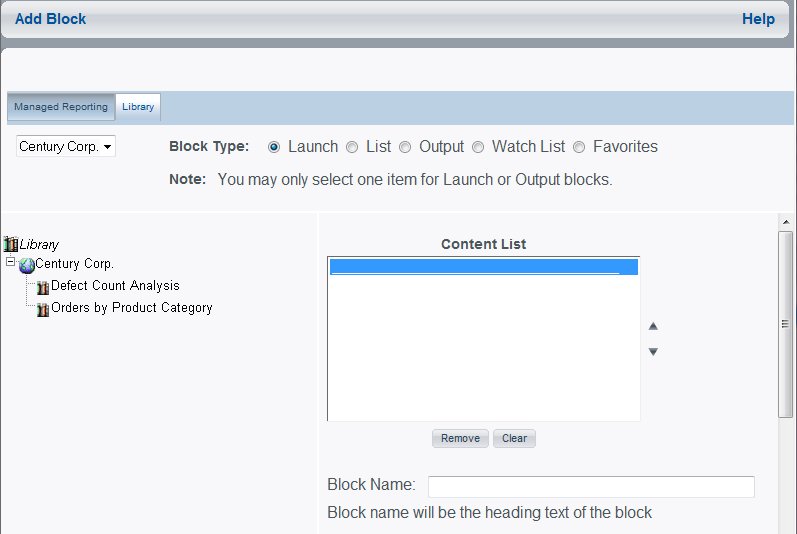
When adding a content block, the Administrator can select content
from the Library to be placed in a launch, list, output, or watch
list block. An additional tab, labeled Library, is available when
adding or editing a content block that allows the Administrator
to view Library content available to the public user and select
it to be added to a public view.
The following image shows the Library tab (in the Add Block window)
that provides access to Library content.