Procedure: How to Create a Title for the Dashboard
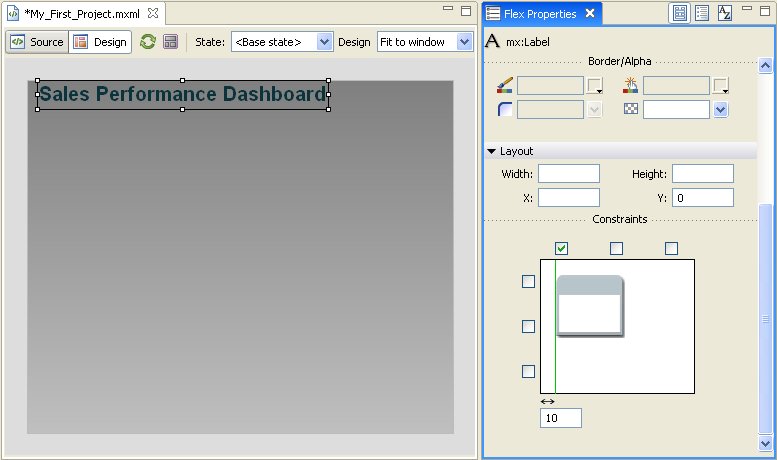
- Select the Label control in Flex Builder and add it to the canvas in the top-left corner.
-
Enter the
title of the dashboard, either directly in the Label bounding box or
on the Properties pane.
In this example, the title is Sales Performance Dashboard.
Tip: When you enter a value for a property on the Properties pane, you do not need to enclose it in double quotation marks. WebFOCUS Enable supplies the quotation marks for you. In the MXML code, a property value must be enclosed in double quotation marks.
- On the Properties pane, adjust the font, size, and other properties as desired.
- Constrain the Label box so that it always appears to the left of the browser window.
-
Set the
left margin to 10. Later you will add a logo
and set its right margin to 10, so that the left and right margins
are the same in the banner section.
Now you are ready to work with Information Builders custom components.