In this section: |
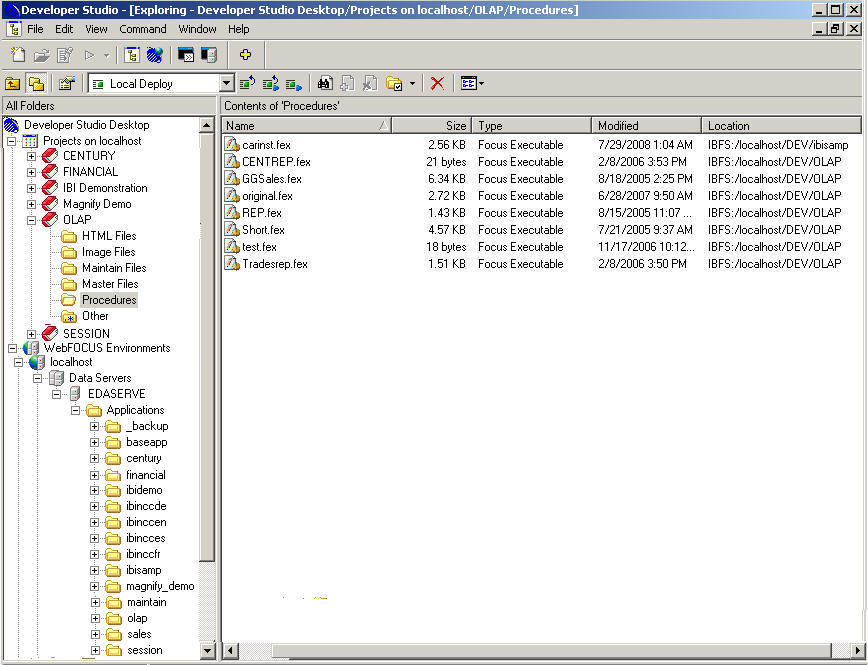
To start Developer Studio, select WebFOCUS Developer Studio from the program group Information Builders. The Developer Studio Explorer opens. In this example, the nodes on the left are expanded to illustrate folders in the working environment.
The Developer Studio Exploreris based on the familiar Microsoft Windows Explorer tree structure and provides access to development tools to quickly build and deploy Web-based reporting applications. In addition, you can use the Maintain features to allow updating of your data.
If the main Explorer window has been closed, you can reopen it
by clicking the New Explorer  button
on the main toolbar.
button
on the main toolbar.
When the Developer Studio Explorer opens, note the following installation-based variations:
When you start Developer Studio, it attempts to start the Internet Information Services (IIS) Web server by default if you have performed a full installation for stand-alone development.
If you do not want the IIS Web server to start automatically when you launch Developer Studio, you can uncheck the Start local Web server option in the Developer Studio Options dialog box. Even if this option is not unchecked, you can use other Web servers (such as Apache, WebSphere, and so on) for stand-alone development.
If you are using a non-IIS Web server, please ensure that you have started and configured it according to instructions in the WebFOCUS Developer Studio Installation and Configuration manual. If you have multiple Web servers set up on the same machine, please ensure that they use different ports or that only the required server is running.
The Developer Studio Explorer displays two top-level folders by default, Projects on localhost and WebFOCUS Environments.
An optional top-level Windows Desktop folder can be displayed to provide access to local and network drives. From the Explorer Window menu in the main toolbar, select Options, and then Show Desktop on Explorer tree in the Explorer tab of the dialog box.
For more information about sample applications, see Using Demonstration Applications in Developer Studio.
You can create a new project by right-clicking the Projects folder and selecting New Project. For each of the project virtual subdirectories, you can create a new resource by right-clicking the folder and choosing New. For more information, press the F1 key to access the help system.
By default, the Projects area shows projects on the localhost. However, you can manage projects on remote environments if you define WebFOCUS environments as explained below.
The project files are stored in a subdirectory located under the Application Root directory (APPROOT). A directory containing project files is distinguished from other directories under APPROOT by the existence of a .gfa (graphical FOCUS application) file. When you create a project, a .gfa file and a directory are created to store the project files. Files are grouped into virtual folders (HTML Files, Procedures, and others). These virtual folders only appear in the Developer Studio Explorer and only directories that contain a .gfa file appear under the Projects folder. Virtual folders are created by the Developer Studio interface to organize files of the same type and can be customized by the developers.
Note: The case of file names entered by a developer is preserved and Developer Studio does not enforce any case-sensitivity rule upon any files received or sent from or to a Reporting Server or Web Server. Developer Studio projects (.gfa) are always case-insensitive, but its cross-platform functionality relies on information stored in lowercase and it is the developers responsibility to be consistent with the way a particular Reporting Server handles files on UNIX platforms. For example, when performing remote Project development against UNIX environments, developers must ensure that file names are created in lowercase and that the appropriate lowercase is also used when referencing files using the INCLUDE command. While working in the Data Servers area, by default, the Reporting Server will enforce lowercase of files and directories that are created in this area.
Managed Reporting development and administration through Developer Studio is only available to those designated as administrators and developers within Managed Reporting.
After adding WebFOCUS environments, you can browse and manage their contents.
For details about the three sub-areas located under WebFOCUS Environments, see WebFOCUS Environments in Developer Studio .
When you use either the Projects folder or the WebFOCUS Environments folder to access a secure server or a secure environment, a logon box displays, prompting you for an ID and password. Note that a dialog box may appear for connection to the Web/Application server, Reporting server, Managed Reporting, or WebFOCUS Client depending on the security implemented in the WebFOCUS environment that is being accessed. In the example image below, a dialog box prompts you for logon to the Managed Reporting environment.
Note: If the local or remote configuration of the Web/Application Server is not correct and Developer Studio fails to connect to the WebFOCUS Client, a logon dialog box will be presented. This occurs even if there is no security setup for the WebFOCUS Client. Select Cancel from the logon dialog box and correct the WebFOCUS Client configuration before attempting to connect again.
There is a check box option on the logon dialog box for remembering the ID or password. By default, it is not checked. If you check this box, your credentials will be stored and encrypted in the wfscom.xml file, the local configuration file that stores information processed by the Developer Studio communication layer. To view, clear the credentials stored, open the WebFOCUS Environment Properties dialog for the environment that is used for development.
For details about the wfscom.xml file, see Working With Environment Properties. If you decide to change the stored credentials later, you can do so from the WebFOCUS Environment Properties dialog box. For details, see Managed Reporting/ReportCaster Properties.
The WebFOCUS Environments area contains sub-areas for the Data Servers, Managed Reporting, and Web Applications environments.

The WebFOCUS Reporting Server uses the APPROOT setting to locate files used in development. Any directory located under APPROOT appears under the Data Servers Applications folder.
The Data Servers folder is a physical view. All files in this location are displayed. The WebFOCUS Reporting Servers Application Root directory is used to store server-based files, such as procedures and metadata. You can only edit and run files processed or used by the Reporting Server (such as .fex, .mas, .acx, .gif, .htm, .html, and .sty files).
For more information, see the WebFOCUS Managed Reporting Developer Manual.
Note:
The cgivars.wfs file contains the APPROOT variable for the WebFOCUS Application Root directories. Typically these files include HTML pages, graphic images, Cascading Style Sheets, and JavaScript files.
The cgivars.wfs file is located in:
|
Type of Installation |
Location of cgivars.wfs |
|---|---|
|
Developer Studio with localhost (full installation) |
install_drive:\ibi\DevStudio77\client\wfc\etc |
|
WebFOCUS |
install_drive:\ibi\WebFOCUS77\client\wfc\etc |
The edaserve.cfg file contains the APPROOT variable for the WebFOCUS Reporting Servers Application Root directory. Typically these files include procedures, WebFOCUS StyleSheets, and customized HTML pages that require processing on the Reporting Server.
The edaserve.cfg file is located in:
|
Type of Installation |
Location of edaserve.cfg |
|---|---|
|
Developer Studio with localhost (full installation) |
install_drive:\ibi\DevStudio77\srv77\wfs\bin |
|
WebFOCUS |
install_drive:\ibi\srv77\wfs\bin |
Note: The Managed Reporting area is not visible if WebFOCUS Managed Reporting is not installed. This is for Developer Studio only installations.
Beginning in Version 7 Release 1, CGI and ISAPI are not supported for development. For Managed Reporting, CGI and ISAPI are only supported for running existing Self-Service applications. For more details, see Technical Memo 4575: WebFOCUS Managed Reporting and CGI/ISAPI Requests.
For details, see the WebFOCUS Managed Reporting Administrator Manual.
For details, see the WebFOCUS Managed Reporting Administrator Manual.
Managed Reporting Administration and User Management capabilities are available only with the full Developer Studio edition.
Reference: |
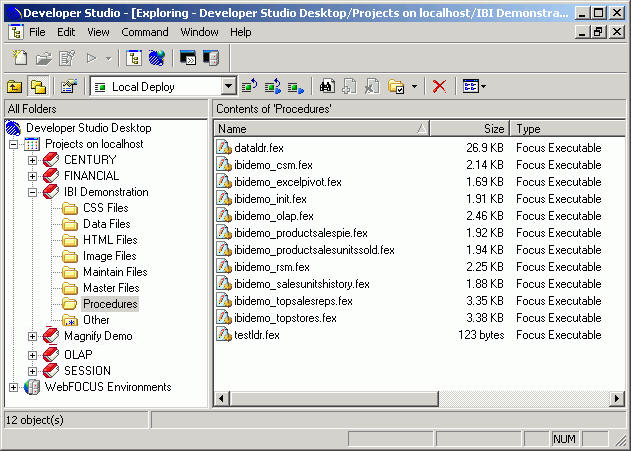
The IBI Demonstration Project is available as demonstration application in Developer Studio.
The IBI Demonstration project represents the types of Business Intelligence reporting applications that can be created with WebFOCUS. The demonstration is available and is installed by Developer Studio in a sample application called ibidemo (under install_dir:\ibi\apps\).
While using the Projects area of Developer Studio, a new project is created during the installation process called IBI Demonstration.
To run the application, open the HTML Files folder and run the file index.htm.
In the virtual folders of the project, HTML Files and Procedures, you will find all the procedures used by this demo application.
This application can also be accessed from the WebFOCUS home page (http://<machine name or ip address>/ibi_apps/) from a link called, Run Century Electronics WebFOCUS 7 Demo Application (http://<machine name or ip address>/approot/ibidemo/index.htm).
The following image is an example of the IBI Demonstration Project folder in Developer Studio.
The following image is an example of the ibidemo folder in the WebFOCUS Environments area of Developer Studio.
| WebFOCUS |