Adding Virtual Columns (DEFINE) in a Synonym
You may create a DEFINE field as a custom field in the
Synonym Editor. A custom field can be used in a request as though
it is a real data source field. Virtual columns (DEFINE fields)
are available when the data source is used for reporting.
A virtual column can contain an expression, a constant, or a
column name.
- If the virtual
column is a complex expression, you can create the expression with
the Virtual Column Calculator or just type it into the Expression
field.
- If the virtual
column is a simple expression, such as a constant value, you can
type the value in the Expression field.
Virtual columns are designated by the following icon:

After creating a virtual column, you can test it by right-clicking
the synonym and selecting Sample Data. Sample
data appears in a separate dialog box.
x
Procedure: How to Create a Virtual Column in a Synonym
To create a virtual column in a synonym:
-
From
the Projects or Data Servers area,
open a synonym by double-clicking a Master File from the Master
Files folder.
The Synonym Editor opens.
-
Right-click
a segment (or column) and click Add.
-
Select Virtual
Column from the Add submenu.
The Virtual Column Calculator opens.
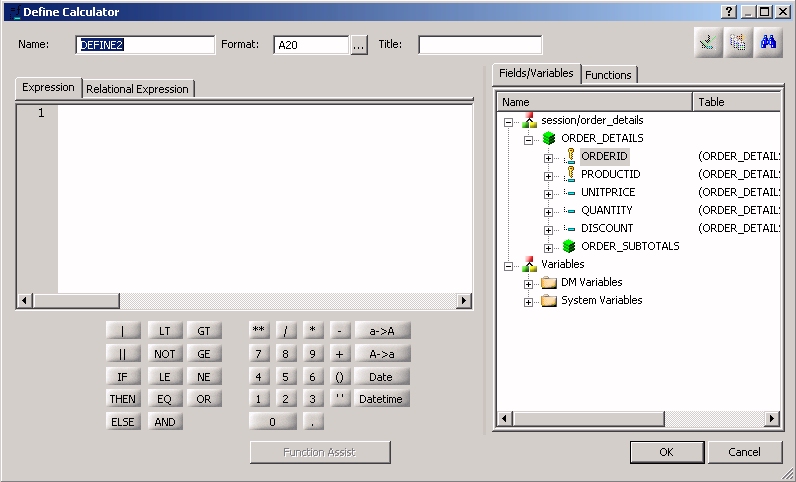
-
From
the Virtual Column Calculator, type a name for the column in the Column
input field, or use the default define name.
-
You may enter a descriptive title for
the virtual column (DEFINE) in the Title input field.
Tip: From the Synonym
Editor, click the browse (...) button at
the right of the TITLE and DESCRIPTION value fields to specify multiple
language titles.
-
Use
the Expression tab and the calculator buttons to build the expression
for the virtual column (DEFINE).
or
Use the Relational
Expression tab to build the expression.
-
From the Relational Expression tab, use the drop-down lists
to select the filter Column, Relation, and Type.
Note: Parameters
are not supported.
-
Click the browse (...) button at the
right of the Value input field.

The Value Selection dialog
box opens.
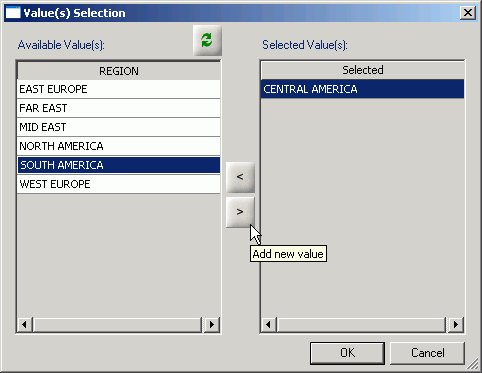
-
Select from the available values and use the arrows to add
or remove values.
-
Click OK to close the Value Selection dialog
box and return to the Relational Expression tab.
The expression is added to the value
field.
-
To add another filter, double-click a column or variable from
the Columns/Variables tab on the right side of the Virtual Column
Calculator.
The filter is added to the Relational Expression tab, where
you can add the expression value.
-
To delete an expression, click in the row number column of
the expression that you are deleting, right-click and select Delete
selected row(s). The expression is removed from the
Relational Expression tab.
-
You
may select the Check expression and Sample Data buttons, located
on the top right of the Virtual Column Calculator, to verify that
the expression is valid and to view sample data for the filter.
-
Click OK to
close the Virtual Column Calculator and return to the Synonym Editor.
Note: To edit the
Define, Title, or Expression, you may do so directly from the Synonym
Editor or you may click the browse (...) button
at the right of the EXPRESSION value field to relaunch the Virtual
Column Calculator.
-
If no
columns from the synonym are used in the expression or have been
defined, you can use the WITH option to identify the logical home
of the defined calculation. You can also use the WITH option to
move the logical home for the virtual column to a lower segment
than it would otherwise be assigned (for example, to count instances
in a lower segment).
Tip: You can click
and drag the DEFINE field and move it to a different segment in
the Segment and Field View tab, which also changes the segment association.
-
Specify
the Missing Data options for columns that allow null data. You can allow
all missing data.
-
Click Save from
the File menu to save the synonym.
-
To close
the Synonym Editor, select Close from the
File menu or click the control button in the upper-right corner.
For more information about expressions and virtual column
(DEFINE) attributes, see Defining Attributes and Creating Expressions for Custom Fields.