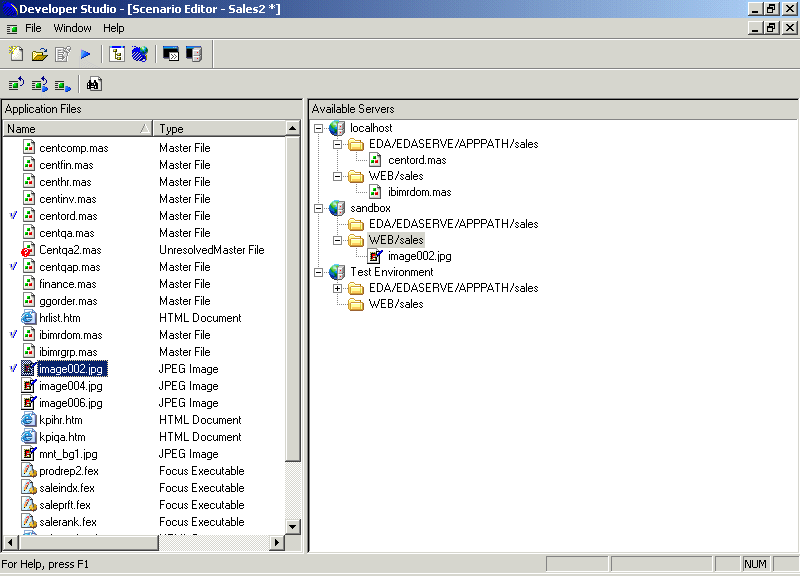
- Select the project. From the drop-down list on the toolbar, select the deployment scenario.
-
Right-click
the project. Select Deploy from the shortcut
menu. Then select:
- Deploy to move the files to the servers based on the partitioning defined in the deployment scenario.
- Deploy and Run to move the files to the servers and then run the starting object defined in the deployment scenario.
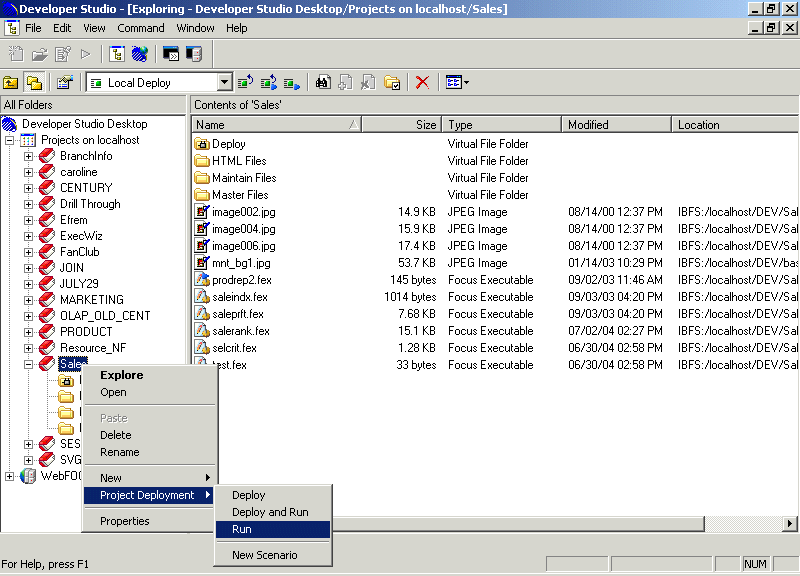
The option Run on the shortcut menu runs the starting object defined in the deployment scenario.
-
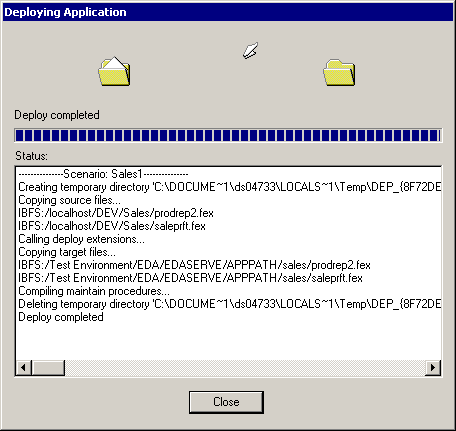
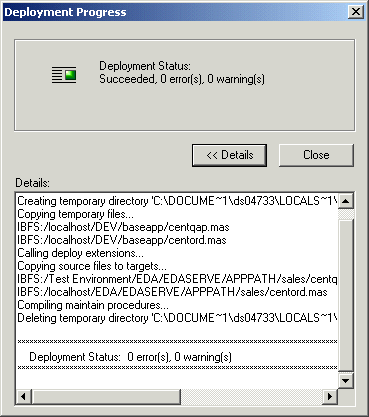
During
deployment, a dialog box tracks the status. You can click Cancel to
terminate the process.
The following image shows the Deployment Progress window detailing successful deployment of HTML files to the Web server and procedures to the WebFOCUS Reporting Server.
Tip: You can click the Details button if you do not want to view messages during the deployment process.
After deployment, the ACTION field indicates that one of the following occurred:
- Deployment Status: Succeeded, 0 warning(s), 0 error message(s).
- Deployment Status: Failed to complete. (The reasons for failure are shown, such as unresolved files, etc.)
- Deployment Status: Cancelled by user.
During the deployment process, the File field shows the names of objects as they are deployed to a server.
The progress bar indicates how much of the process is complete, as it takes place.
The Status field displays the events that took place in the deployment process.