You can control and limit projects (.GFA files) that are visible using Workspace files in the Projects area. Workspace files are created through Developer Studio and are stored on your PC. The Projects area is populated based on projects listed in the Workspace file. This is applicable when performing local or remote project-based development and enables you to organize your projects. In case of remote group development, you may view only your own projects. This enhances performance upon launching Developer Studio.
When using Workspace files, you may:
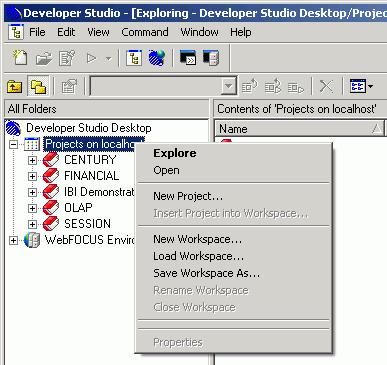
The following image is an example of the Workspace file options available from the context menu.
Note: You may also select these options from the File menu.
The New Workspace Wizard- Page 1 of 2 opens.
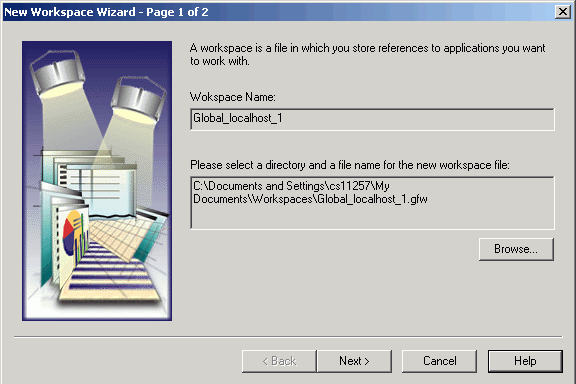
Note: The Workspace file has a .GFW extension.
Note: This step is optional. The default location for Workspace files is drive:\Documents and Settings\user_ID\My Documents\Workspaces\.
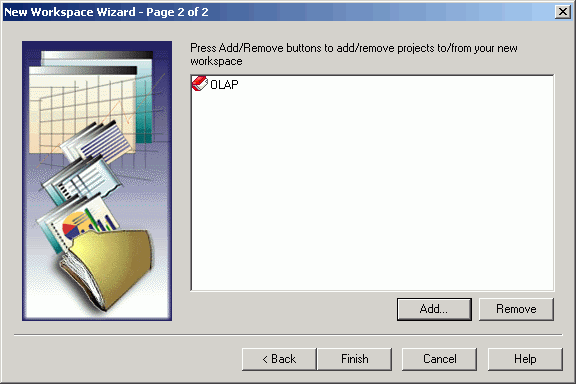
The New Workspace Wizard-Page 2 or 2 appears where you may add or remove projects to your workspace.
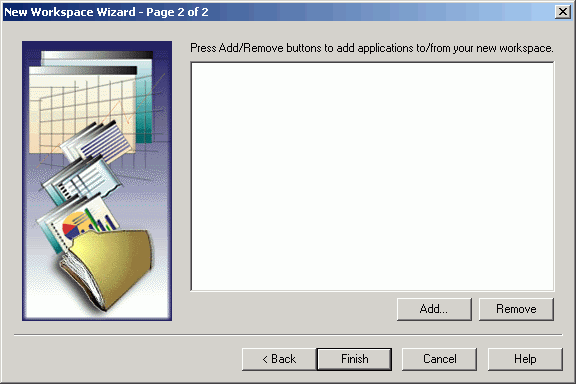
Note: You may add multiple projects.
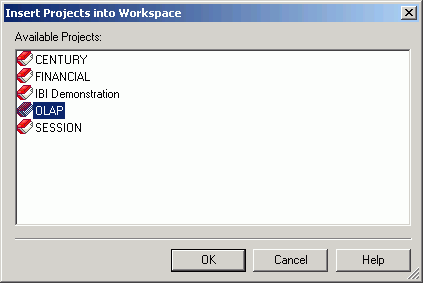
The project name is added to the New Workspace Wizard.
The Projects area refreshes, showing the selected Workspace file.
Note: New projects are added and created in the Workspace file.
Note: The Workspace file has a .GFW extension.
The Projects area shows the selected Workspace file by default.
The Projects area refreshes to its original view, where all projects are visible.
Note: The default location for Workspace files is drive:\Documents and Settings\user_ID\My Documents\Workspaces\.
The Projects area refreshes, showing the selected Workspace file.
Changing the environment is useful if the original environment description name was changed, or if you want to use a different environment that has the same projects.
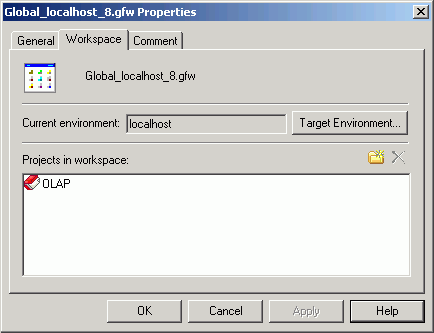
The Properties dialog box opens.
The target environment appears as the current environment for the Workspace file.
Note: If
the environment name changes and it does not contain projects that
exist in the Workspace file, the projects appear as unresolved  in the
Projects area.
in the
Projects area.
The Properties dialog box opens.
Note: You may also insert and remove projects from the Workspace file directly from the Projects area.
The Properties dialog box has the following fields/options:
Shows name, location, and other Workspace file information.
Shows the environment and projects assigned to the workspace. You can change projects assigned to the workspace and change the WebFOCUS environment.
Enables you to add comments for the Workspace file.
The project is removed from the Workspace file.
Note: You may also remove a project from the Workspace file by using the Workspace tab of the Properties dialog box.
Note: You may add multiple projects.
The Workspace File refreshes, showing the added project name.
Note: You may also insert a project into the Workspace file by using the Workspace tab of the Properties dialog box.
| WebFOCUS |