Using WebFOCUS Verification Tools
Administrators can test the following components of
WebFOCUS using the Verification tool on the Diagnostics menu of
the WebFOCUS Administration Console:
- WebFOCUS Client
- WebFOCUS Reporting
Server
-
ReportCaster Main Page
The Automatic option verifies all of the currently configured
components. The Selective option enables you to choose components
to test.
The verification process includes checking Web server aliases
and directory permissions for each type of client communication
mode (CGI, WFServlet, or ISAPI).
The Automatic Verification and WebFOCUS Client verification tools,
by default, place the verification logs in the ibi\WebFOCUS77\logs
directory. These tools test read, write, and remove permissions
for the logs directory. They also test read and write permissions
for the ibi\WebFOCUS77\config directory.
x
Procedure: How to Use Automatic Verification
-
Click Automatic on
the Verification menu.
This enables you to see your directory permissions and
test whether you can perform all the common WebFOCUS and WebFOCUS
client operations, such as creating and deleting applications, logging
on as the administrator, reading and writing from the standard directories,
creating and deleting domains, and creating and deleting reports.
-
Clicking Possibilities tells
you what the problem might be and possible solutions.
Note: If
you run this test (it is the Installation Verification Procedure) immediately
after performing the installation procedure, there might be a delay.
Check if the WWW Service has fully initialized before trying to
execute this procedure.
x
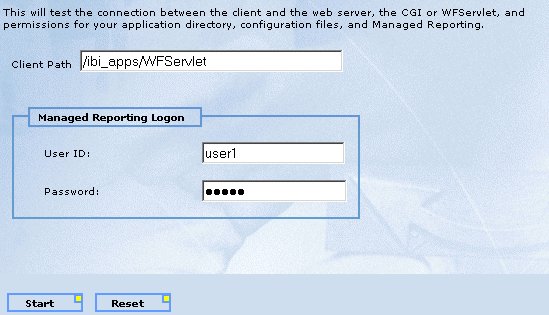
Procedure: How to Verify WebFOCUS Client Connections and Permissions
-
Click WebFOCUS
Client on the Verification menu to test the connection
between the client and the Web server and permissions for your application
directory, configuration files, and Managed Reporting.
When you click WebFOCUS Client and
if Managed Reporting is installed, the Managed Reporting logon section
displays in addition to the Client path you are using, either CGI/ISAPI
or servlet.
-
At this
point you can change the Client path to test alternate communication
methods and verify if they are available or configured properly.
-
If the
Managed Reporting logon screen displayed, enter your ID and password,
then click Start.
x
Procedure: How to Verify ReportCaster Settings
Click ReportCaster Main Page on the Verification
menu to open the ReportCaster home page.
This verifies
that resources in the rcaster Web application are accessible.
x
Procedure: How to Test the WebFOCUS Reporting Server
Click WebFOCUS
Reporting Server on the Verification menu to test the
connection between the client and the WebFOCUS Reporting Server.
It
shows your Client path and allows you to select a node (for example,
EDASERVE).
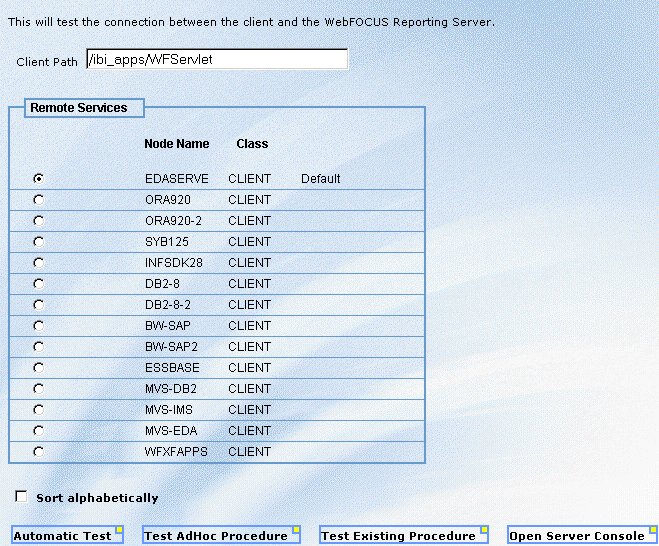
Note: You
can select the Sort alphabetically check box
to sort a list of multiple servers.
You can then test the
following areas:
-
Automatic Test. This
selection checks connections and checks to see if you can list applications
under the approot directory, if you can create and delete an application,
and if you can run stored procedures and ad hoc reports. When you
are finished, click Back to return to the
previous screen.
-
Test Ad Hoc Procedure. This
selection opens a window containing a default ad hoc procedure.
You can select to run an ad hoc table request or an ad hoc graph
request. Click Run to execute the procedure,
or you can edit the procedure first. The procedure can consist of
WebFOCUS or SQL commands. You can also change the Application path
(using APP PATH, not EDAPATH). You will be prompted for credentials
if the server is secure. When you are finished, click Back to
return to the previous screen.
-
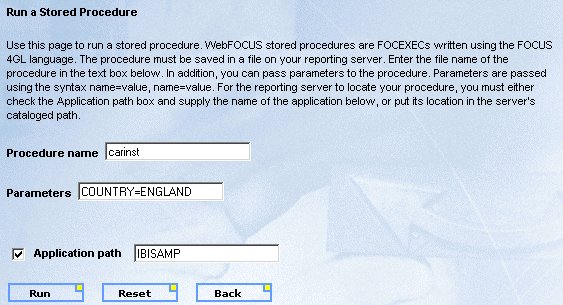
Test Existing Procedure. This
selection lets you enter a procedure name and any necessary parameters.
The procedure must be stored on the Reporting Server. You can also
change the application path. Click Run to execute
the procedure. When you are finished, click Back to return
to the previous screen.
-
Open Server Console. This
selection opens the Reporting Server console.