Managing Applications and Paths in the Data Management Console

How to:

Reference:

On the Windows platform, you can manage your applications from the Data Management Console (DMC) as an alternative to Web Console. On the DMC, the Metadata or Procedures navigation panes provide a set of context sensitive menus at three levels of the application tree:


Top of page

x
Procedure: How to Create an Application in the Data Management Console
  1. Right-click Application Directories in the navigation pane and select Directories.
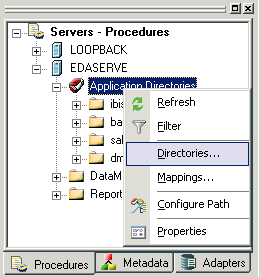
    The Manage Application Directories dialog box opens.
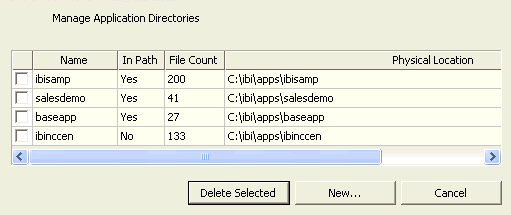
  2. Click the New button.

    The Manage Application Directories - Create Directory dialog box opens.
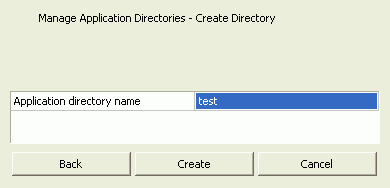
  3. Enter the name of the new application, and click Create.

    Note that the application name cannot contain spaces. If the name contains spaces, each section is understood to be a separate application.

The new application will appear in the Manage Application Directories dialog box.

Note: The application must still be added to the Application Path.


Top of page

x
Procedure: How to Delete an Application in the Data Management Console
  1. Right-click Application Directories in the navigation pane and select Directories.

    The Manage Application Directories dialog box opens.

  2. Select the check box for the application you want to delete and click Delete Selected.

    A confirmation dialog box opens.

  3. Click OK.

Top of page

x
Procedure: How to Add Application Mappings in the Data Management Console

You can create a new mapping to an application anywhere in the file system and include it in the server path. Application mappings can be added and deleted on a per profile basis.

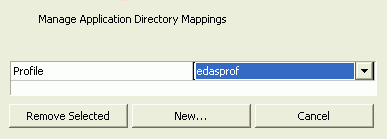
  1. Right-click Application Directories in the navigation pane and select Mapping.

    The Manage Application Directory Mappings dialog box opens.

  2. From the drop-down menu, select a user profile. This profile will have the application mapping added to it.
  3. Click the New button.

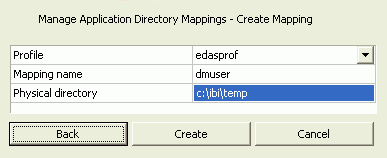
    The Manage Application Directory Mappings - Create Mapping dialog box opens.

  4. In the Mapping name box, enter an application name of up to 64 characters.
  5. In the Physical directory box:
    • For platforms other than USS, enter the full path of the physical directory to be mapped, in the format required on your platform. (If there are spaces in the directory you are mapping, you must enclose the entire path in double-quotation marks.)
    • For USS HFS and PDS deployments, enter values using the following formats:

      HFS

      PDS

      ext=//DD:ddname

      or

      /dir/subdir
      ext=//DD:ddname

  6. Click the Create button.

    The new mapping appears in the Manage Application Directories Mappings dialog box.

  7. Click Cancel.

Note: The mapping must still be added to the Application Path.


x
Procedure: How to Delete Application Mappings in the Data Management Console
  1. Right-click Application Directories in the navigation pane and select Mapping.

    The Manage Application Directories Mappings dialog box opens.

  2. Select the check box for the mapping you want to delete and click Remove Selected.

    A confirmation dialog box opens.

  3. Click OK.

Top of page

x
Procedure: How to Configure the Application Path in the Data Management Console

You must add an application or mapping to the Application Path for it to be accessible.

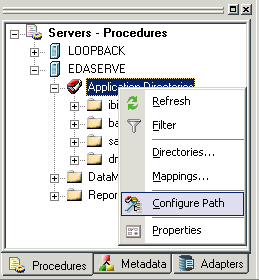
  1. Right-click Application Directories in the navigation pane and select Configure Path.

    The Configure Application Path dialog box opens.

  2. Select the profile of the user whose Application Path you wish to set.
  3. Select the In Path check box for the application or mapping you want to add to the application path.
  4. Optionally, deselect the In Path check box for any application or mapping you want to remove from the application path. This allows you to remove the application or mapping from the path without deleting it completely.
  5. Set the search order by selecting an application or mapping and using the up and down arrows.

    You may want to consider moving the ibisamp application to the bottom of the list to avoid confusion. If you do not plan to use the sample data, you can remove ibisamp from your Application Path completely.

  6. When you have added and arranged all necessary directories and mappings, click Apply.
  7. Right-click Application Directories in the navigation pane and select Refresh to see the application or mapping in the tree.

Top of page

x
Procedure: How to Filter Application in the Metadata Tree in the Data Management Console

You can limit the synonyms that appear in the Metadata Tab application tree by applying a filter.

  1. Right-click Application Directories in the Metadata Tab and select Filter.

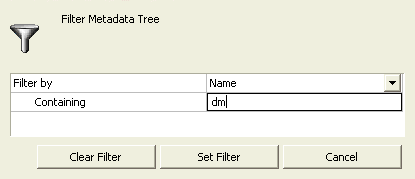
    The Filter Metadata Tree dialog box opens.

  2. Choose one of the following from the Filter by drop-down menu:
    • Name to filter on a synonym name.
    • Adapter to filter on the adapter (data source) type that follows the synonym name in the listing on the Metadata navigation pane.
    • Remarks to filter on remarks in the Filename section of the synonym. For example:
      FILE=   , SUFFIX=     ,
      .
      .
      .
      REMARKS='Inventory'  ,$

    Note that these entries are case sensitive.

  3. Enter the letter(s) which the Name, Adapter, or Remarks of the synonym must contain and be displayed in the application tree.

    Note: The synonym will be displayed if the letter combination appears anywhere in the name, adapter, or remarks.

  4. Click the Set Filter button.

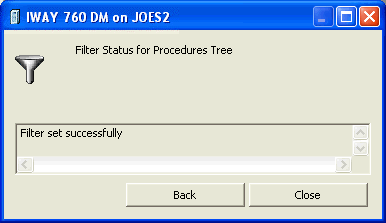
    The Filter Status dialog box confirms that the filter was set.

    A filter icon will appear on applications that are open or have been opened.

Note: The filter can be removed by clicking the Clear Filter button in the Filter Metadata Tree dialog box.


Top of page

x
Procedure: How to Filter Applications in the Procedures Tree in the Data Management Console

You can limit the procedures that appear in the application tree of the Procedure Tab by applying a filter.

  1. Right-click Application Directories in the Procedures Tab and select Filter.

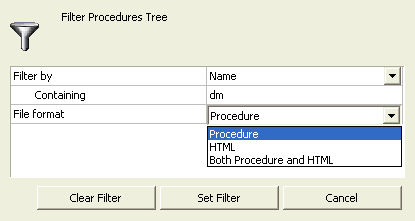
    The Filter Procedures Tree dialog box opens.

  2. Choose one of the following from the Filter by drop-down menu:
    • Name to filter on a procedure name.
    • Description to filter on the description keyword (-*DM_REQ_DESC=) in Data Migrator flows.

    Note that these entries are case sensitive.

  3. Enter the letter(s) which the Name or Description of the procedure must contain and be displayed in the application tree.

    Note: The procedure will be displayed if the letter combination appears anywhere in the name or description.

  4. Click the Set Filter button.

    The Filter Status dialog box confirms that the filter was set.

    A filter icon will appear on application that are open or have been opened.

Note: The filter can be removed by clicking the Clear Filter button in the Filter Procedures Tree dialog box.


Top of page

x
Reference: Application Directories Options

If you right-click Application Directories in the navigation pane of the DMC, the following options are available:

Refresh

Refreshes the applications tree.

Filter

Allows you to filter the procedures or synonyms that appear in the applications tree.

Directories

Allows you to create and delete applications.

Mappings

Allows you to create and delete application mappings.

Configure path

Allows you to add and delete application and mappings from the application path.

Properties

Allows you to view the application properties.


WebFOCUS