How to: |
For these platforms, the migration procedure is executed in a Web Console session.
To start the migration job:
- Click the Workspace link in the toolbar and click Configuration/Monitor.
-
Expand the Server folder, right-click Migration,
and select Resource Management, as shown
in the following image.

-
The Resource Management Migration page opens, as shown
in the following image.
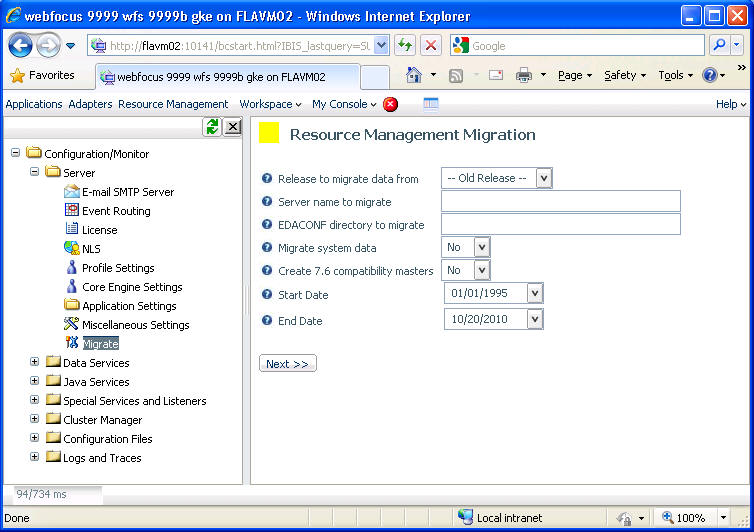
Note: All values are required.
The following options are available:
- Release to migrate data from
-
The release number you are migrating from. Options include 53x, 710-712, 713-718, and 76x.
Note: For Service Pack releases, 5.3x includes all 5.3 releases; 710-712 includes 7.1.0, 7.1.1, and 7.1.2; 713-718 includes 7.1.3 and later 7.1x releases, and 76x includes all 7.6 releases.
- Server name to migrate
-
The server name used by Resource Management in the old release. You can find the server name in the GKESET FOCEXEC.
- EDACONF directory to migrate
-
The path to the EDACONF directory of the release being migrated. Examples are C:\ibi\srv76\wfs for Windows and /home1/ibi/srv71/wfs for Unix.
- Migrate system data
-
Select Yes if the previous releases system data should be migrated. If Yes is selected, SMCNTRL, SMPRMTRS, and SMPRL data will be migrated. Only custom BRL members will be migrated. The SMKNBNAME value in SMCNTRL will not be migrated and any Govern and/or Advise values will be set to OFF. Any compiled rule files must be rebuilt after the migration is completed and new Govern and/or Advise values must be set. The default value is No.
Note: If multiple migration runs are being made, only migrate the system data once.
- Create 7.6 compatibility masters
-
Select Yes if you want to have 7.6 style masters created that will allow existing custom reports to run. Some modifications to your custom reports may be required.
- Start Date
-
The earliest date of the data to be migrated. The format is MM/DD/YYYY. The default value is 1/1/1995.
- End Date
-
The latest date of the data to be migrated. The format is MM/DD/YYYY. The default value is the current date.
-
Click Next. The Deferred Execution
page opens, as shown in the following image.
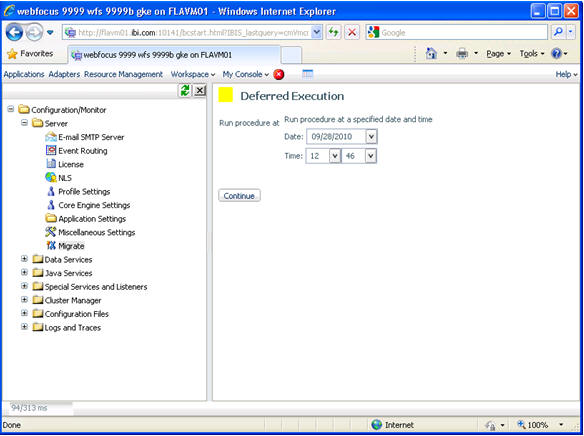
-
Accept the default date and time, or enter the specific
date and time that you want the migration to run. Click Continue to
submit the Deferred request. Confirmation of the request appears,
as shown in the following image.
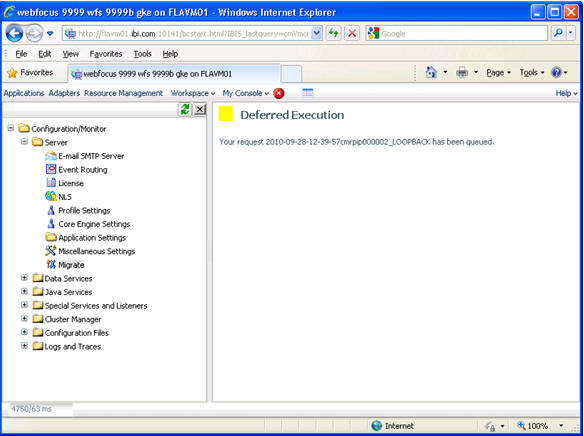
To view the progress of the Deferred request, expand the Special Services and Listeners folder to see a list of the various special services and listeners.
-
Right-click on the DFM item to
display the context menu for the Deferred Manager.
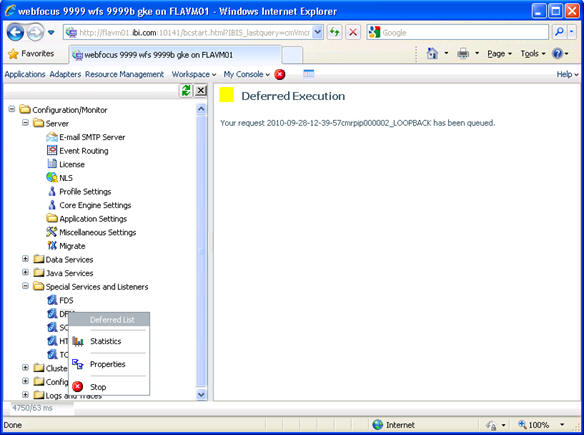
-
Select Deferred List to display
the list of deferred requests and to view the request name that
was displayed when the deferred migration job was scheduled. Examples
of request names are listed in the Deferred ID column, as seen in
the following image

The Status column shows the state of the deferred request, which can be Queued, In-progress, or Ready. To see if the status has changed to Ready, either keep refreshing the page using the refresh options located at the top of the page, or redisplay the page at a later time. Once the status is Ready, right-click the request line and select Get to review the job output.
