Upgrading PMF will let the installer decide how to install
the new version based on what is found on your machine. You can
upgrade PMF only if you already have an older version of PMF installed.
A PMF upgrade will affect all the components that were previously
installed. When
upgrading, be sure to back up any changes that were made.
x
Procedure: How to Upgrade PMF
-
Insert the
Performance Management Framework CD in your CD drive. The Setup
program starts automatically.
Choose what language to run the setup program in before proceeding.
-
A window
opens that lists the prerequisites for installing PMF.
Click Next to continue.
-
Select Upgrade in
the window that appears, as shown in the following image.

Click Next to
continue.
-
If the PMF
Setup program correctly found the previous installation, an upgrade
confirmation message is displayed in the window that appears, as
shown in the following image.
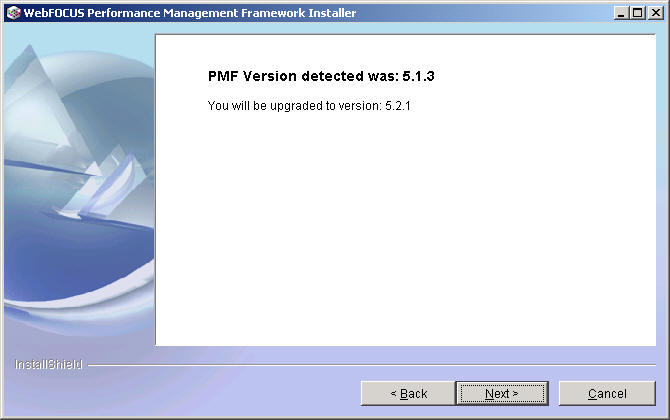
The
installation files will be upgraded and when you login to PMF, the
PMF administrator will resynchronize the database. A message stating
that some previously written files are going to be overwritten appears,
as shown in the following image.

Click Next to
continue to step 6.
-
If either
the previously installed version is earlier than PMF Release 5.0 or
the PMF Setup program was unable to find the previous installation,
an upgrade error message is displayed in the window that appears,
as shown in the following image.

The
PMF Setup program will upgrade the files in the installation, but
the database will have to be manually upgraded utilizing the included
DDL scripts.
Click Next to continue.
-
The summary information window appears,
as shown in the following image.

Note: Up
to this point, no changes have been made to your machine and you
may cancel the install.
Click Next to
continue.
-
The installation
window appears, showing that the new version of PMF is being installed.
When it finishes installing, click Next to continue.
-
The PMF
Setup program copies all the files and configures PMF for operation.
After the PMF Setup program is complete, a window will open prompting
you to restart the Web Server and Web Application Server.
Click Next to continue.
-
A final
installation window will open, informing you that PMF was successfully
upgraded.
Click Finish to exit the upgrader.
x
Procedure: How to Upgrade PMF in UNIX
-
Launch the
Setup program, as shown in the following image.
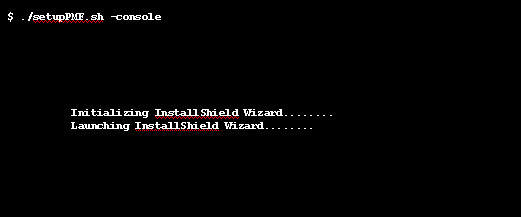
Choose what language to run the setup in before proceeding.

-
The prerequisites for installing PMF
are listed, as shown in the following image.
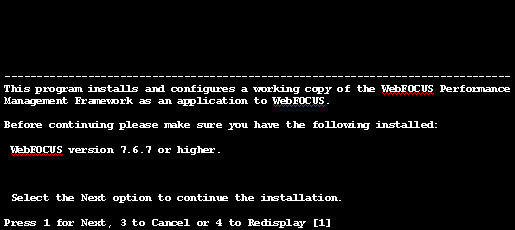
Enter
1 to continue.
-
Select Upgrade
for the install type, as shown in the following image.
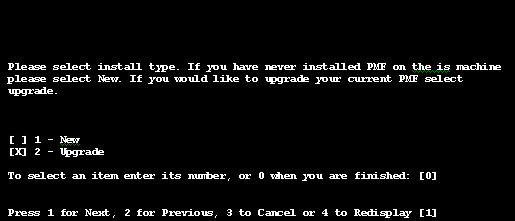
Enter
1 to continue.
-
Select the check boxes for the components
that you want to install, as shown in the following image.
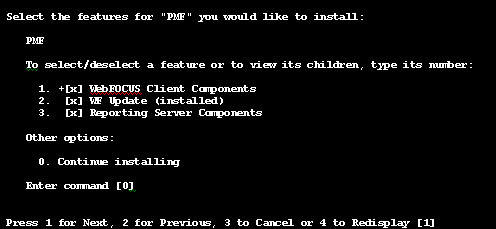
Enter
1 to continue.
-
Type the Web Home, WebFOCUS Client,
and WebFOCUS Server file locations in the appropriate fields, as
shown in the following image.

Note: The
fields available in this window depend on what components were installed
in step 4.
Enter 1 to continue.
-
If the setup
program correctly found the previous installation, an upgrade confirmation
message is displayed.
The installation files will be upgraded and when you login
to PMF, the PMF administrator will resynchronize the database. A
message stating that some previously written files are going to
be overwritten appears, as shown in the following image.

Enter
1 to continue.
-
The summary information appears, as
shown in the following image.
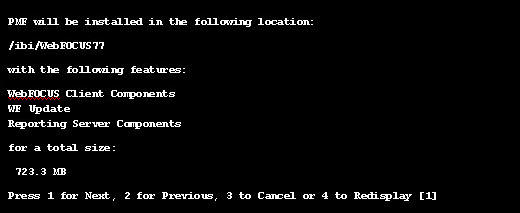
Note: Up
to this point, no changes have been made to your machine and you
may cancel the setup.
Enter 1 to continue.
-
The Setup
program copies all files and configures PMF for operation.
-
The final installation information
that appears, as shown in the following image, tells you that PMF
has been successfully upgraded.

Enter
3 to finish and exit the installation.
x
Procedure: How to Use Oracle SQL*Plus to Upgrade the Data Mart From PMF 4.2 to PMF 5
To
upgrade and migrate an existing PMF 4.2 data mart, perform the following steps:
-
Back up
your current PMF 4.2 data mart.
-
Upgrade
to PMF 5 using the PMF installer.
-
Edit the
migration DDL 50_42_sqlora_migrate.sql file, which is located in
the \ibi\apps\pmfdbms\Upgrade_Database directory. Review and edit
the environmental variables as needed.
For details about variable settings, see Settings for Oracle Data Mart Build and Upgrade.
-
Start Oracle
SQL*Plus.
-
In the SQL*Plus
session, run 50_42_sqlora_migrate.sql, which contains the code for
migrating the data mart to PMF 5.
-
Start PMF
to continue the migration.
The Resync panel on the Administrator Dashboard (01) will
automatically complete the migration.
The first time you perform
the migration, the Resync panel will prompt you. For details, see PMF Automatic Upgrade Behavior When Using Oracle.
Note: If
you have a data mart version earlier than PMF 4.2, contact your
IBI representative for assistance.
x
Procedure: How to Upgrade a PMF 5 Data Mart to the Current Version in Oracle
To
upgrade and migrate an existing PMF 5 data mart, perform the following
steps:
-
Back up
your current PMF 5 data mart.
-
Upgrade
the PMF application to the current version using the PMF installer.
-
Start PMF
to continue the migration.
The Resync panel on the Administrator Dashboard (01) will
automatically complete the migration.
The first time you perform
the migration, the Resync panel will prompt you. For details, see PMF Automatic Upgrade Behavior When Using Oracle.