Magnify Search-Based Application
The Magnify platform has been updated with features
to help guide users to the information they are looking for within
the Magnify search application. For example, queries can be automatically
expanded to match multiple variations of a word or suggest similar
words to guarantee results. In addition, the interface can be configured
for various languages and tuned for advanced content analysis. The
interface has also been designed to detect differences between desktop
and mobile access.
For more information on the features described in the following
sections, see the Magnify Security and Administration Manual.
x
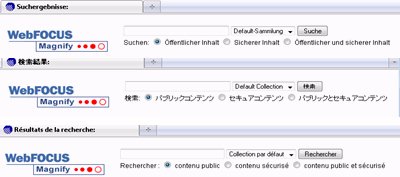
Magnify can be configured to support various languages
using its international stylesheets and language analyzers. The
stylesheets are available in the following languages:
- Portugese
- Chinese
- Japanese
- Spanish
- French
- French Canadian
- German
- English
- Russian
- Mandarin
The following image illustrates the Magnify interface in various
languages.
x
Analyzers are used to process text strings so that the
most relevant information is stored in the index and returned to
the Magnify search application. An analyzer is a configured set
of rules that break up text strings into tokens. For example, the Standard
analyzer breaks apart a sentence at each space and makes all characters lowercase.
Magnify supports all Lucene and Solr analyzers in all languages.
You can also create custom analyzers to provide a more enhanced
search experience. Analyzers are assigned to a collection in the
collections.xml file as follows:
<group name="documentation" id="documentation">
  <search lang="en" analyzer="StandardAnalyzer"
     stylesheet="en/en_stylesheet"	id="en_search_default_collection"/>
  <component id="technical_documentation" member="technical_documentation"/>
</group>
x
Magnify provides spellchecking functionality when other
terms that are similar to those searched are found.
The following image displays a spelling suggestion for a search
query that did not find any matches in the default collection.

To enable the spellchecking functionality in Magnify, you must
create a spelling dictionary, which will contain the terms that
will be used to make a spelling suggestion. For more information
on enabling the Magnify Spellchecker, see the Magnify Security
and Administration Manual.
xMagnify Demo Search Application
Magnify provides the Century Electronics sample search
application, which uses sample indexes and a sample stylesheet that
can be used to preview some Magnify features. Century Electronics
is a consumer electronics manufacturer that distributes products
through retailers around the world. Its intranet search application
enables executives and analysts to see how their business is performing
through Key Performance Indicator reports to typical business reports,
such as detailed trends analysis.
To use the Century Electronics sample search application, type
the following URL in the address bar:
http://server_name:port_number/wf_context_root/search?
clearcache=1&proxyreload=1&collections=collections_century.xml
where:
- server_name:port_number
Is the server name of where Magnify is installed and the
HTTP port of the application server. For Tomcat stand-alone configurations,
the default port number is 8080. If you require SSL, use HTTPS instead
of HTTP.
- wf_context_root
Is the alias of the WebFOCUS Web application specified during
the installation. The default is ibi_apps.
The Century Electronics
data is available in \ibi\WebFOCUS\utilities\demos\ibimagn.zip and
can be used to create your own sample indexes using the iWay Transformer,
Prototype Wizard, or the FORMAT MAGNIFY command.
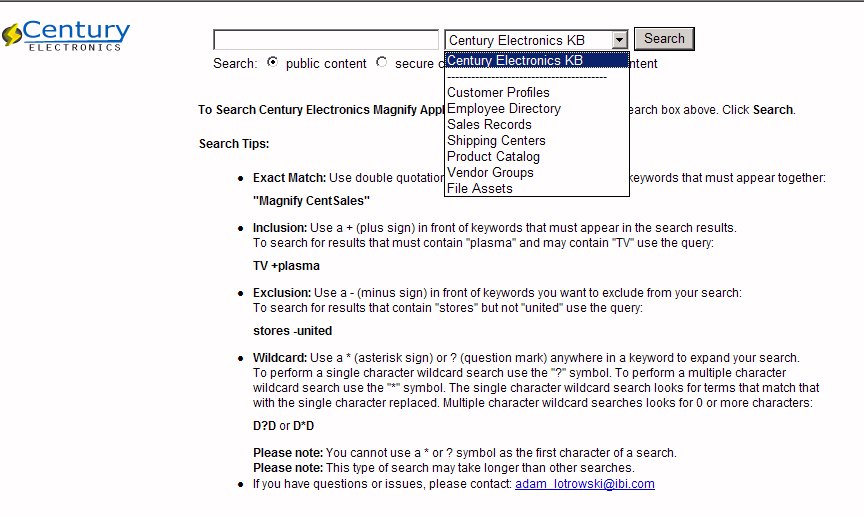
The following image illustrates the Century Electronics search
application and its various collections.
x
Procedure: How to Configure the Century Electronics Search Demo
Complete
the following steps to make the Century Electronics the default
search application in Magnify.
-
Stop the
application server.
-
Backup the
current collections.xml file in the \ibi\WebFOCUS\config\magnify
directory.
-
Rename the
century_collections.xml file in the \ibi\WebFOCUS\config\magnify
directory to collections.xml.
-
Restart
the application server.
-
Navigate
to the WebFOCUS home page using the following URL:
http://server_name:port_number/wf_context_root/
-
Click Magnify
Search Page.