
In this section: |
To import an already existing project from a remote location, you must open a perspective for version control. To add a perspective, click on the Open Perspective icon in the Perspective Switching panel, and select Other, as shown in the following image.
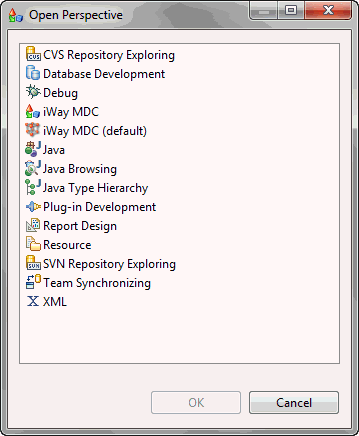
The Open Perspective window appears where you can select your preferred option (SVN or CVS) and add it to your perspective Switching Panel by clicking OK, as shown in the following image.
After opening the perspective, a new pane appears in the Navigation Pane. To switch between different views in the Navigation Pane, switch the perspectives by clicking on the icon in the Perspective Switching Pane.
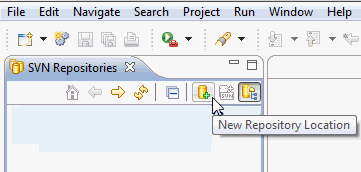
To add a new repository to your workspace, click the New Repository Location icon in the Navigation pane. This opens the Location Properties, accessed from the SVN Perspective view.
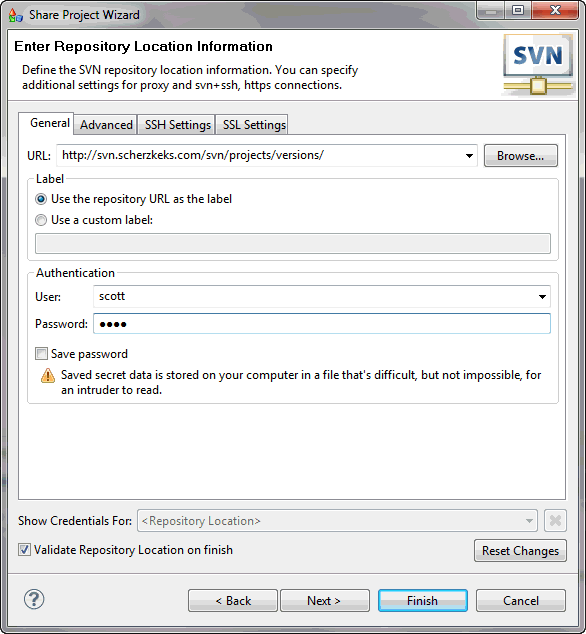
In this window, you can specify the URL of the new repository and complete the user authentication details. You can also complete the custom label, shown in the Model Explorer view, instead of providing the location. To complete adding a new resource, click Finish, as shown in the following image.
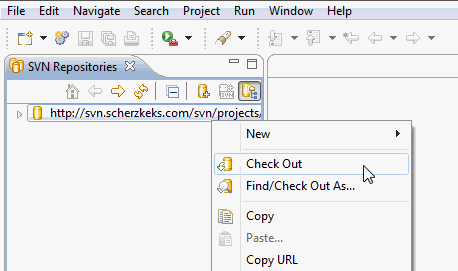
Once the project is added, it is visible in the Navigation Pane of the SVN Repositories perspective, listing its subfolders. To create a local copy of the remote project (or its part) on your system, check out the project (or a part of it) by right-clicking on the project in the Navigation Pane in SVN perspective, and selecting Check Out, as shown in the following image.
If you choose Check Out, the selected resource is automatically copied into the default workspace and shown in the Model Explorer.
| iWay Software |