To share a project using SVN:
-
Right-click on the project and select Team and
then Share Project, as shown in the following
image.

-
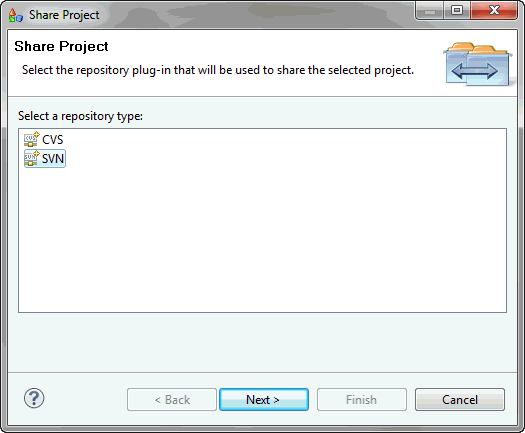
Choose the preferred type (for example, SVN), and
click Next, as shown in the following image.

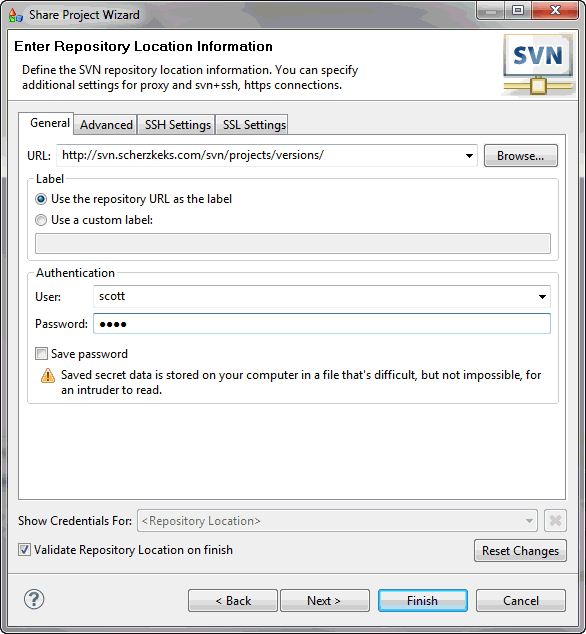
- In the Share Project Wizard, create a new repository location where you want to import your project.
-
Specify the URL of the new repository and user authentication
details, and click Finish. You can also complete
the custom label, which is shown in the Model Explorer view, instead
of providing the location,

The project will automatically be shared on the selected URL. A window for entering a commit comment appears, allowing you to add additional comments to your project or select a previously entered project.
If the shared project is a model project, it will be added among other projects in your Model Explorer view in the Navigation Panel. If it is a regular project, it will be shown in File Explorer only.
After sharing the project, question marks will appear over the icons of files. This indicates that the project has not been uploaded to the repository. After committing all files to the repository, all files will be marked with a yellow indicator in the shape of a cylinder.