iWay MDS offers an interface to display relations between business objects in the Relationship Editor. It enables viewing, mapping, and modifying tables, relationship types and their attributes through a simple graphical user interface. This interface is mostly used to edit objects in the logical model and connected systems model.
A logical model is the core of iWay MDS, as it defines the data tables that are to be used and their relationships to each other.
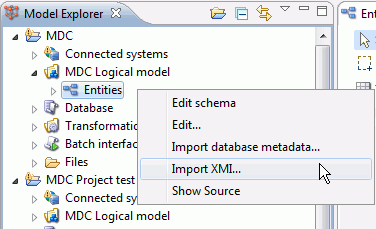
A logical model can be created from scratch. Parts of the logical model can also be imported by importing database metadata, an XMI file, or other model (for example, Powerdesigner .cdm or .pdm file). To import database metadata or a model file, right-click the Entities node in the navigation pane, as shown in the following image.
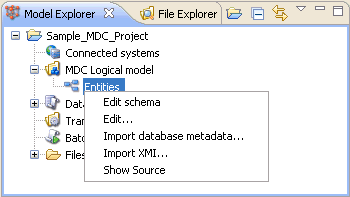
Select the appropriate option from the context menu to launch a wizard that will import the information in the file.
Note: To define a database connection, see Working With Databases.
To add tables:
-
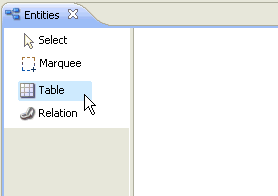
Click Table in
the Entities tab of the workspace area and then click again on the
diagram canvas.
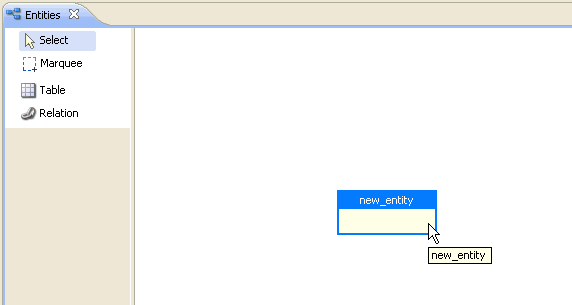
A new table called new_entity is created, as shown in the following image.
-
Double-click
the new_entity component.
The new_entity table configuration dialog opens, as shown in the following image.
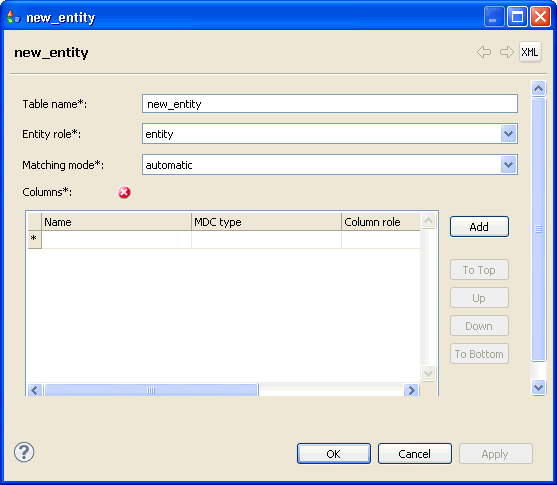
There are two types of tables that you can select from the Entity role drop-down list:
- Entity
- Relationship
Entity tables represent the data that exists in the connected systems, while relationship tables are created to store information that is common to multiple entity tables.
- Specify the matching mode (automatic or manual) from the Matching mode drop-down list.
-
Add columns
to the table by clicking Add to the right
of the Columns table.
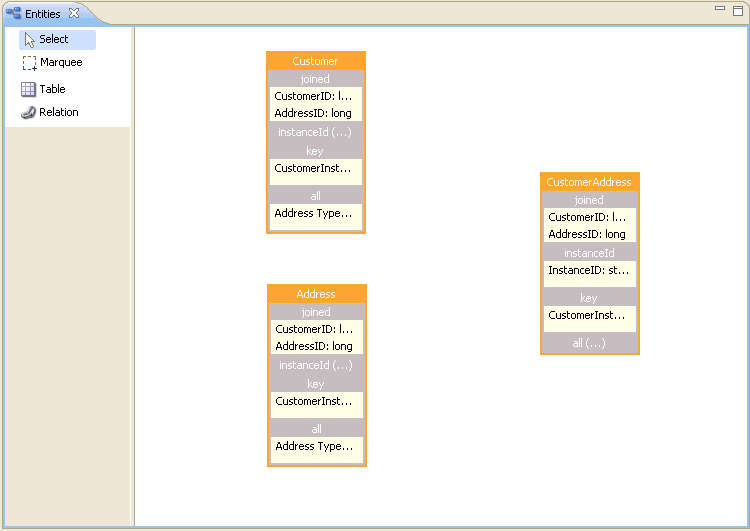
Each column must have a name, role, and type (the original database type and how it should be treated in iWay MDS). The workspace area will show a representation of the table, with the columns categorized by role, as shown in the following image.
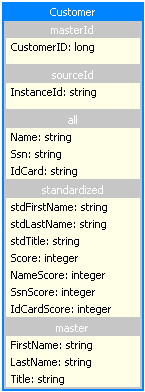
Entity tables are displayed with a blue border and header, while relationship tables are displayed with an orange border and header. Any issues that may exist are listed in the status pane.
After the tables have been added, relationships between them can be added.
-
To add a
relationship, select the Relationship item from the palette and
drag a connection from one table to another.
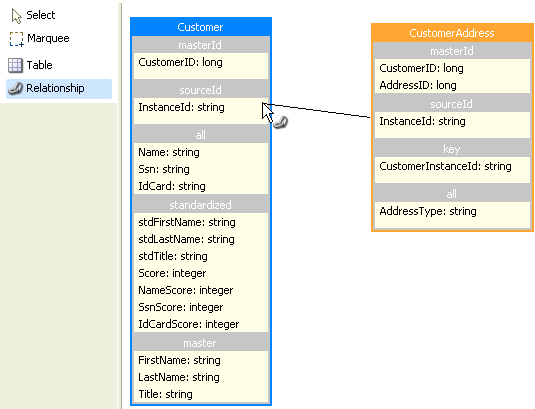
A relationship is created, called new_relationship.
-
Double-click
on the green box to open the relationship configuration dialog.
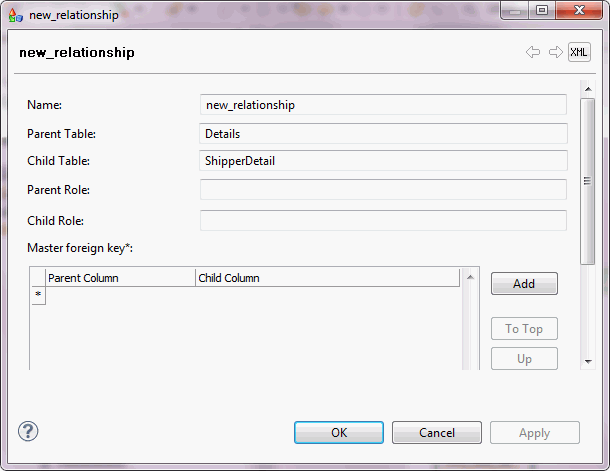
- In the Parent Table field, enter the table that the arrow points to.
- In the Child Table field, enter the table that the relationship originates from.
- Enter the name(s) of the matching key columns in the Representative Foreign Key table to define the specific relationship between the tables.