Outlets contain references to preemitters, encryptors,
and emitters. Once a document has been processed, it must be sent
to one or more designated recipients. This is the job of the outlet.
The outlet is responsible for all aspects of preparing the document for
emission and then emitting it.
Outlets contain a sequence of components tailored for this task.
Multiple outlets can be configured for a single message flow. Each
outlet incorporates all of the components needed to send the message
to its destination.
A channel must contain an outlet; however, a default outlet,
which contains no emitter, can be used. When you assign an empty
outlet to a channel, the document output goes back to the listener
assigned to the inlet and is emitted through whatever output is
specified in the listener.
Preemitters convert the document from the internal format to
an external format. This may include simply flattening XML or may
be more complex, involving transformation logic. An example is converting
the document to an EDI or HIPAA format. Preemitters can also be chained,
so the output of one becomes the input to the next. The first preemitter
receives the document in internal form, and transforms it to a message
format. Subsequent preemitters can perform extra work on this message.
Transformations are prepared using the iWay Transformer. For more
information, see the iWay Transformer User’s Guide.
Encryptors operate on the message that is ready for emitting.
Parameters such as the location of encryption keys or certificate
aliases can be stored by destination address in the optional iWay
Trading Manager component. For more information, see the iWay Trading
Manager User’s Guide.
The emitter uses the appropriate transport protocol to send the
document to its destination. Examples include JMS, HTTP, email,
and AS2. Header information that has been prepared by processes
and stored in special registers is applied to the message in a format-appropriate
manner.
x
Procedure: How to Define an Outlet
To
define an outlet using the iWay Service Manager Administration Console:

-
In the
left console pane of the Registry menu, select Outlets.
The Outlets pane opens.

The
table that is provided lists each outlet that is defined with a
brief description. If you click the document schematic icon in the
References column for a specific outlet, you will see which components
are referencing that outlet.
-
Click Add.
The New Outlet Definition pane opens.

-
Enter
a name, for example, SampleOutlet, and description for the outlet.
-
Click Finish.
The Construct Outlet pane opens.

The
table that is provided is used to list the components that are currently registered
with the outlet.
-
Click Add.
The Select component type pane opens.

The table that is
provided lists the component types you can select and register with
the outlet you are defining.
-
Emitter -
Protocol handlers that send the output of a channel to a configured
endpoint.
-
Preemitter -
A logical process that handles documents immediately prior to transmission,
for example, converting an XML document to non-XML.
-
Encryptor -
Used to encrypt a document.
An outlet that does not contain an emitter is considered
a default outlet, whose emitter is defined by a channel’s inlet
listener. A default outlet defines an empty outlet.
-
Select Emitter from
the list of component types and click Next.
The Select an emitter definition pane opens.

-
Select
an available emitter, for example, pictures, from the list and click Finish.
You are returned to the Construct Outlet pane, which now
includes the emitter (pictures) you registered with your outlet
(SampleOutlet).

You
can now add other components, such as preemitters or encryptors.
If
you return to the main Outlets pane, you will notice that the outlet
you just defined (SampleOutlet) has been added to the list, as shown
in the following image.

x
Procedure: How to Modify an Outlet
To
modify an outlet:

-
Click
the name of the outlet you wish to modify in the main Outlets pane,
for example, SampleOutlet.
The Construct Outlet pane opens.

The
table that is provided shows the component that has been registered
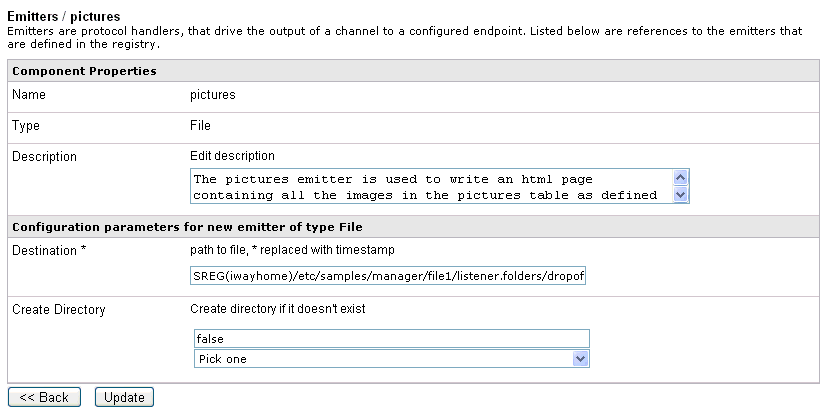
for the outlet you are modifying. In this example, the pictures
emitter is used.
-
Click
the name of the emitter.
The Emitters pane for the pictures emitter opens.

-
Make
your changes to the emitter properties as required and click Update when
you are finished.
The outlet is now modified.
x
Procedure: How to Delete an Outlet
To
delete an outlet:

-
Click
the check box next to the outlet you wish to delete, for example,
SampleOutlet.
-
Click Delete.
A confirmation dialog box opens, prompting you to confirm
the deletion of the outlet.
-
Click OK.
The outlet is deleted from the system.
Tip: To
delete more than one outlet at once, you can select multiple check
boxes in the Outlets pane and click Delete.
x
Procedure: How to Rename an Outlet
To
rename an outlet:

-
Click
the check box next to the outlet you wish to rename, for example,
SampleOutlet.
-
Click Rename.
The Rename pane opens.

-
Type
a name, for example, TestOutlet, in the New Name field and click Finish.
You are returned to the main Outlets pane.

The new name for the
outlet you provided is shown.
x
Procedure: How to Copy an Outlet
To
copy an outlet:

-
Click
the check box next to the outlet you wish to copy, for example,
SampleOutlet.
-
Click Copy.
A copy of the outlet is made, as shown in the following
image.

Making
copies of an outlet is useful for versioning and testing purposes.
Tip: To
copy more than one outlet at once, you can select multiple check boxes
in the Outlets pane and click Copy.
x
iWay Service Manager provides mechanisms to support
various routing strategies when using outlets. This section describes
how you can use iSM to execute business logic and route documents
to a particular location. The following topics are provided:
- Adding
conditions to outlets.
- Configuring
run-time options for outlets (On Success, On Error).
x
Procedure: How to Add Conditions to Outlets
To
add conditions to outlets:
-
Open
the channel you want to edit.
-
Click
the add conditions icon
 in the outlet for which you want
to set conditions.
The Set Conditions pane appears.
-
Provide
the condition, and then click Back to return
to the channel pane.
The icon changes to the edit icon  to
indicate that a condition has been set.
If multiple outlets
are defined for a channel and no conditions are added to the outlets,
all of the outlets will be processed by iWay Service Manager.
For
more information on the conditions you can use, see the iWay
Service Manager Component and Functional Language Reference Guide.
x
Procedure: How to Configure Outlet Run-Time Options
To
configure outlet run-time options:
-
Open
the channel you want to edit.
-
Click
the check icon
 for
the outlet you want to modify to set the run time option from On
Success to On Error
  or the other way around, as appropriate.


 in the outlet for which you want
to set conditions.
 for
the outlet you want to modify to set the run time option from On
Success to On Error
  or the other way around, as appropriate.