iWay Service Manager provides model configurations that
you can use as is, or edit to create a custom configuration. When
you install iSM, it includes the following configurations:
You can base your new configuration on one of these two model
configurations or on another existing configuration. To avoid conflicts
with other configurations, the system automatically assigns the
next available port as the console port for the new configuration. This
port is used for internal communication and cannot be accessed directly.
You can override this value. If you override the port with a value
already assigned to another configuration, then you are prompted
to make a different selection.
Based on the template you use, the configuration software generates
the new configuration and the required folders and files. You can
also add other components to your configuration. Before you can
use a configuration effectively, you must define its channels and
business logic.
To create a configuration:
- Add the configuration
to the console.
- Create a Windows
service for the new configuration.
- Start the Windows
service for the new configuration.
In order to take advantage of performance enhancements, Service
Manager configurations can be installed to run as services in separate
Java processes. In order to do this:
- Uninstall the
configuration that you wish to modify.
- Create a service
for the new configuration with Java running in a separate process. This
is explained in How to Create a Windows Service for a New Configuration.
- Start the service
for the new configuration.
x
Procedure: How to Add a Configuration to iWay Service Manager
To
add a configuration to iWay Service Manager:
-
In the
top pane, click Management.

The Deployments pane
opens by default, as shown in the following image.

-
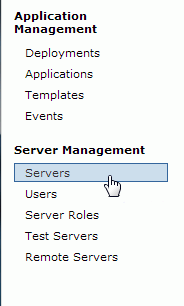
In the
Server Management section, click Servers,
as shown in the following image.
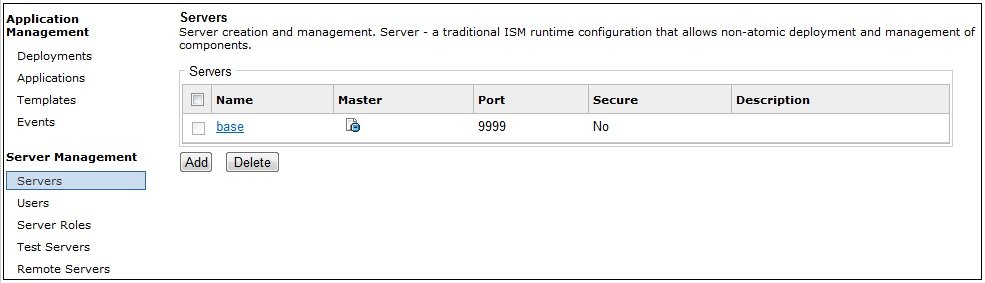
The Servers pane opens,
as shown in the following image.
-
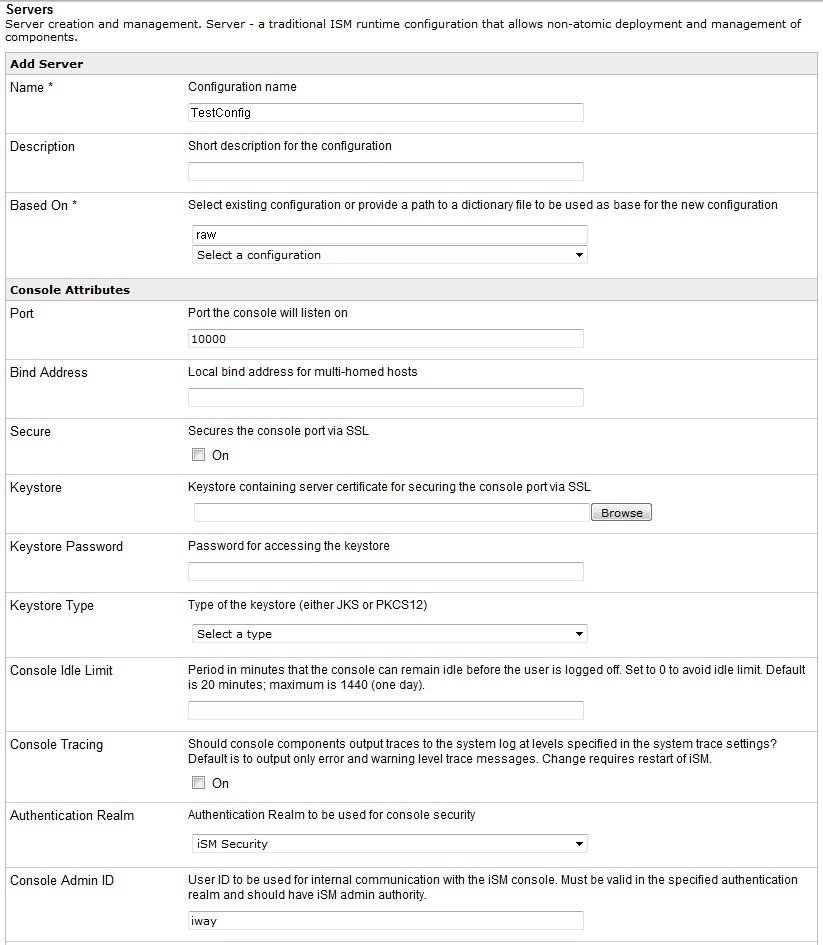
Click Add.
The Servers configuration pane opens, as shown in the following image.
-
In the Name field (required), type
a name for the configuration, for example, TestConfig.
-
In the Description field (optional), type a
description for the configuration, for example, Configuration for
testing.
-
In the Based On field (required), select an
existing configuration from the drop-down list, or provide and absolute
path to a dictionary file.
-
In the Port field under Console Attributes,
type the port number on which the console is listening.
-
In the Bind Address field (optional), provide
a local bind address for multi-homed hosts.
-
If you want to secure the console port via SSL, select
the On check box (optional) in the Secure section.
-
In the Keystore field, type the keystore pathway containing
the server certificate for securing the console port using SSL.
-
In the Keystore Password field, type the password
for accessing the keystore.
-
In the Keystore Type drop-down list, select
the keystore type (either JKS or PKCS12).
-
In the Console Idle Limit field, type the period
in minutes that the console can remain idle before the user is logged
off. Default is 20 minutes.
-
In the Console Tracing field, check On to
enable component output traces.
-
In the Authentication Realm drop-down list,
select the Authentication Realm to be used for console security.
-
In the Console Admin ID field, type the User
ID to be used for internal communication with the iSM console. The
ID must be valid in the specified authentication realm and should
have iSM admin authority.
-
In the Console Admin Password field, type the
password for the console admin account.
-
Click Finish.
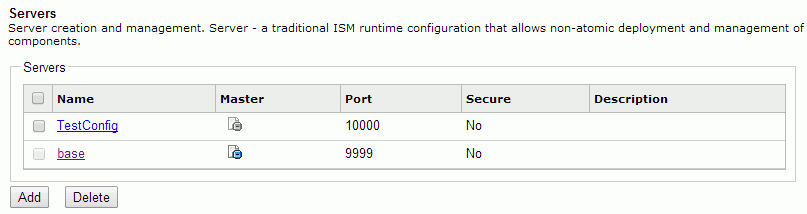
The new configuration, TestConfig, appears in the Configurations
list, as shown in the following image.
After your configuration
is created, you can create a Windows service to start the configuration.
This is optional.
x
Procedure: How to Create a Windows Service for a New Configuration
To
create a Windows service that can be used to start a new configuration:
-
Open
a Command Prompt window and navigate to the iWay home bin directory.
For example, on Windows, if iWay is installed in C:\Program Files\iWay7,
go to
C:\Program Files\iWay7\bin
The iwsrv command
starts iSM in a command window and allows you to create a Windows
service.
-
At the
command prompt, type
iwsrv config_name -s install
To
create a service with Java running in a separate process, type
iwsrv config_name -s install -l java
where:
- config_name
Is the name of the configuration for which you are creating
a service.
A message appears, indicating
that the service was installed successfully.
Your next task
is to start the configuration as a service. For more information,
see How to Start a Configuration as a Service on Windows.
x
Procedure: How to Syntax: How to Manage a Configuration With IWSRV
The
full syntax for the iwsrv command is:
iwsrv [configuration] [-s service] [-l launch] [options]
where:
- configuration
Is the name of the server configuration that is loaded for
this instance. The default value is base.
- service
Is the name of the service that is executed. Valid values
are:
start: Starts the server configuration (default).
stop: Stops
the server configuration.
install: Installs the server
configuration.
remove: Removes the server configuration.
query: Queries
the server configuration.
- launch
Specifies the launch method. Valid methods are:
java: Loads
Java in a separate process and uses the JVM options, NT dependencies,
and other preferences found within the iSM configuration that are configured
through the console. For example: iwsrv.exe base -s start -l
java
script file: Specifies a script file
that defines the run-time preferences. This script file must be
located in the iWay Service Manager installation directory. For example: iwsrv.exe
base -s start -l iWay7.cmd
Both of the above uses
of -l will force the service to load Java in a separate process.
When the service is stopped, both iwsrv.exe and java.exe are terminated.
- options
Specifies tracing or server back-up information. Valid values
include:
-b: Indicates that Service Manager is a back-up
server, for example:
iwsrv.exe base -s start -b
-c: Turns
tracing on. In this mode, you can display useful error messages on
the console. For example, you can display a message that says the
Java Runtime Environment (JRE) is not properly installed. For example:
iwsrv.exe base -s start -c
-d: Limits
tracing to debug only, for example:
iwsrv.exe base -s start -d
-f: [PATH]
filters the system path when invoking JAVA. [RESTART] suppresses
the JVM fault restart capability.
-h: iWay7 home directory.
-t: The
amount of time (in seconds) to process service shutdown.
x
Procedure: How to Start a Configuration as a Service on Windows
To
start a new configuration as a service on Windows:
-
From
the Start menu, select Start, Settings, Control
Panel, Administrative Tools,
and then Services.
The Services window opens.
-
Scroll
down to display the iWay Service Manager services, as shown in the
following image.

-
Right-click
the service you created, for example, iWay Service Manager - TestConfig
and then, select Start (if it is not already started).
The service status changes to Started. The default start-up
type is Automatic.
x
Procedure: How to Start a Configuration as a Service on a Non-Windows Platform
To
start a new configuration as a service on a platform other than
Windows:
-
Locate
the default start-up file, which is supplied for the base configuration,
in the iWay7/bin directory.
On UNIX, this file is called:
startservice.sh
On
other non-Windows platforms, the name may vary.
-
Create
a copy of the start-up file for your service.
-
Edit
the copy of the start-up file using an editor and navigate to the following
section in the file to replace base with
the name of your configuration:
#!/bin/sh
#####################################################################
#
# Init
# Setup global variables and signal handling
#
# Edit following lines to point to install dir and change user ID"
IWAY7=/WorkSource/iWay7/
IWAYUSER=root
IWAYCONFIG=baseMOD=""
-
Navigate
to the following section in the file and change the log file name, serviceOut.txt,
to be unique to this service:
cd $IWAY7/config/$IWAYCONFIG
if test 'uname' = 'OS400'; then
 	java $REMDBG -cp $CLASSPATH -DIWAY7=$IWAY7
  com.ibi.service.edaqmSilentService -config $IWAYCONFIG >>
  $IWAY7/serviceOut.txt
&elif test 'uname' = 'OS/390'; then
 	java $REMDBG -cp $CLASSPATH -DIWAY7=$IWAY7
  com.ibi.service.edaqmSilentService -config $IWAYCONFIG >>
  $IWAY7/serviceOut.txt
&else	su $IWAYUSER -c "java $REMDBG -cp $CLASSPATH -
  Diwaysoftware.af.idocument=com.ibi.edaqm.XDDocument -DIWAY7=$IWAY7
  com.ibi.service.edaqmSilentService -config $IWAYCONFIG >>
  $IWAY7/serviceOut.txt
&"fi
-
Save
your changes.
-
Execute
the start-up file for your service.
The service is started.