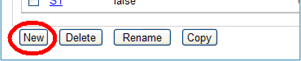
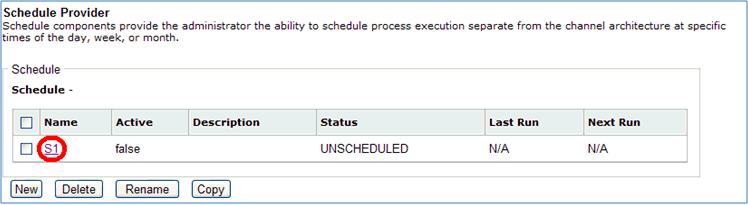
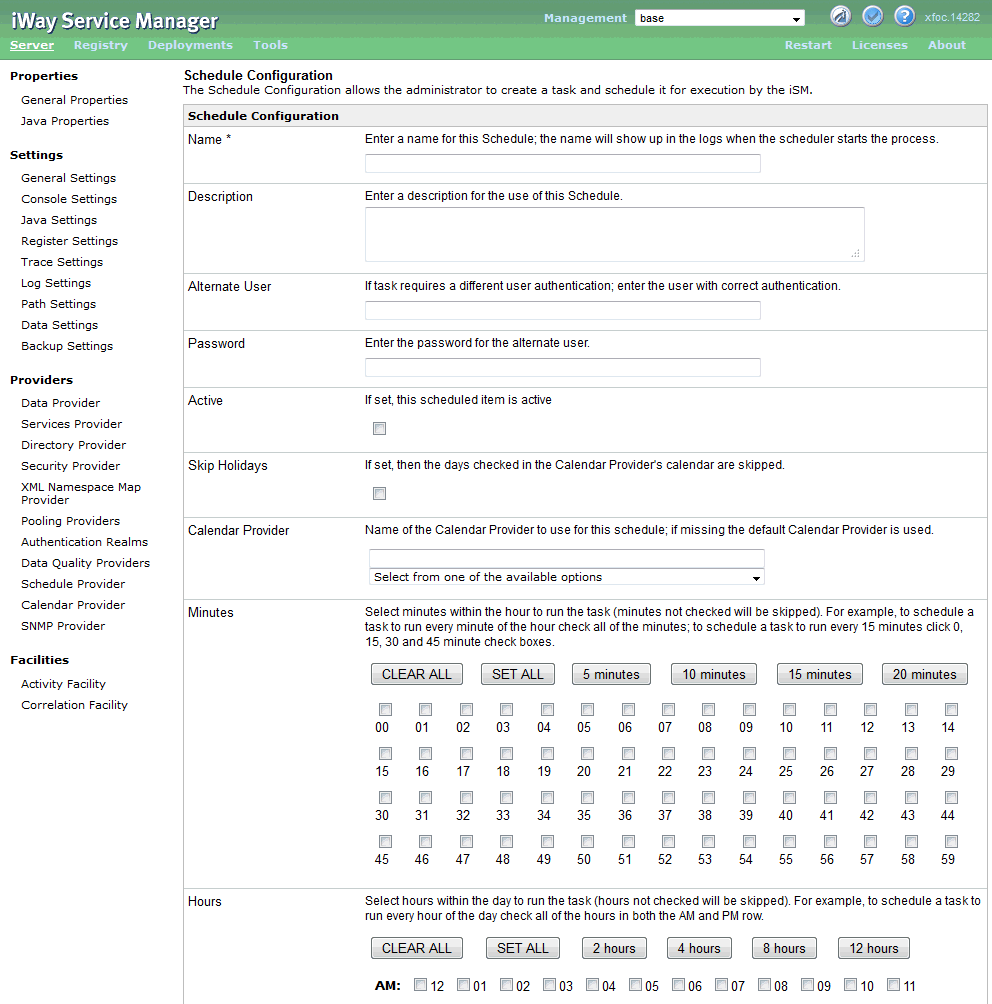
Configuring the iWay Service Manager Scheduler

In this section:

This section provides an overview of using the iWay Service Manager Administration Console to schedule and configure Service Manager tasks.


Top of page

x
iWay Service Manager Administration Console

The following image shows the default iWay Service Manager Administration Console open to the General Properties pane.

The Administrative Console is divided into the following sections:

If the scheduler extension of the Service Manager has been successfully installed, the Schedule Provider hyperlink is found in the Configuration menu.


Top of page

x
iWay Service Manager Schedule Provider

This section describes how to access and use the Schedule Provider in iWay Service Manager.


x
Accessing iWay Service Manager Schedule Provider

To access the Schedule Provider:

  1. Click Server from the navigation menu in the top pane.
  2. Select Schedule Provider from the configuration menu in the left pane.

The following image shows the Schedule Provider listing with several tasks scheduled.

The Schedule Provider displays a list of already configured tasks. If this is the first time that the administrator is using the Schedule Provider or there are no tasks configured for this Managed server, then this list will be blank.

The following table shows the columns that a list of entries would be categorized by.

Column

Description

Name

Name associated with the task.

Active

Flag indicating whether or not the configured task is active.

If True, the task is active and will be scheduled whenever iWay Service Manager is recycled.

If False, the task is inactive and will not be scheduled whenever iWay Service Manager is recycled.

Description

Description of the task; this is a freeform field that is entered in the Schedule Configuration page, containing a description of what the task does.

Status

Last known status reported by the task.

Last Run

Last time that the task was run by the Service Manager.

Next Run

Next time that the task will be run by the Service Manager.


x
Procedure: How to Schedule a Listener to Start

To create a new Schedule Provider:

  1. Click Server from the navigation menu in the top pane.
  2. Select Schedule Provider from the configuration menu in the left pane.

    A table appears that lists any existing Scheduled tasks and a short description for each.

  3. Click New as shown in the following image.

    The Schedule Configuration page opens, as shown in the following image.

  4. Provide the appropriate property values for the task, as defined in the following table.

    Note: An asterisk indicates a required property.

    Property

    Definition

    Name*

    Name to associate to this task. Task names are case sensitive and can not contain punctuation or other special characters.

    Description

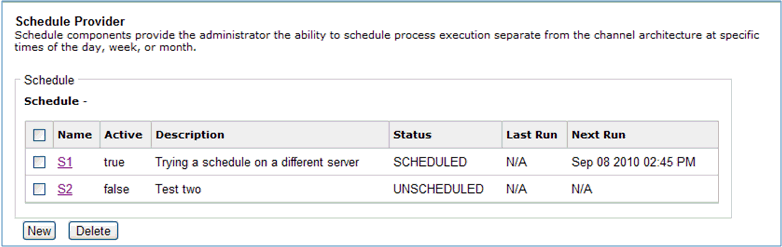
    A brief description of what this task does. This description should be descriptive enough to identify the task. This description is displayed on the Schedule Provider list of scheduled tasks.

    Alternate User

    If this task is being executed with credentials of a different user, enter the User ID of that user. An alternate user must be a valid user defined on this iSM server.

    Note: The Alternate user can contain iFL commands (iSM functions like _SREG, _PROPERTY, and so on) that will be evaluated when the schedule provider is called.

    Password

    If this task is being executed with credentials from a different user, enter the password of that user.

    Note: The Password can contain iFL commands (iSM functions like _SREG, _PROPERTY, and so on) that will be evaluated when the schedule provider is called.

    Active

    If set to true, this task will be scheduled each and every time the Service Manager is recycled.

    Minutes

    Checks the starting minute(s) of the hour to start the task at. Six short cut buttons are supplied to help in setting the minutes to start execution:

    • Clicking the CLEAR ALL button sets all the minute check boxes off.
    • Clicking the SET ALL button sets all the minute check boxes on.
    • Clicking the 5 minutes button starts at 0 and sets each 5 minute check box on. For example, 0, 5, 10, 15, and so on.
    • Clicking the 10 minutes button starts at 0 and sets each 10 minute check box on. For example, 0, 10, 20, 30, and so on.
    • Clicking the 15 minutes button starts at 0 and sets each 15 minute check box on. For example, 0, 15, 30, 45, and so on.
    • Clicking the 20 minutes button starts at 0 and sets each 20 minute check box on. For example, 0, 20, 40, 60, and so on.

    Hours

    Checks the starting Hour(s) of the day to start the task at. Six shortcut buttons are supplied to help in setting the minutes to start execution.

    • Clicking the CLEAR ALL button sets all the hour check boxes off.
    • Clicking the SET ALL button sets all the hour check boxes on.
    • Clicking the 2 hour button starts at 12am and sets each 2 hour check box on. For example, 12 am, 2 am, 4 am, and so on.
    • Clicking the 4 hour button starts at 12am and sets each 4 hour check box on. For example, 12am, 4 am, 8 am, and so on.
    • Clicking the 8 hour button starts at 12am and sets each 8 hour check box on. For example, 12am, 8am, 4pm, and so on.
    • Clicking the 12 hour button starts at 12am and sets each 12 hour check box on. For example, 12am, 12pm, and so on.

    Month

    Checks the month that the task should run on. Two shortcut buttons are also provided:

    • Clicking the CLEAR ALL button un-checks all of the Month check boxes.
    • Clicking the SET ALL button checks all of the Month check boxes.

    Weekday

    A number between 0 (Sunday) and 6 (Saturday) or 1 and 7 depending on the default Schedule Settings that represents what day of the week that the task should run on. In addition to the numerical representation, the weekday names or abbreviations can also be used:

    • Clicking the CLEAR ALL button un-checks all of the Weekday check boxes.
    • Clicking the SET ALL button checks all of the Weekday check boxes.
    • Clicking the Set Weekdays button checks the Monday (Mon) through Friday (Fri) check boxes.
    • Clicking the Set Weekend button checks the Saturday (Sat) and Sunday (Sun) check boxes.

    Day of Month

    Checks the day of the month that the task should run on. In addition to the days, the following special values can also be checked:

    • @FMOM: First Monday of the month, can be abbreviated as @FM.
    • @LFOM: Last Friday of the month, can be abbreviated as @LF.
    • @LBDOM: Last business day of the month. This value will return the last calendar workday (Monday through Friday) of the month. This value can be abbreviated as @LBD.
    • @LDOM: Last day of the month; can be abbreviated as @LD.

    Clicking the CLEAR ALL button un-checks all of the Day of Month check boxes but does not clear the Special Value check boxes.

    Clicking the SET ALL button checks all of the Day of Month check boxes but does not check the Special Value check boxes.

    Command*

    The command that the task will execute when the scheduled time comes. Any Service Manager command will be executed. Some Service Manager commands make more sense than others to schedule as tasks.

    Duration Timer

    Length of time that the task will run prior to the Dependent Command. The format of duration [in seconds] is in the form [xxh][xxm]xx[s], as shown in the following example:

    04h30m45

    This creates a duration of 4 hours, 30 minutes, and 45 seconds.

    Dependent Command

    Command to be executed after the Duration Timer of the task has expired.

    This can be the name of another configured scheduler task or be a separate iSM command (for example, stop listener, start listener, and so on). This task is entered into the Service Manager schedule as name.dependent, where name is the name assigned to this task. The dependent task will not be rescheduled after executing, but rather scheduled again only after the command of the primary task has started.

  5. Click Add.

    The Schedule Provider page is displayed, as shown in the following image.

    The task BeginningOfMonth is added to the schedule list of iWay Service Manager and will be scheduled when iSM is recycled and a new instance is started.


x
Procedure: How to Update a Task in Schedule Provider

From time to time it can become necessary to update the schedule of an existing task. To update a task in Schedule Provider:

  1. Click Server from the navigation menu in the top pane.
  2. Select Schedule Provider from the configuration menu in the left pane.

    A table appears that lists any existing Scheduled tasks and a short description for each.

  3. Click a scheduled task you wish to update, for example, S1, as shown in the following image.

    The Schedule Configuration page is displayed with the Schedule parameters for that task. Make whatever change is necessary to the schedule.

  4. Click Update, as shown in the following image.

    The Schedule Provider page is displayed and the task S1 has been updated in the schedule.

    Changes that you have made to the Active and Description fields of the task will be reflected in the list, but schedule changes will not take place until either the Service Manager is recycled or a new instance is started.


x
Procedure: How to Reload a Task in Schedule Provider

Reloading a task in the schedule of iSM should be done when:

To reload a task in Schedule Provider:

  1. Click Server from the navigation menu in the top pane.
  2. Select Schedule Provider from the configuration menu in the left pane.

    A table appears that lists any existing Scheduled tasks and a short description for each.

  3. Click a scheduled task you wish to update, for example, S1, as shown in the following image.

    The Schedule Configuration page is displayed with the Schedule parameters for that task.

  4. Click Reload as shown in the following image.

    The Schedule Configuration page is displayed. If the task is successfully scheduled within this Service Manager instance, you will see the following message.

  5. Click Schedule Provider on the configuration menu in the left pane to exit.


x
Procedure: How to Copy a Task in Schedule Provider

To copy a task in Schedule Provider:

  1. Click Server from the navigation menu from the top pane.
  2. Select Schedule Provider from the configuration menu in the left pane.
  3. Select the check box next to the name of the Schedule Provider you wish to copy, for example, S1, as shown in the following image.

  4. Click Copy, as shown below.

    All schedules that are marked with the check are copied to a new Schedule Provider with the name pattern of oldProviderName_copy.


x
Procedure: How to Rename a Task in Schedule Provider

To rename a task in schedule provider:

  1. Click Server from the navigation menu from the top pane.
  2. Select Schedule Provider from the configuration menu in the left pane.
  3. Select the check box next to the name of the Schedule Provider you wish to rename, for example, S1_copy, as shown in the following image.

  4. Click Rename, as shown below.

    Clicking on the Rename button displays the Provider Rename frame with the current name of the provider displayed in the New Provider Name field, as shown in the following image.

    To abort renaming the provider, click Back.

  5. Enter a new name for the provider in the field provided and click Finish.

    The provider will be renamed and the Schedule Provider screen will be displayed, as shown below.


iWay Software