In this section: |
The following section describes a sample application console, which is referred to as the red console.

The red console consists of a channel with an NHTTP listener as the inlet, several conditional routes, and a default outlet. The listener is configured to handle GET requests by creating an event message that contains the context of the request, including the path requested by the URL. All but one of the routes is conditional on an XPath expression that evaluates the URL path. Each of these routes is associated with a process flow that generates a console screen by executing one or more agents and transformations. The other route is run by default and tries to run a process flow whose name matches the request path.
For example, a GET request to the NHTTP listener on http://myhost:3125 would create this message. The router would evaluate the expression XPATH(/http/url/path), find "/", and call the main menu process.
<http user="unknown" type="GET">
   <parms>
      <parm name="version">1.1</parm>
      <parm name="source">localhost</parm>
      <parm name="rcReq.Host">localhost:32125</parm>
      <parm name="rcReq.Cache-Control">max-age=0</parm>
      <parm name="rcReq.User-Agent">Mozilla/5.0 Windows; …</parm>
      <parm name="reqType">GET</parm>
      <parm name="rcReq.Connection">close</parm>
      <parm name="rcReq.Referer">http://localhost:32125/</parm>
      <parm name="pdm">0</parm>
      <parm name="rcReq.Accept">text/xml,application/xml,application/
         xhtml+xml,text/html;q=0.9,text/plain;q=0.8,image/png,*/*;q=0.5</parm>
      <parm name="action"/>
      <parm name="rcReq.Accept-Encoding">gzip,deflate</parm>
      <parm name="rcReq.Accept-Charset">ISO-8859-1,utf-8;q=0.7,*;q=0.7</parm>
      <parm name="rcReq.Accept-Language">en-us,en;q=0.5</parm>
      <parm name="url">/</parm>
      <parm name="ip">127.0.0.1</parm>
   </parms>
   <body/>
   <url secure="false">
      <host>localhost</host>
      <port>32125</port>
      <path>/</path>
      <query/>
   </url>
   <version>1.1</version>
</http>
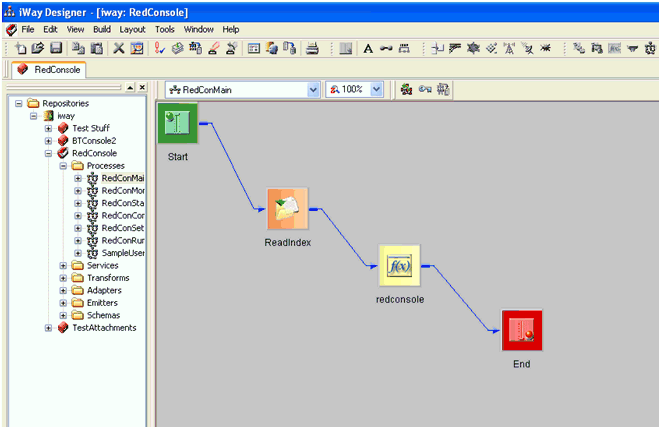
The main menu process reads an XML file containing menu options and welcome text. An XSLT stylesheet transforms this document to HTML before returning the main menu page to the user.

In addition to the channel package, the application console uses three external files. Since components in the packaged channel reference these files using relative paths, these files must be in the correct locations with respect to the iSM configuration in which the channel will run. For reference, assume that the channel is deployed to myconfig, at the absolute path /iwayhome/config/myconfig.
The myconfig directory contains the properties file, userparms.properties. This contains the names and current values of any properties you want to expose to the end user. For example:
name=steve
port=2200
These properties can be referenced in the channel configurations using the _PROPERTY() function.
The myconfig/redconsole directory contains the index.xml file, which lists the menu items needed to include on the console pages and the text for the main menu page. For example:
<redconsole style="redconsole">
  <menu>
    <item name="Configuration" href="/configuration"/>
    <item name="Monitor" href="/monitor"/>
    <item name="Status" href="/status"/>
  </menu>
  <text>Welcome to the Main Menu.</text>
</redconsole>
The myconfig/redconsole directory also contains the propsmeta.xml file, which contains metadata for properties needed to be exposed. For example:
<properties>
  <group name="general">
    <parm name="name" type="string"/>
    <parm name="foo" type="int"/>
    <parm name="other" type="boolean"/>
  </group>
  <group name="security">
    <parm name="sslcertalias" type="string"/>
  </group>
  <group name="http">
    <parm name="port" type="int"/>
  </group>
</properties>
The red console channel also uses one custom agent (service), RedConsoleSetPropsAgent. This agent updates the properties file given an NHTTP event document for a GET request with properties and values in the query string.
This section describes how to configure the red console demo channel and how to add an item to the channel menu.
To configure the red console demo channel:
/iWay7/config/myconfig/redconsole
To add an item to the menu:
Be aware of the content type you are returning. By default, the red console channel returns text/html. If you want another content type, set the worker:resp.ct special register in your process. The register needs the worker: prefix to make it available outside of the process flow.
XPATH(/http/url/path) == /path/from/URI
This is the HREF from the index.xml file.
Note: Since the default behavior of the red console channel is to run a process with the name specified in the URI, an alternative method would be to simply add the process to the menu as described above with href='/myflow'. You can then publish the process flow directly to the configuration as a system process. This avoids directly modifying the registry. However, performance is slightly slower, since it runs the process from within another process.
Notes on look and feel:
You will have to republish and rebuild the channel as a result of this step.
It may also be necessary to edit the redconsole.xslt file to handle the display of the new page.
| iWay Software |