Deploying a channel is the third stage in channel management. Deployment takes a built channel and deploys its components into a runtime environment. When you deploy a channel, you deploy a version of the built channel.
To deploy a channel:
-
Click Deployments in the menu bar.
The Deployments pane opens, showing links to Channels, Services, and Web Services, in the left pane.
-
In the
left console pane of the Deployments menu, select Channels.
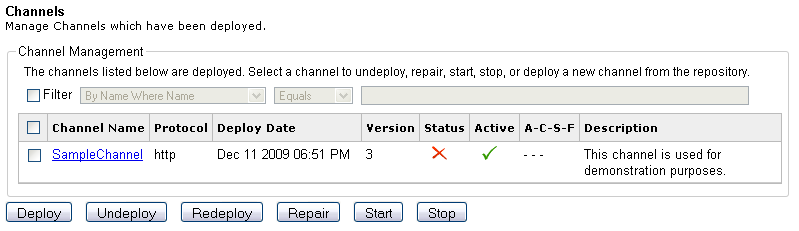
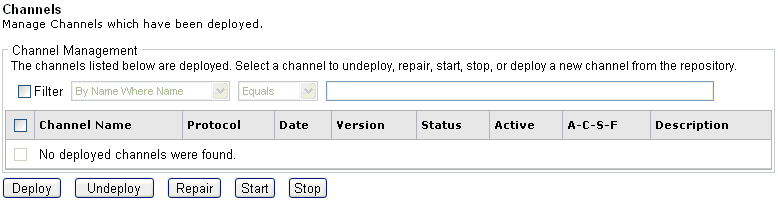
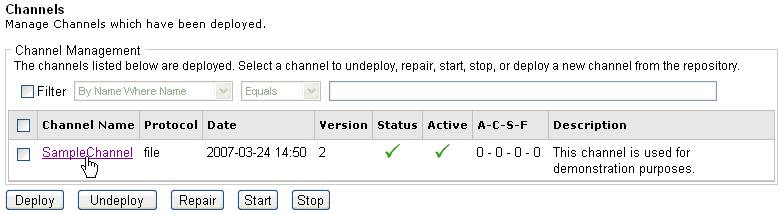
The Channel Management pane opens. This can also show already deployed channels.

-
Click Deploy.
The Available Channels pane opens.
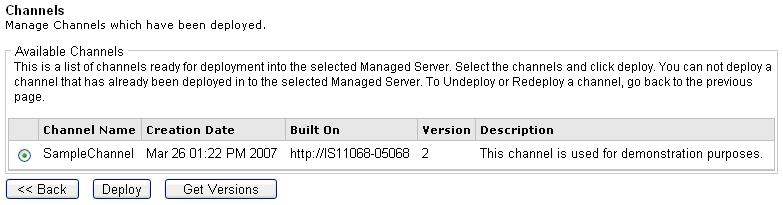
The table that is provided lists all channels that have successfully completed the build process. It also includes the channel creation date, the system where the channel was created, a version number, and a short description.
If there are multiple versions of a channel, you must deploy a specific version of the channel. In this example, there are two versions of SampleChannel.
-
Click Get
Versions.
The Channel Versions pane opens.
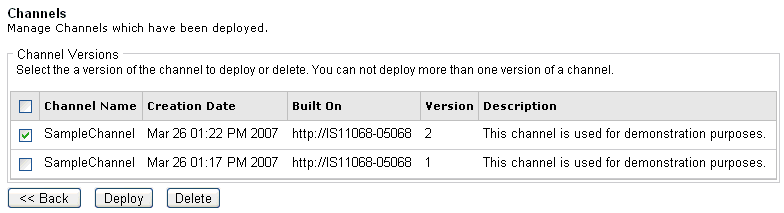
Creating multiple versions of a channel is useful if the current version is not working properly and you want to revert back to a previous version that worked.
-
Select
the channel version you want to deploy, for example, SampleChannel,
Version 2, and click Deploy.
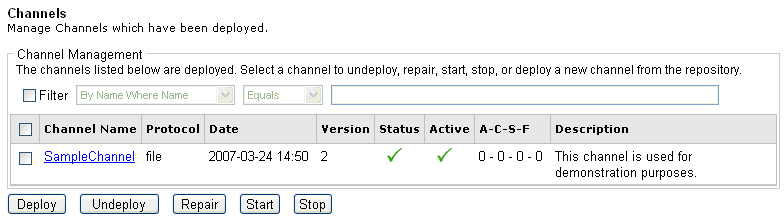
You are returned to the Channel Management pane. Notice that SampleChannel is now included in the list of deployed channels.
Once a channel is deployed, it must be started. For more information, see How to Start a Channel.
To undeploy a channel:
-
In the
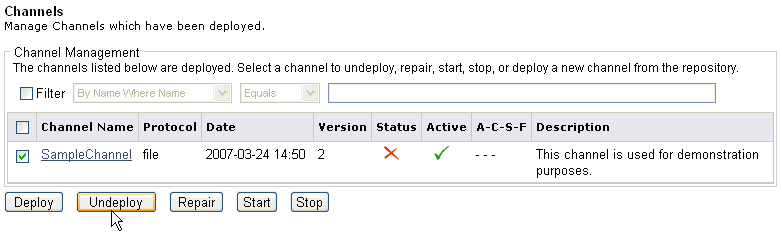
left console pane of the Deployments menu, select Channels.
The Channel Management pane opens.
-
Select
the channel you want to undeploy, for example, SampleChannel, and
click Undeploy.
The channel is undeployed and no longer appears in the Channel Management pane.
To start a channel:
-
In the
left console pane of the Deployments menu, select Channels.
The Channel Management pane opens.

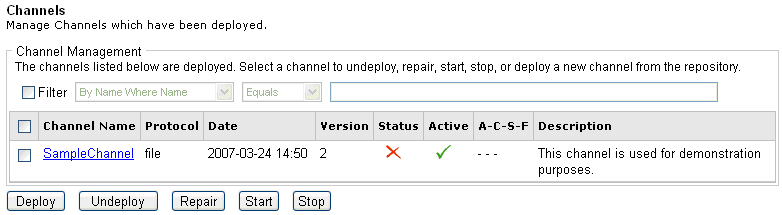
The red X in the Status column indicates that a channel is not started.
- Select the check box next to a deployed channel you wish to start, for example, SampleChannel.
-
Click Start.
A green check mark now displays in the Status column, indicating that the deployed channel is started.
Tip: To start more than one channel at once, you can select multiple check boxes in the Channel Management pane and click Start.
To stop a channel:
-
In the
left console pane of the Deployments menu, select Channels.
The Channel Management pane opens.
The green check mark in the status column indicates that a channel is started.
- Select the check box next to a deployed channel you wish to stop, for example, SampleChannel.
-
Click Stop.
A red X now displays in the Status column, indicating that the deployed channel is stopped.
Tip: To stop more than one channel at once, you can select multiple check boxes in the Channel Management pane and click Stop.
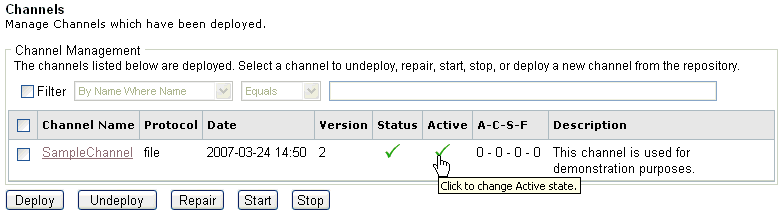
Active means that the channel will start automatically during the next restart of iWay Service Manager. If you do not want the channel to start automatically during the next restart of iSM, you must deactivate the channel.
To make a channel active, click the red X in the Active column. To make a channel inactive, click on the green check mark in the Active column. In either case, the Channels pane will refresh and display the changed status in the Active column. Unlike starting and stopping channels, you may only toggle the Active status one channel at a time.
To view the trace log associated with a channel:
-
In the
left console pane of the Deployments menu, select Channels.
The Channel Management pane opens.
-
Click
the name of a channel, for example, SampleChannel.
The trace log for the selected channel opens.
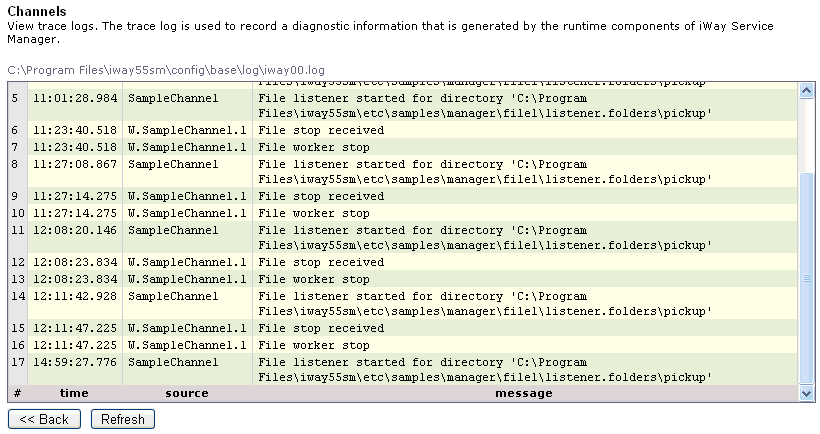
- Click Refresh to view the latest instance of the channel trace log.
To visualize a channel:
-
In the
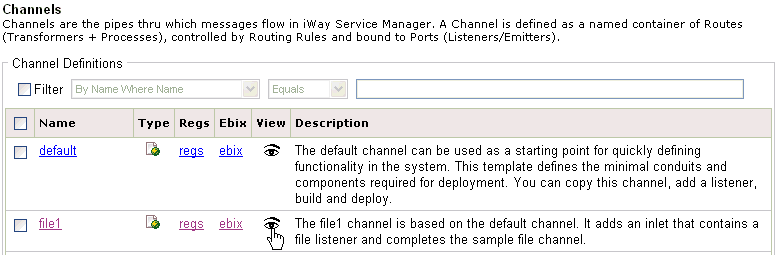
left console pane of the Registry menu, select Channels.
The Channels pane opens.
-
In the
View column, click the eye icon for the channel you want to view, for
example, file1.
A graphical representation of the channel, including the registered channel components, is displayed.

The left portion of the image represents the inlet, the middle portion represents the route, and the right portion represents the outlet.
If you move your mouse cursor over any of the portions in the channel image map, the cursor changes to a hand selection icon. The name of the specific channel component is provided.
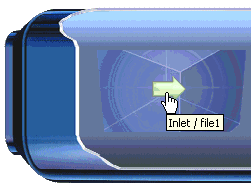
These portions of the image map are active areas that allow you to navigate to the channel component that is defined in the Registry. For example, if you click the Inlet / file1 portion of the image, the following pane opens:
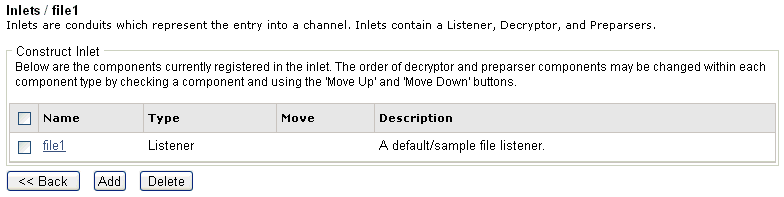
-
Click Back to
return to the Channels pane.
After making any changes to the channel components, click Build to rebuild the channel.